# 💎 Breakout 1: Add data storage services to our sample application 💎
⏲️ Est. time to complete: 90 min. ⏲️
# Here is what you will learn 🎯
Now that we have made experience with Azure SQL DB, Azure CosmosDB and Azure (Cognitive) Search, it is time to add these services to our sample application.
In this challenge you will:
- use Azure SQL DB and CosmosDB to store objects from the application
- add an Azure Cognitive Search Instance
- make use of Azure Service Bus for messaging between the application services
- add additional application services
TIP
📝 If you could not finish the breakout challenges of "Day 2", there is a baseline deployment script that will automatically deploy all necessary Azure services for you and put you in the position to start right away with this challenge.
# Table Of Contents
- Introduction
- Setup Data Storage Services
- Setup Messaging Services
- Quality Check
- Re-deploy Contacts/Resources Service and Image Resizer Function
- Deploy the Contacts Search Service
- Deploy the Visit Reports Service
- Deploy the Frontend
- Wrap-Up
# Introduction
At the end of the day, the architecture will look like this:
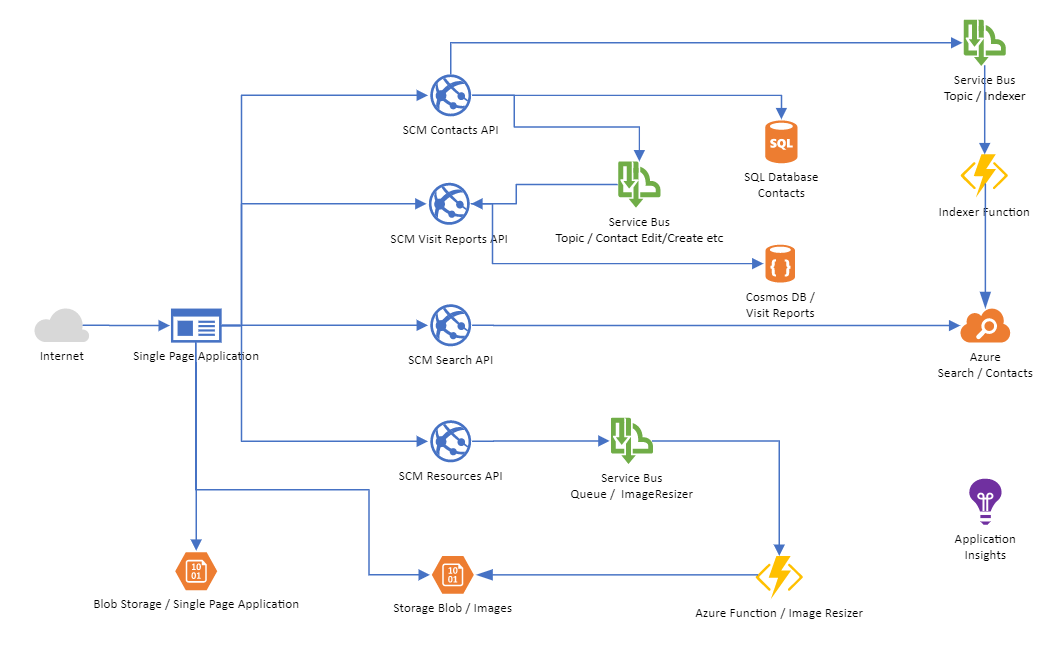
As you can see, we will introduce a new microservice (with its own data store - Cosmos DB) called "Visit Reports", that allows us to add visit reports to existing contacts. We will have a 1-to-many relation between Contacts and Visit Reports. And, to have the Visit Reports service being able to work on its own, it will also store some data coming from the Contacts service. So there will be some kind of duplication of data, which - in a microservice approach - is not an unusual thing.
The services interact via the Azure Service Bus (Producer/Consumer pattern) and exchange data, when events occurs in e.g. the Contacts service.
The advantage is, that the services aren't tied together via REST calls and can work and be scaled independently. If we would introduce another service in the future that needs information from a contact, we would simply introduce another consumer for the Contacts topic.
In addition, we will also be migrating the Storage Queue services (for image resizing) to Azure Service Bus Queues so that we only have one messaging component in our architecture.
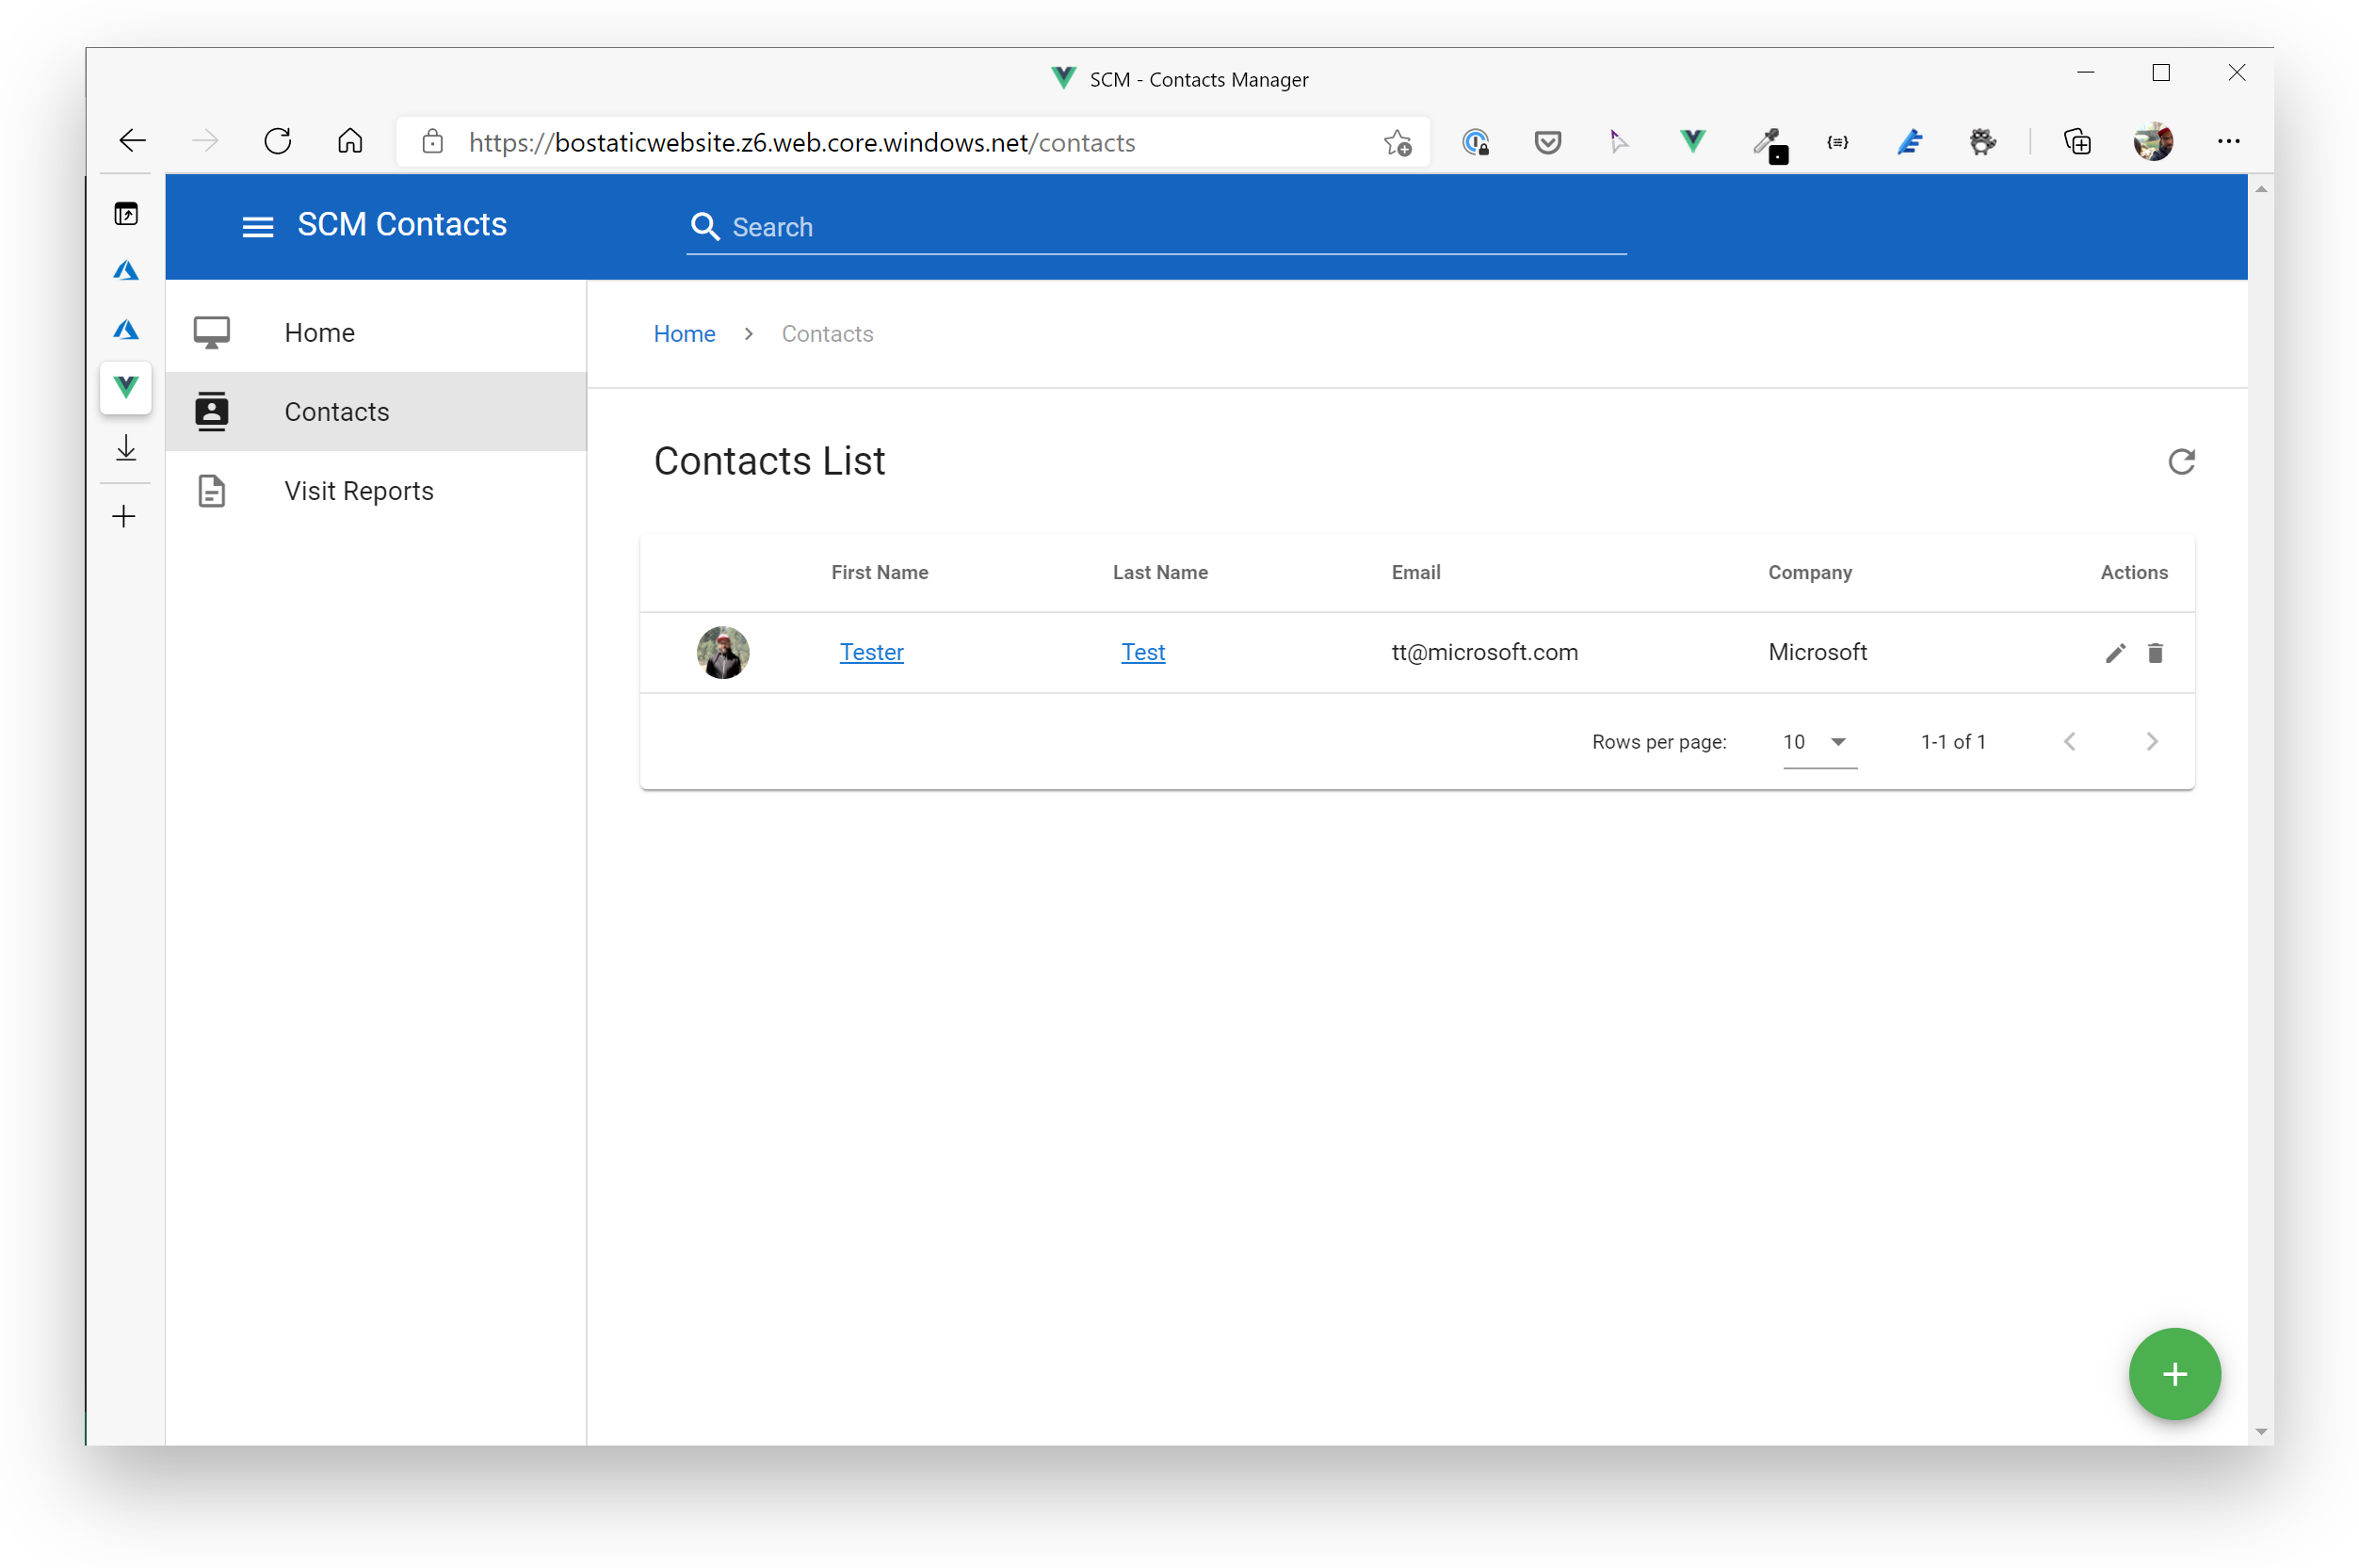
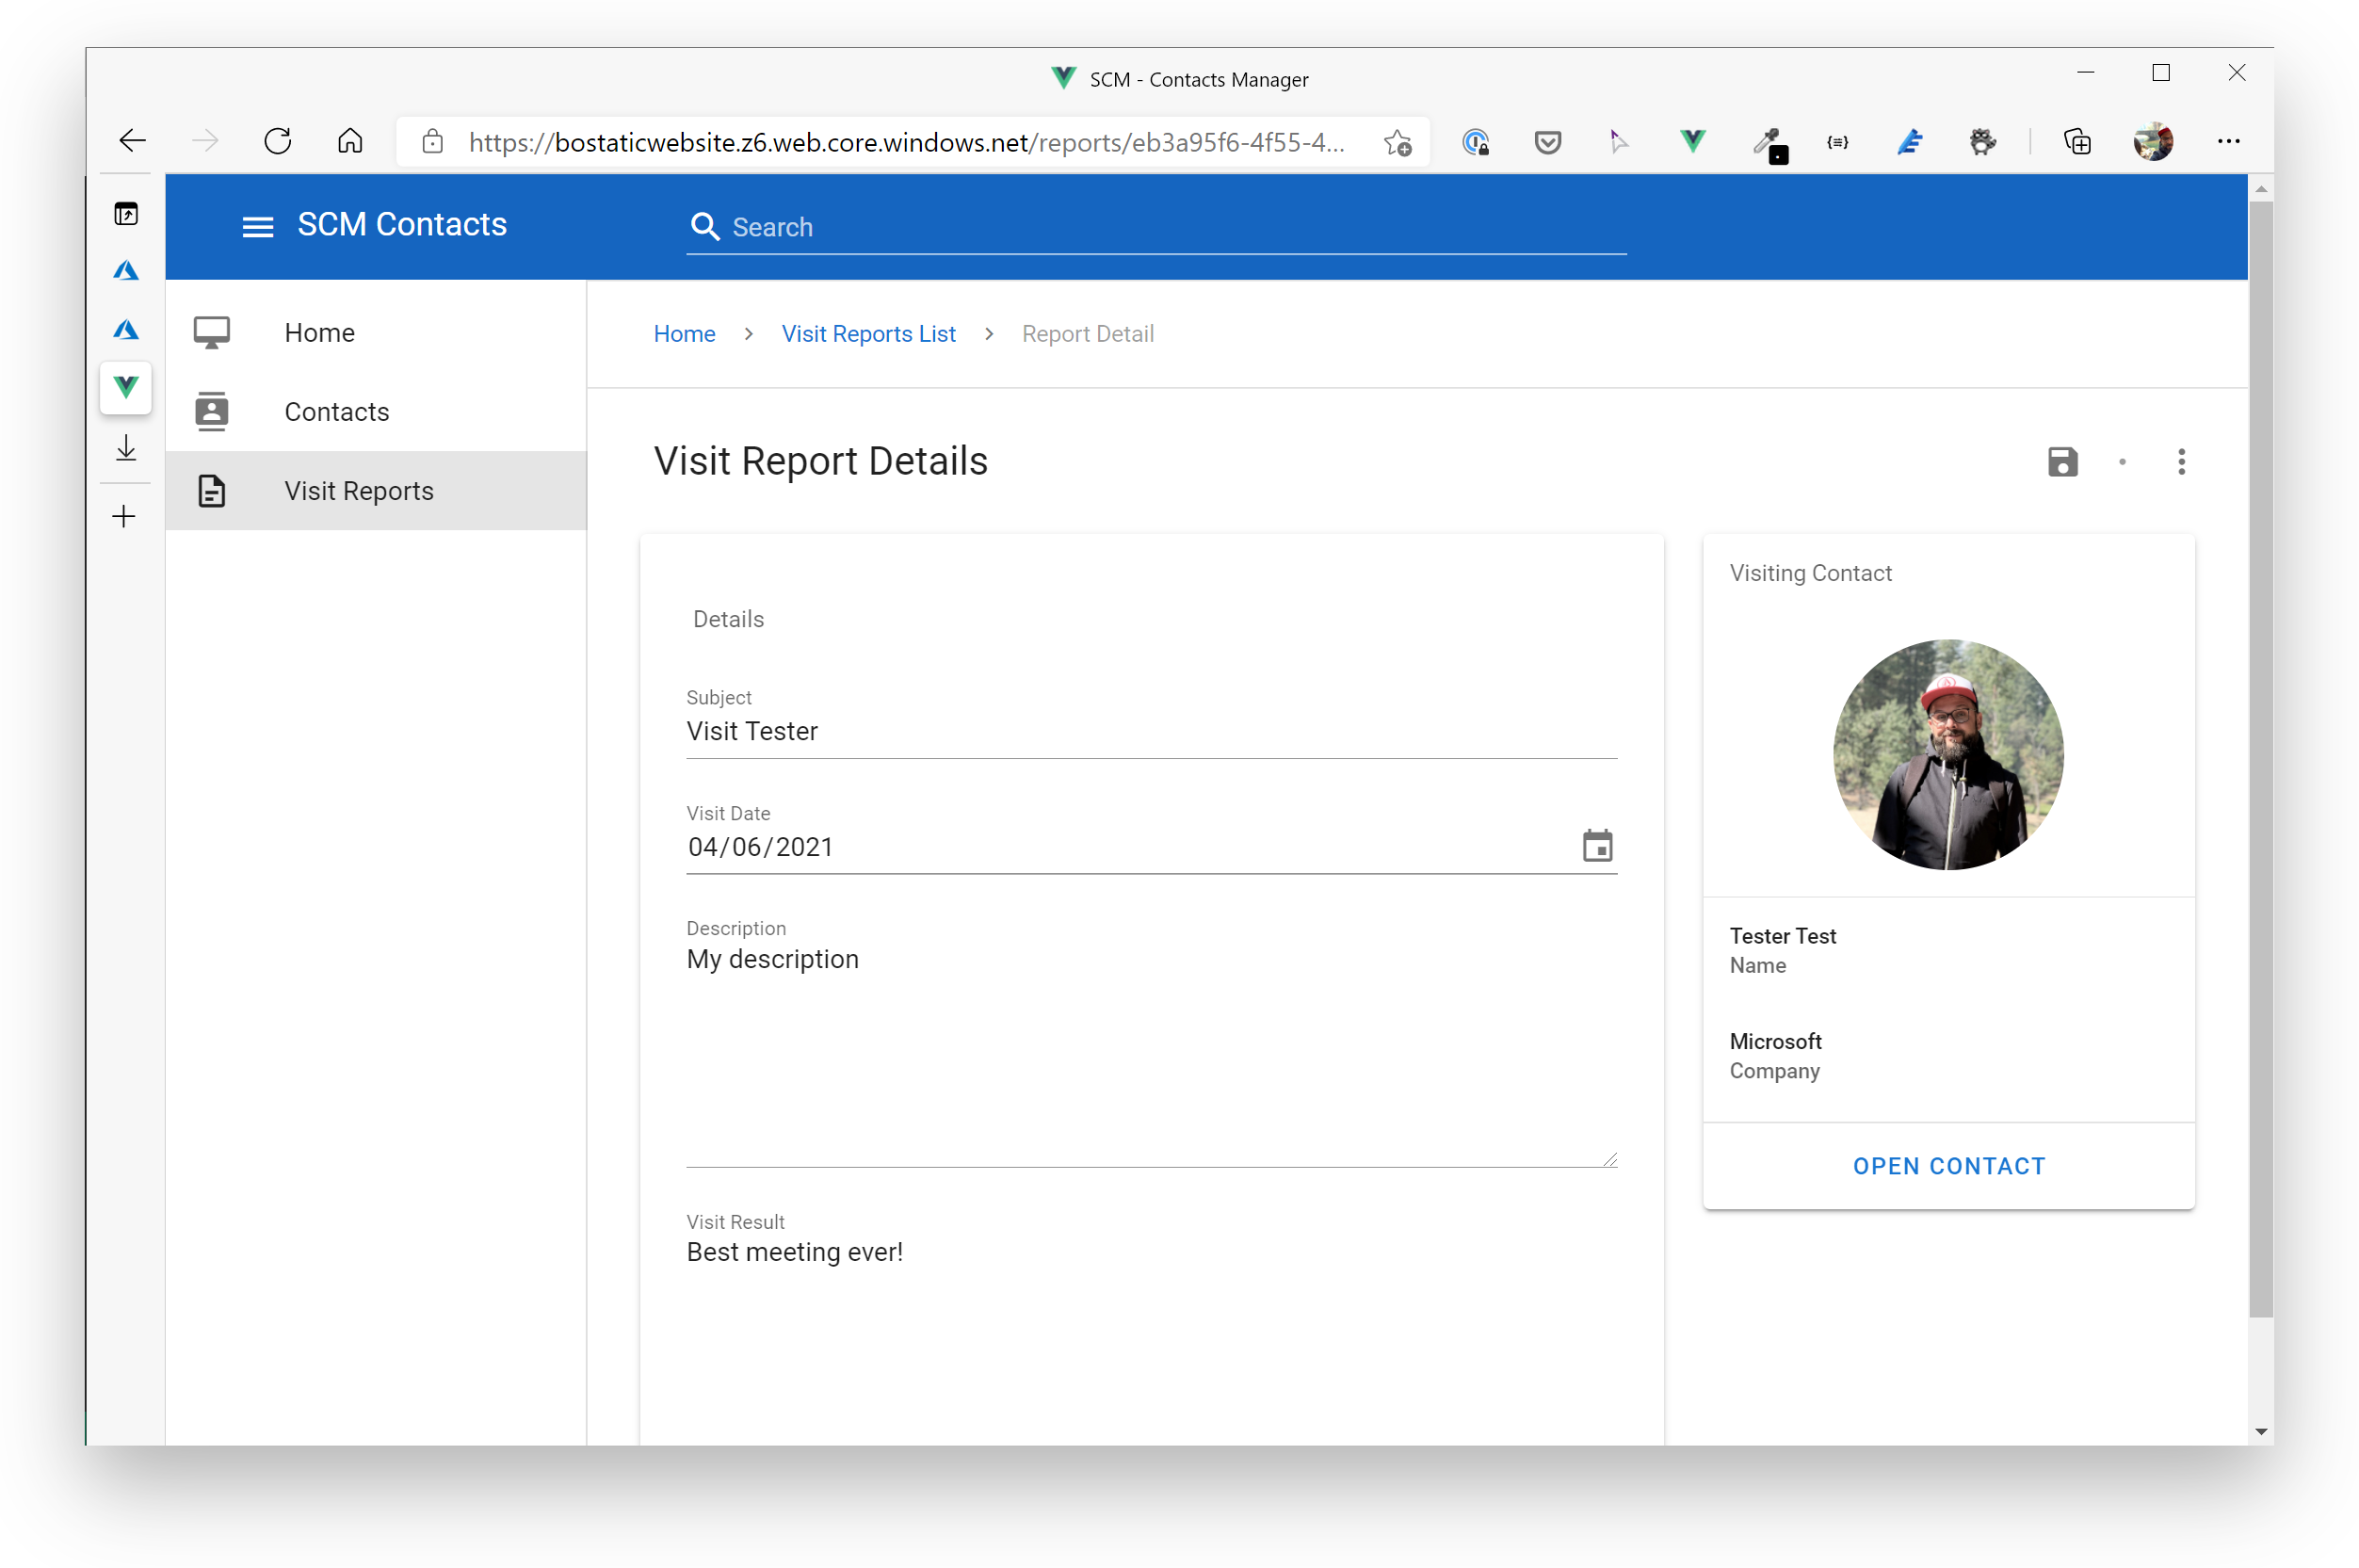
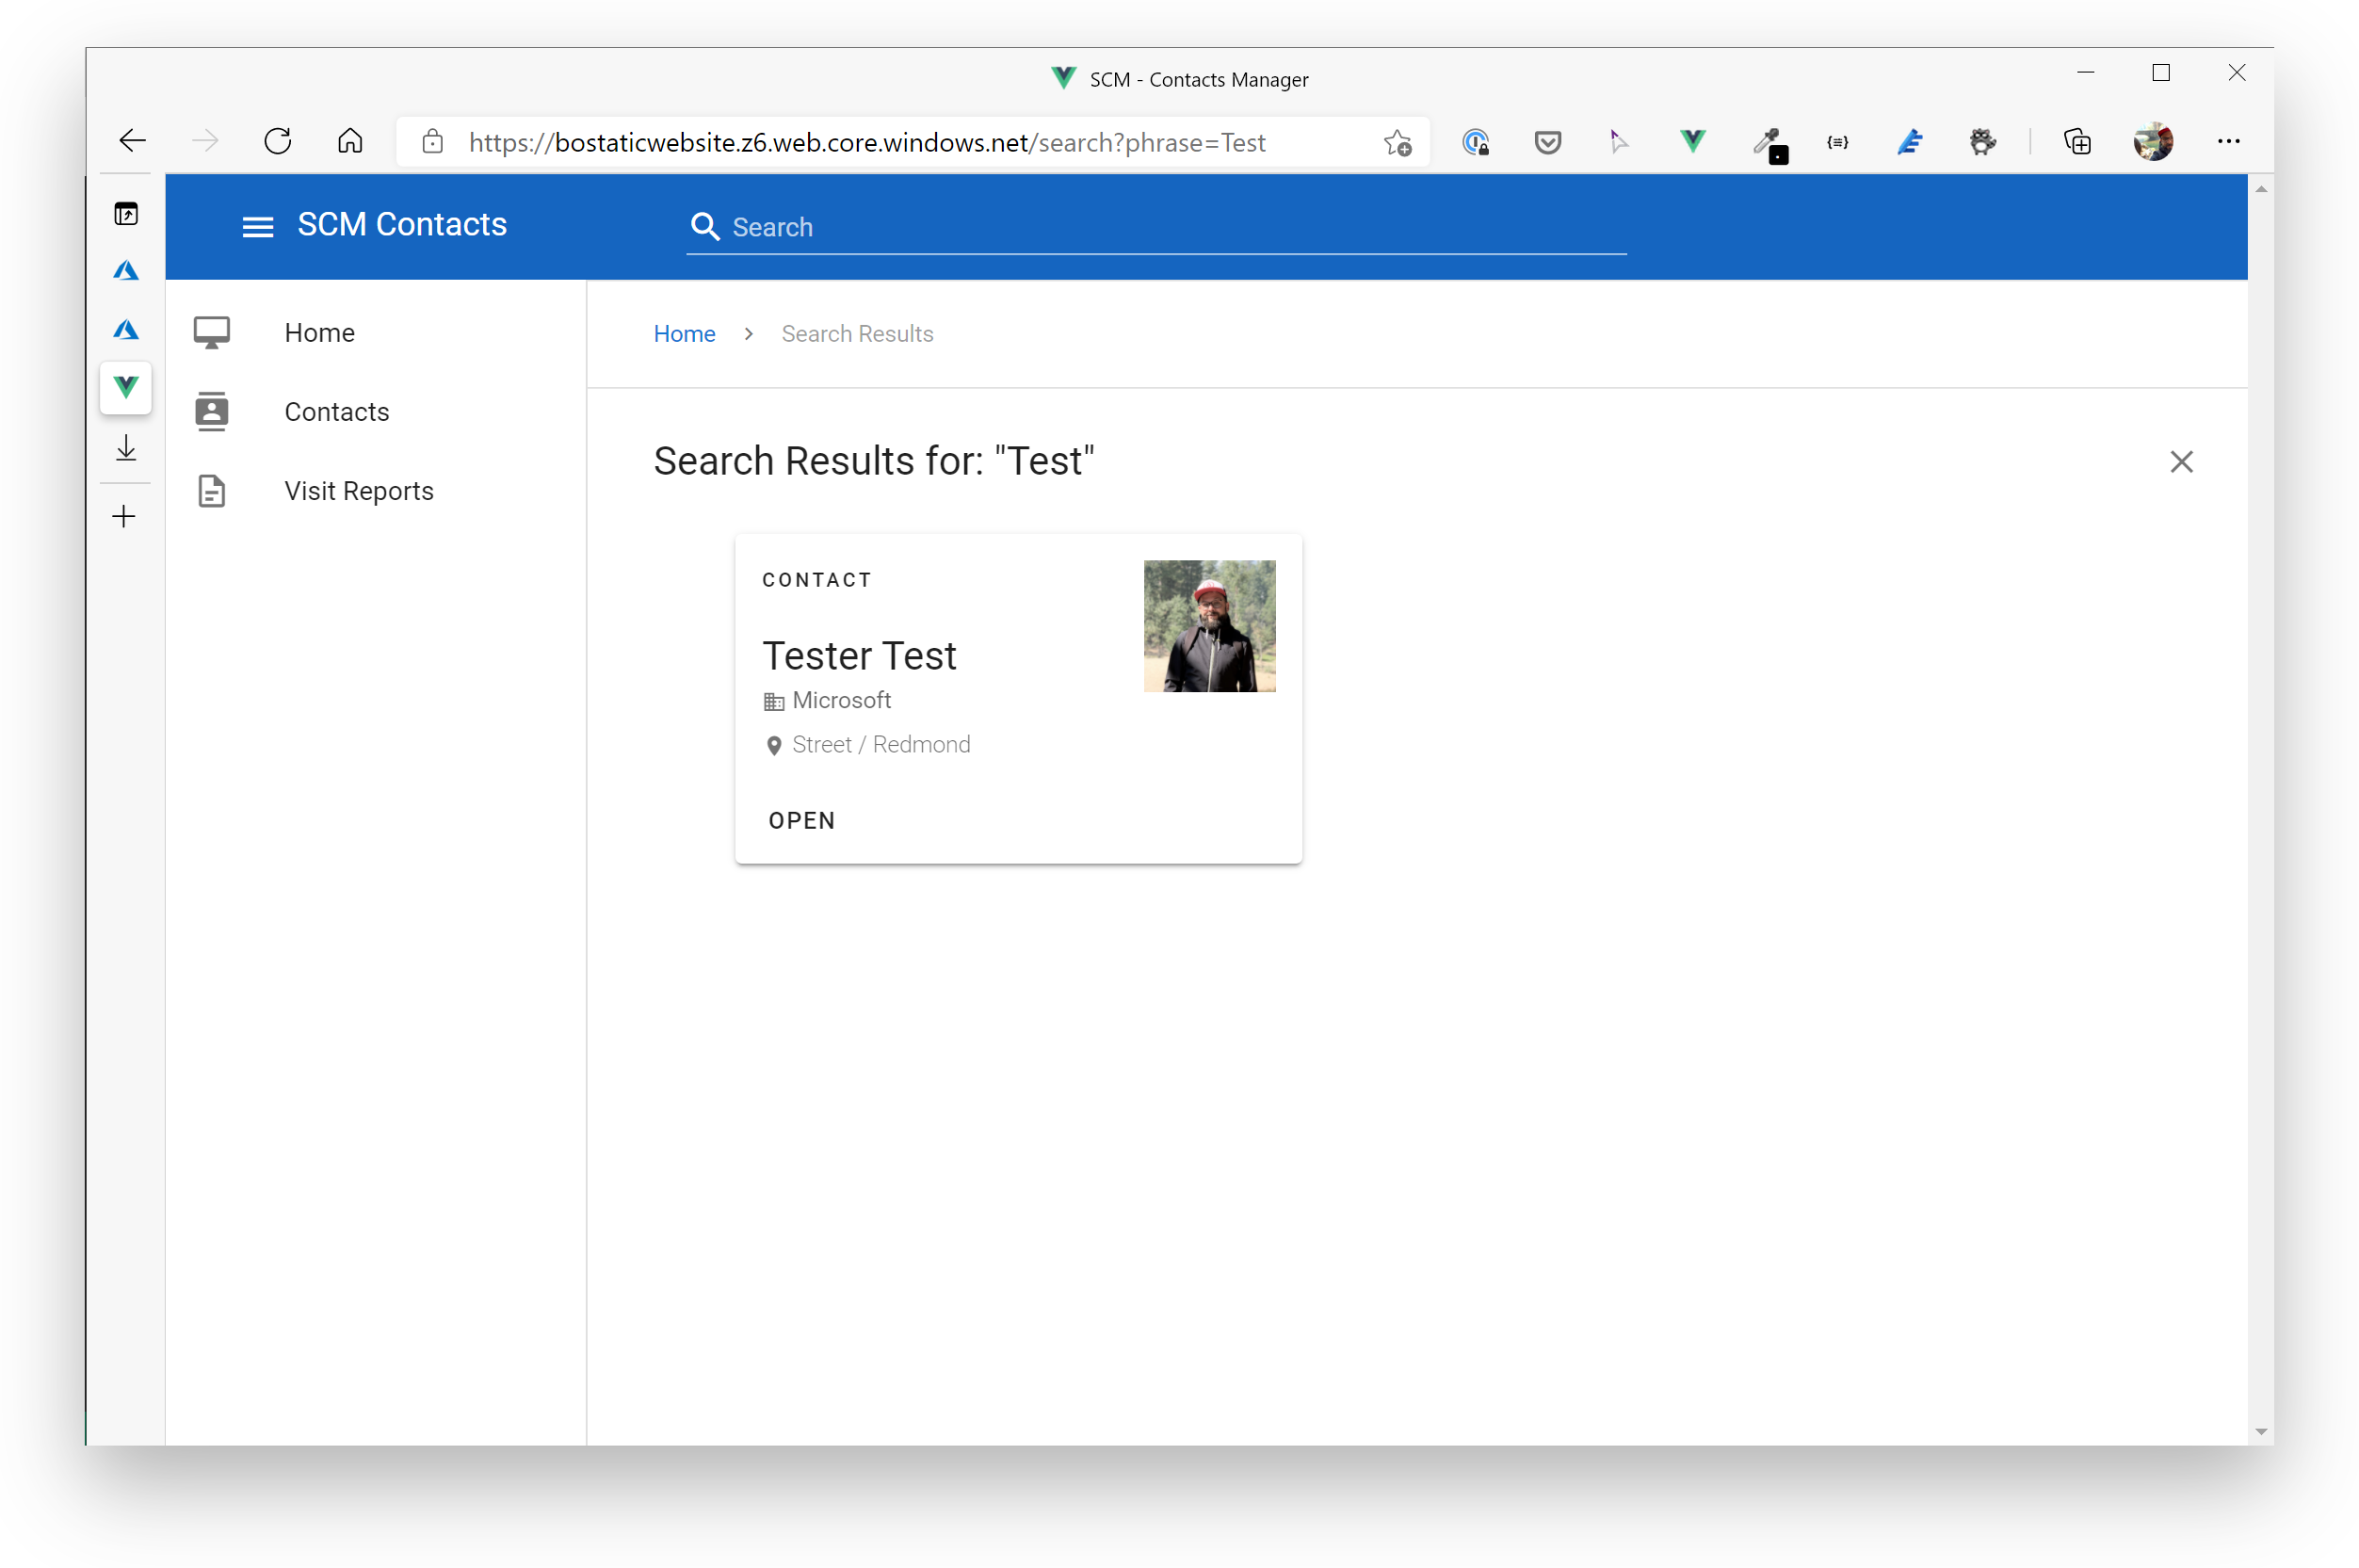
The frontend will also change, as we introduce a new service:
# Setup Data Storage Services
First of all, we now add an Azure SQL DB, Cosmos DB and an Azure Search service for the application.
# SQL DB
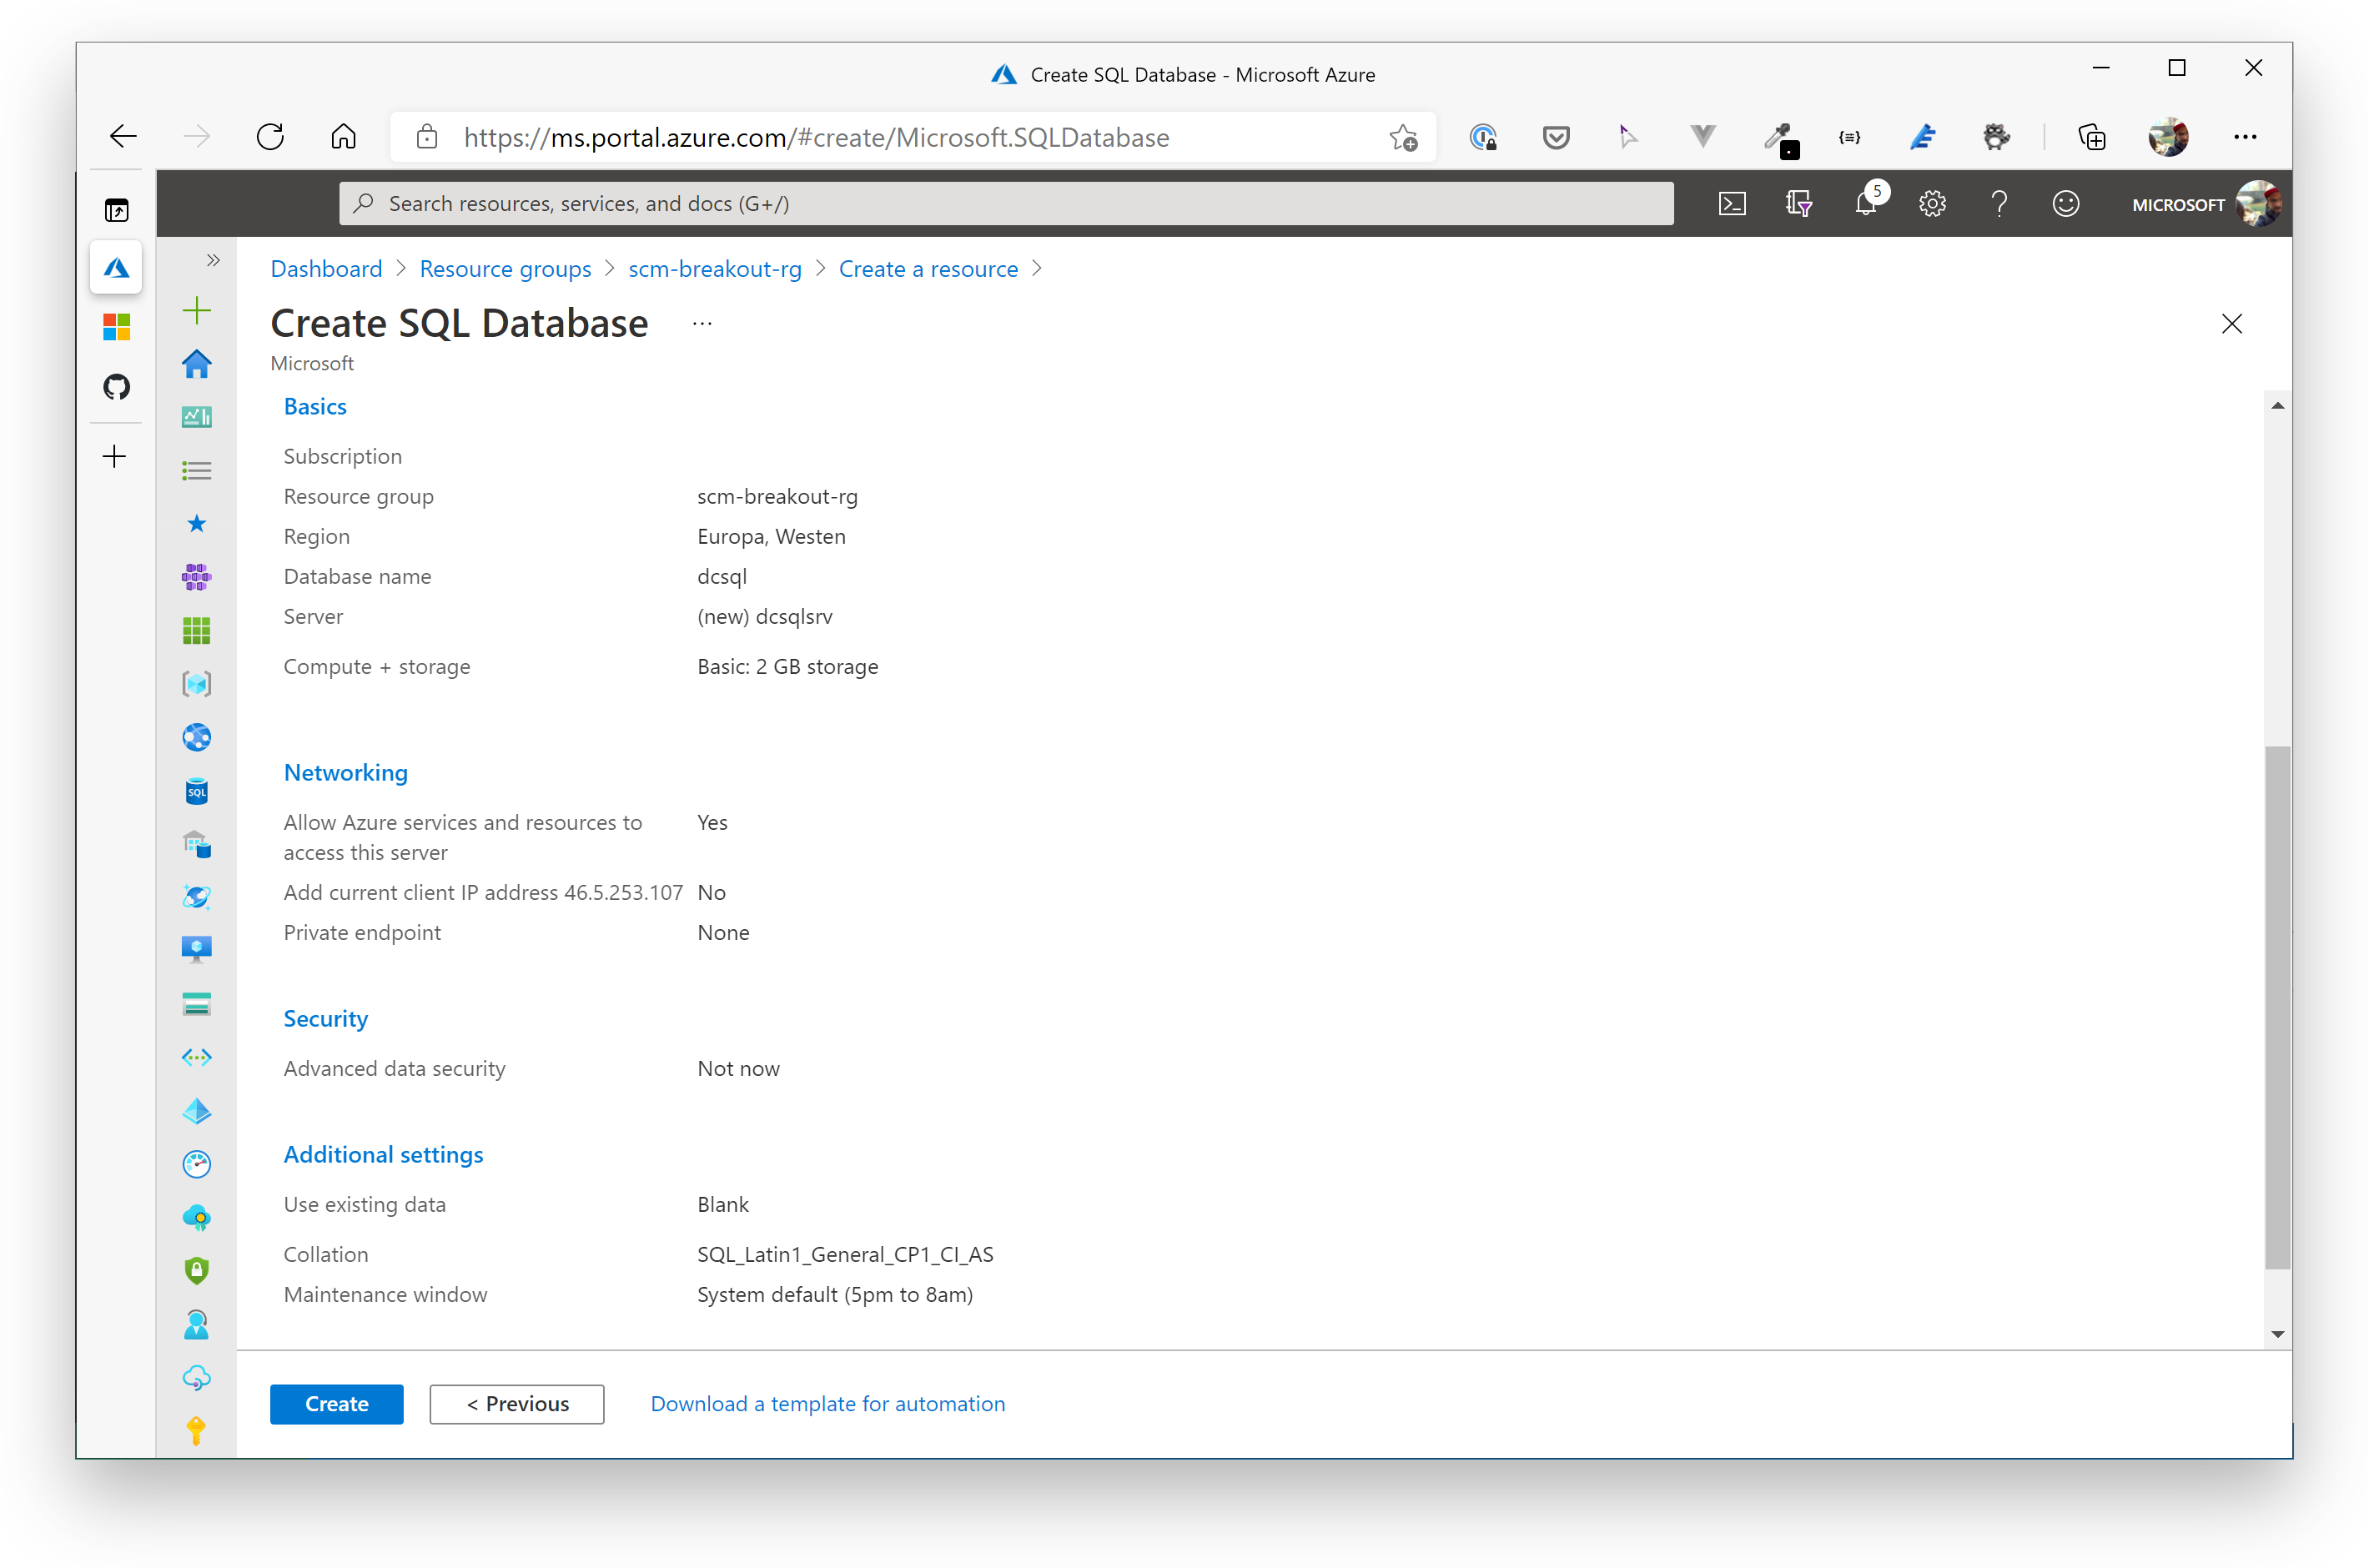
Create a new Azure SQL DB either via the Azure Portal or Azure CLI.
Database Properties:
| Parameter | Value |
|---|---|
| Resource group | use your existing resource group: scm-breakout-rg |
| Compute + storage | Basic tier |
| Location | West Europe |
| Server | Create a new server in West Europe |
| Networking Tab | Connectivity => Public Allow Azure services and resources to access this server is set to YES |
Leave all other settings as proposed by Azure.
TIP
📝 You can proceed with the next step while the Azure SQL DB is being created.
# Cosmos DB / SQL API
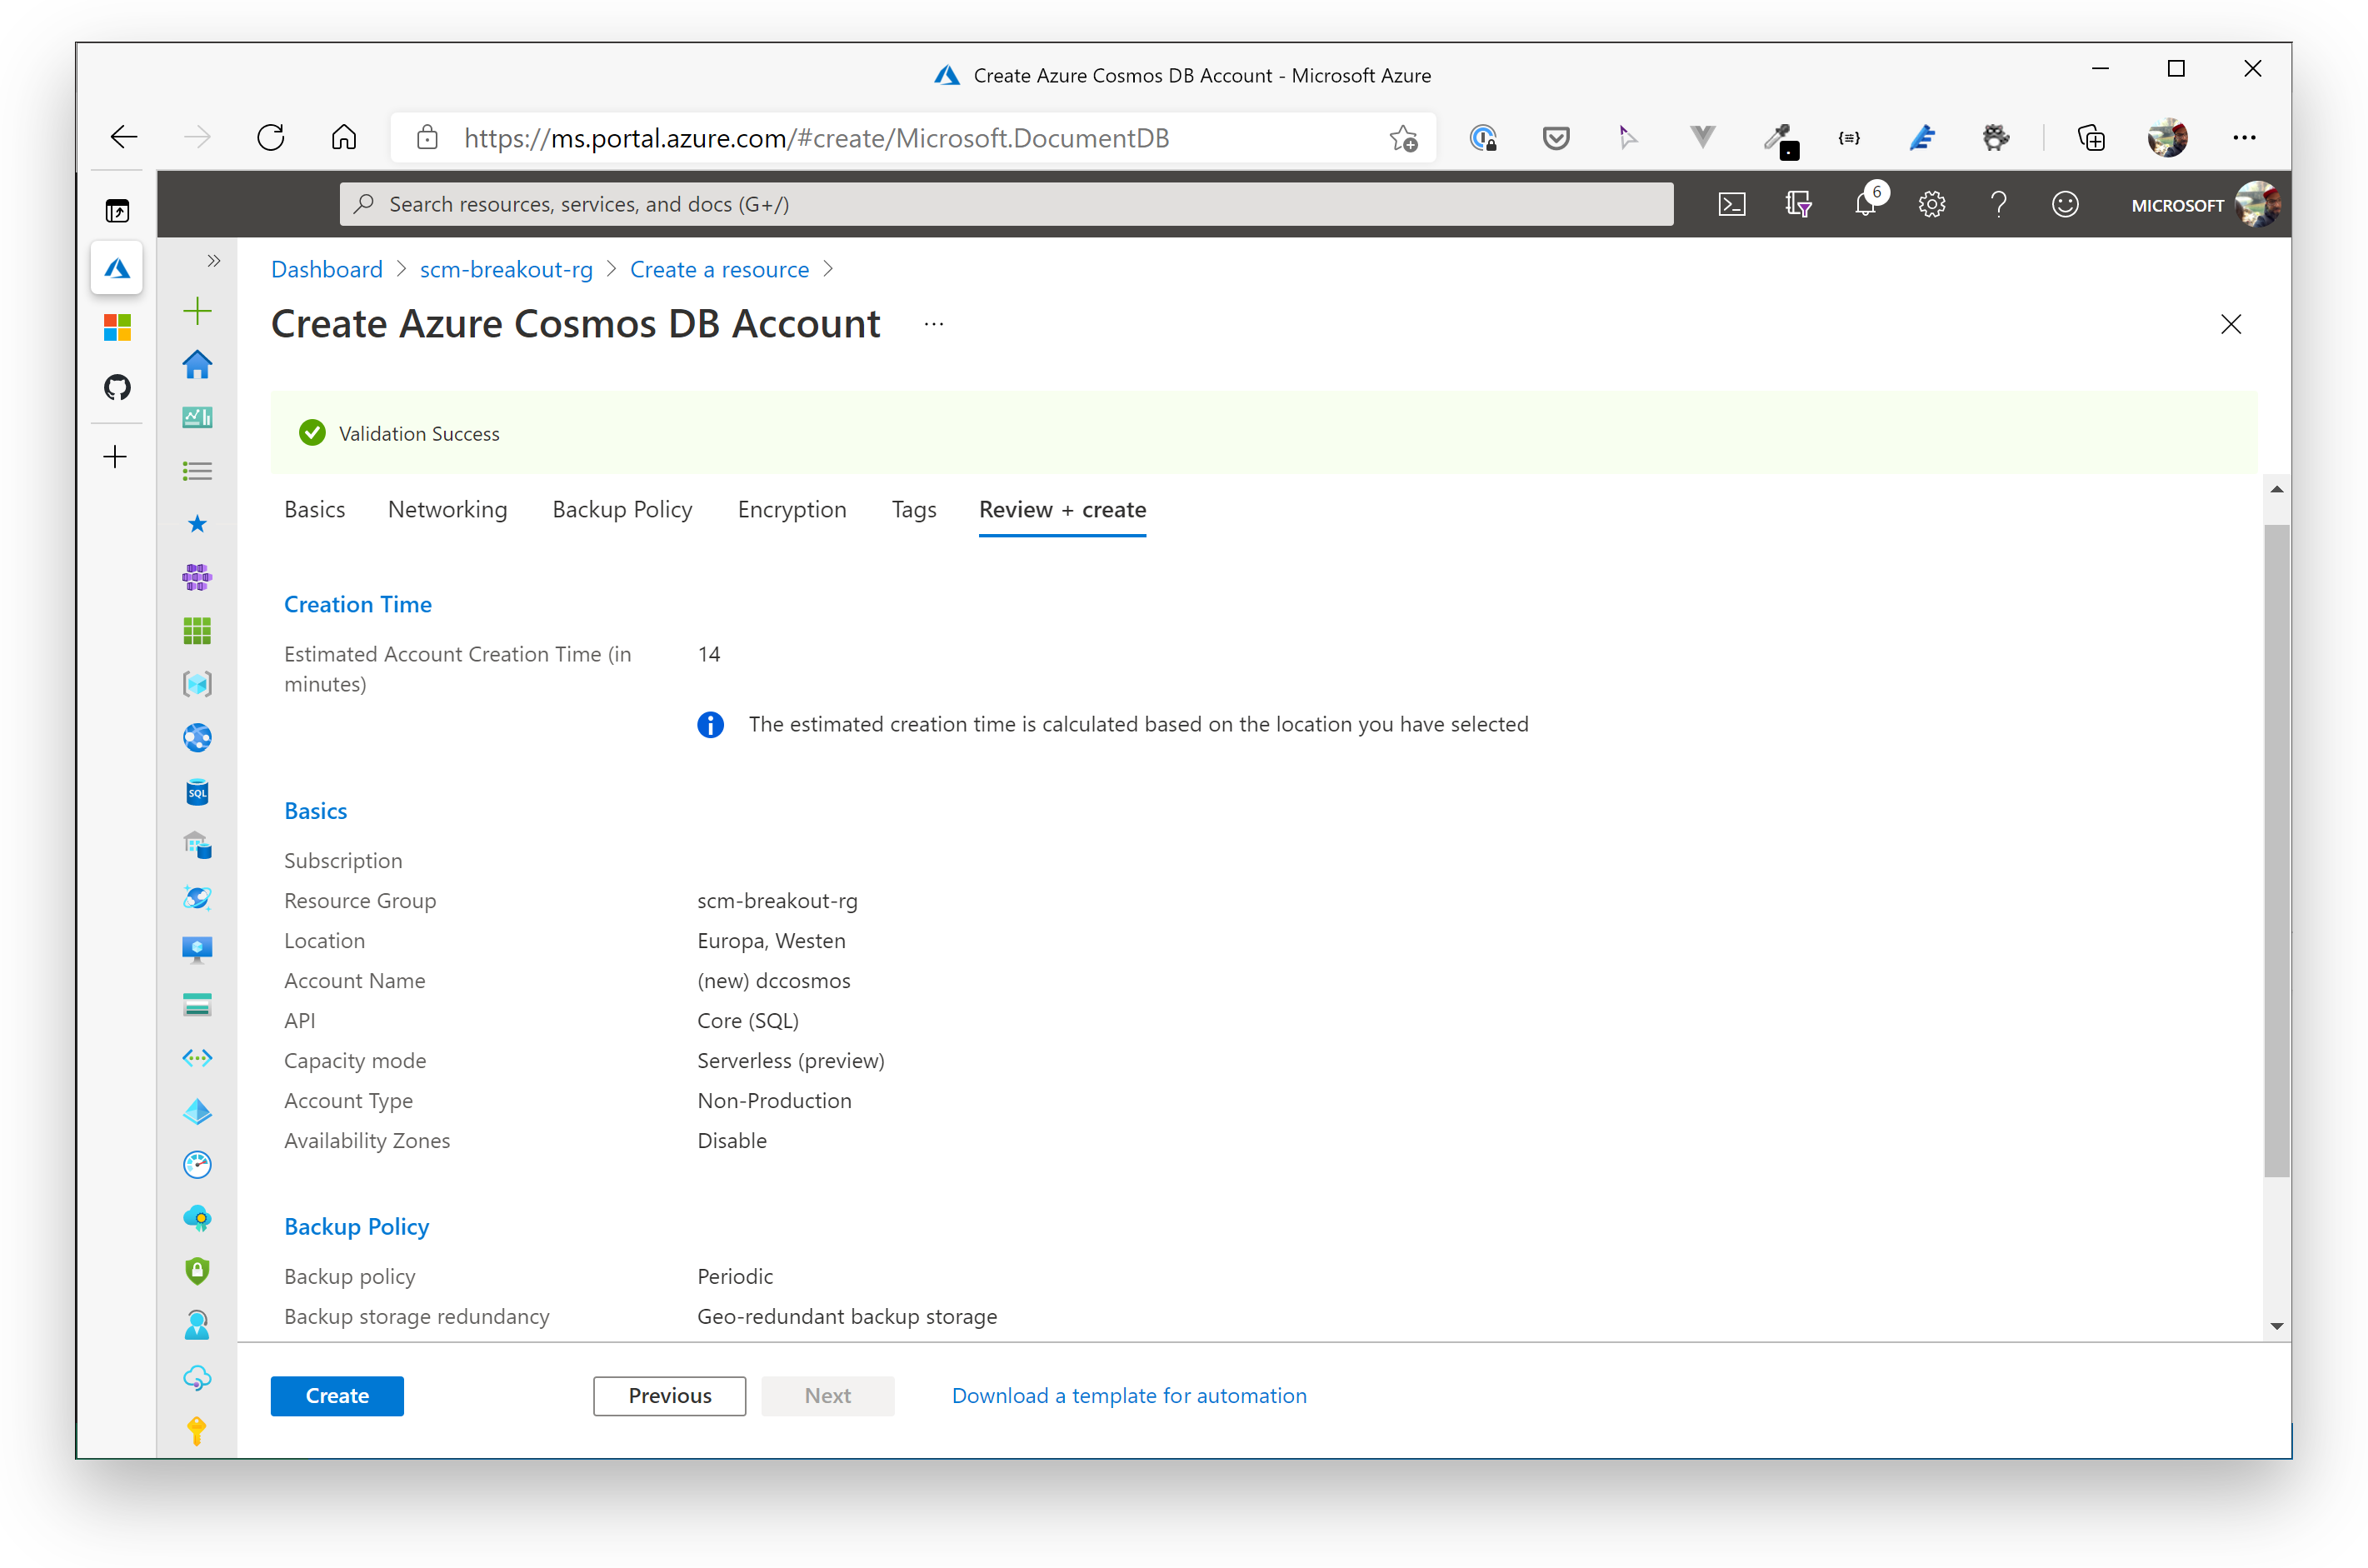
Create a new Azure Cosmos Account either via the Azure Portal or Azure CLI.
Account Properties:
| Parameter | Value |
|---|---|
| Resource group | use your existing resource group: scm-breakout-rg |
| API | Core SQL |
| Location | West Europe |
| Capacity mode | OPTIONAL - if you want to, you can choose Serverless |
TIP
📝 The Serverless option is a perfect fit for development environments and small applications. You can find out more about the deployment option here: https://docs.microsoft.com/azure/cosmos-db/throughput-serverless (opens new window)
Leave all other settings as proposed by Azure.
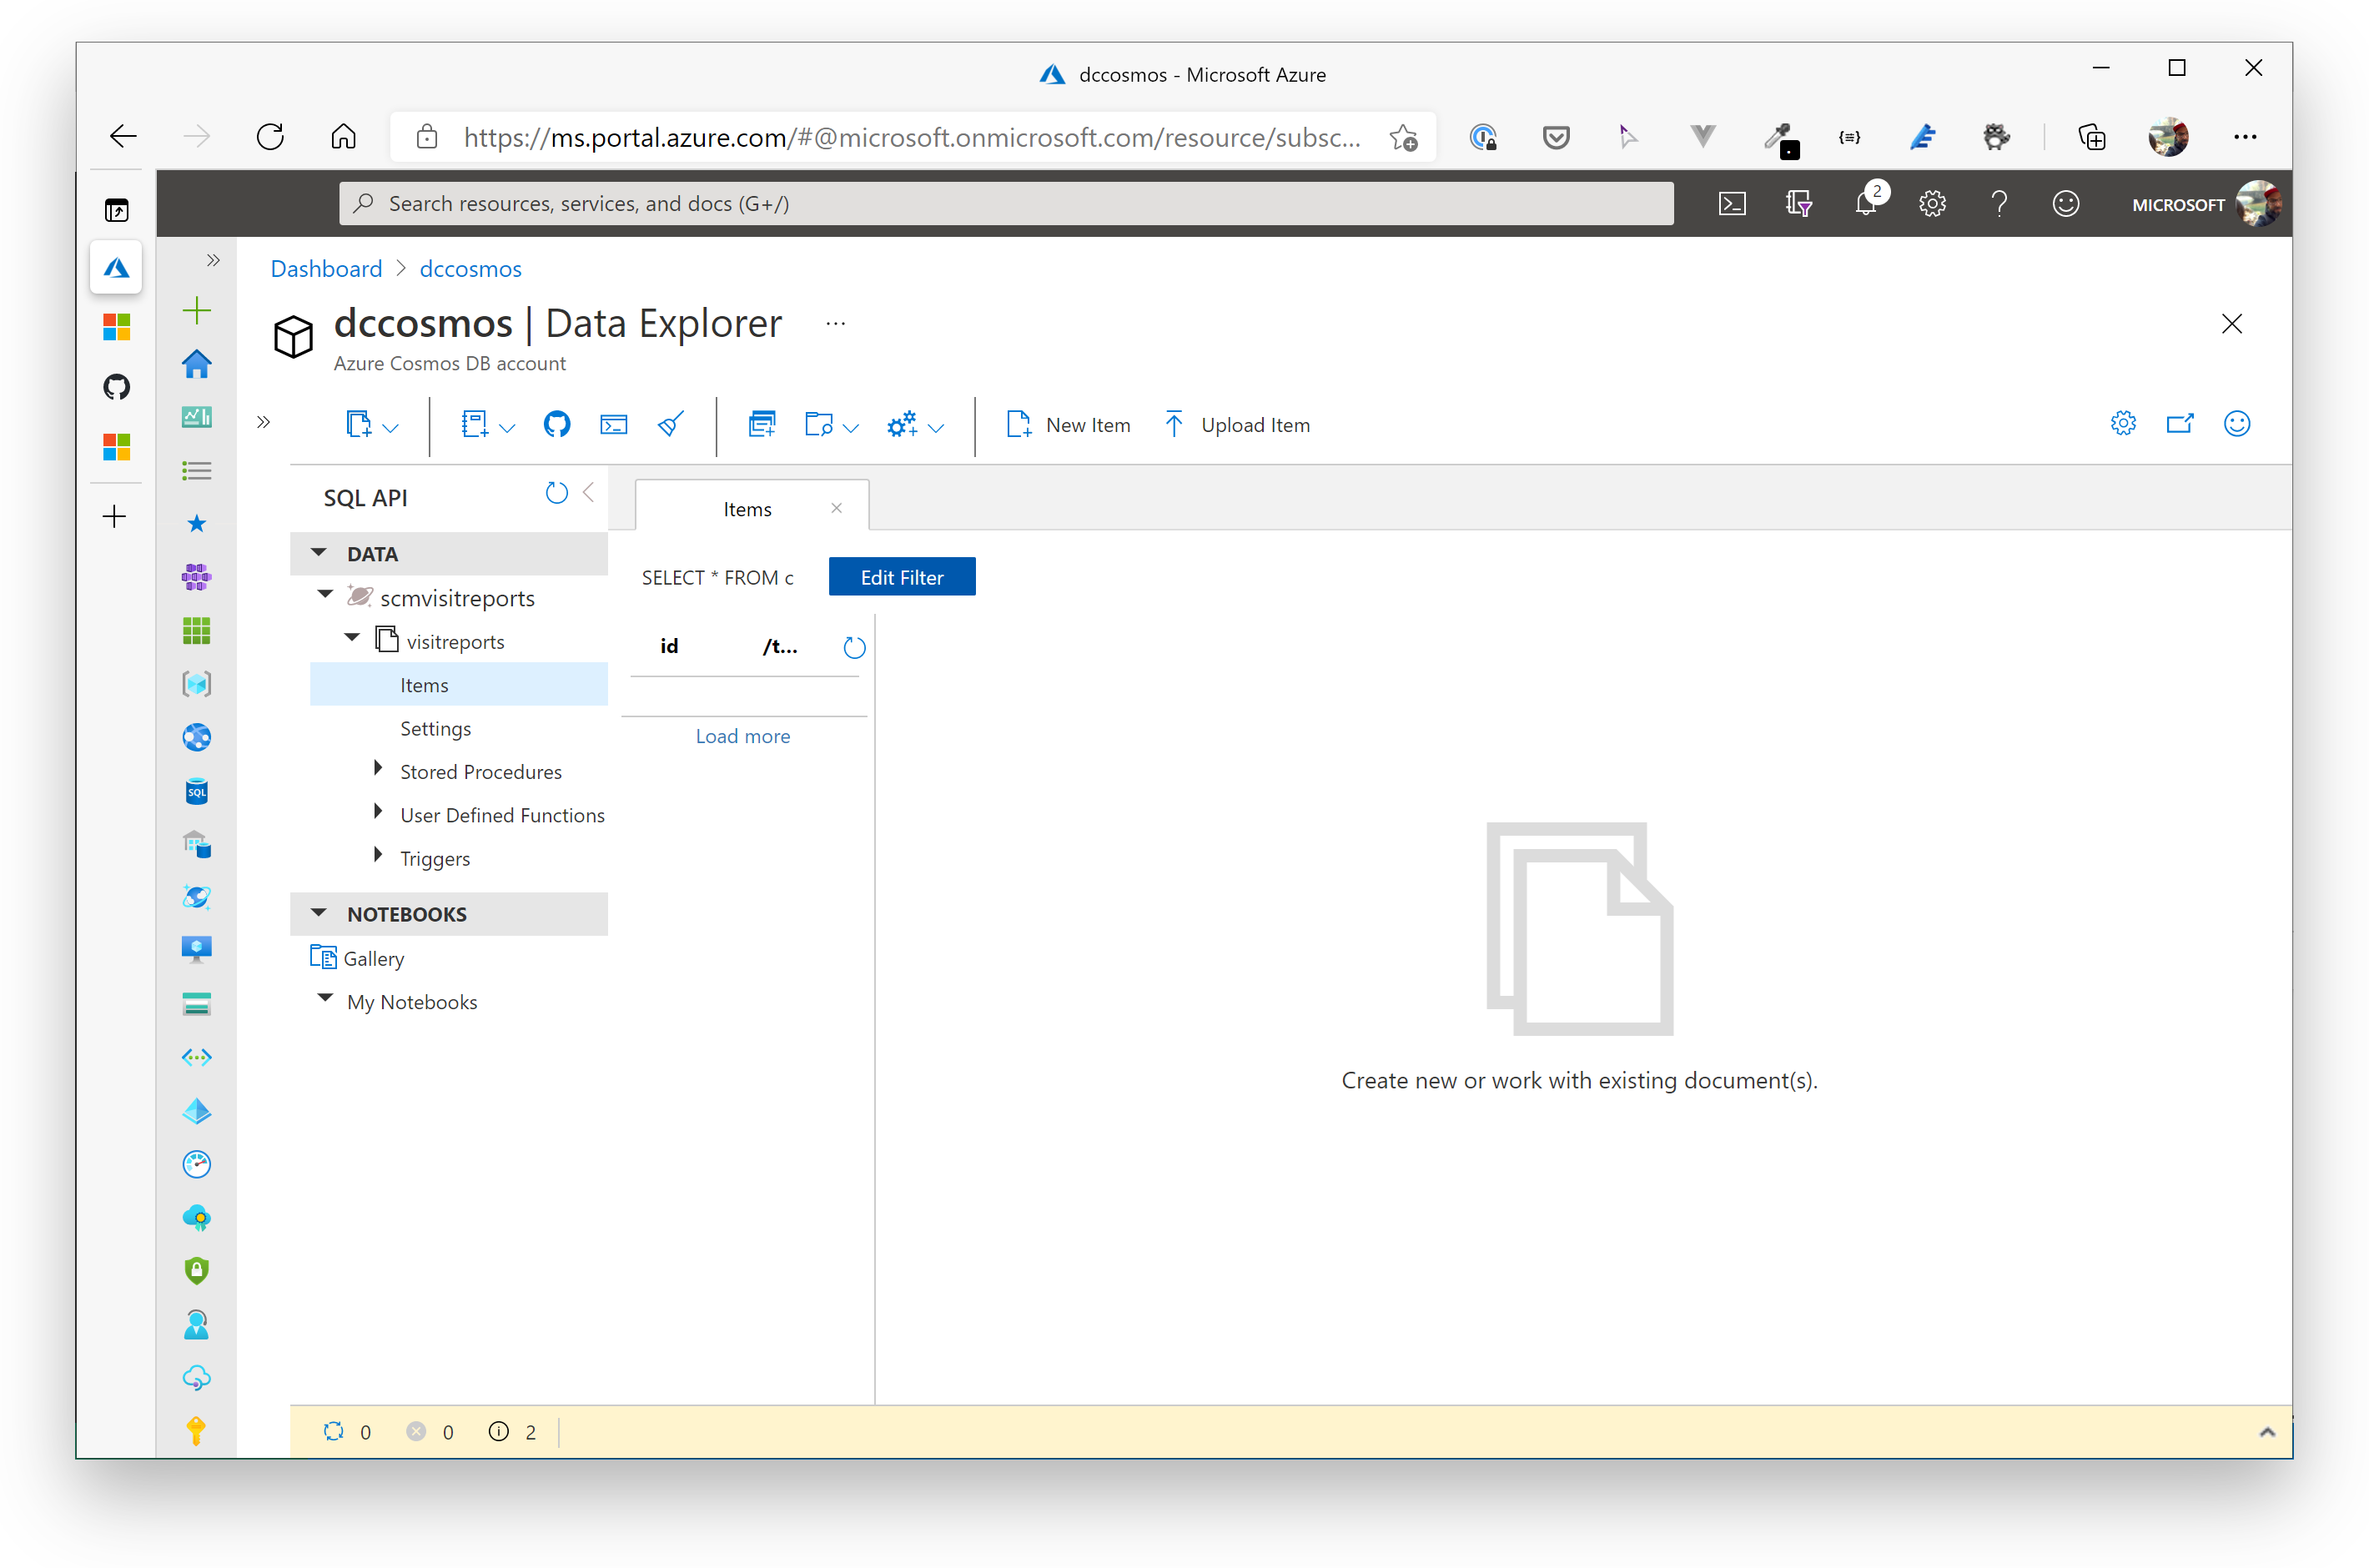
When the deployment has finished (creating the account takes some time - you can grab a coffee), create a new Database and Container under "Data Explorer" in the portal for the Visit Reports microservice.
Database Properties:
| Parameter | Value |
|---|---|
| Database ID | scmvisitreports |
| Provision Database Throughput | true (not neccessary, if you chose to enable Serverless mode) |
| RU/s | Manual / 400 (not neccessary, if you chose to enable Serverless mode) |
Container Properties:
| Parameter | Value |
|---|---|
| Database ID | scmvisitreports |
| Container ID | visitreports |
| Partition | /type |
# Azure Cognitive Search
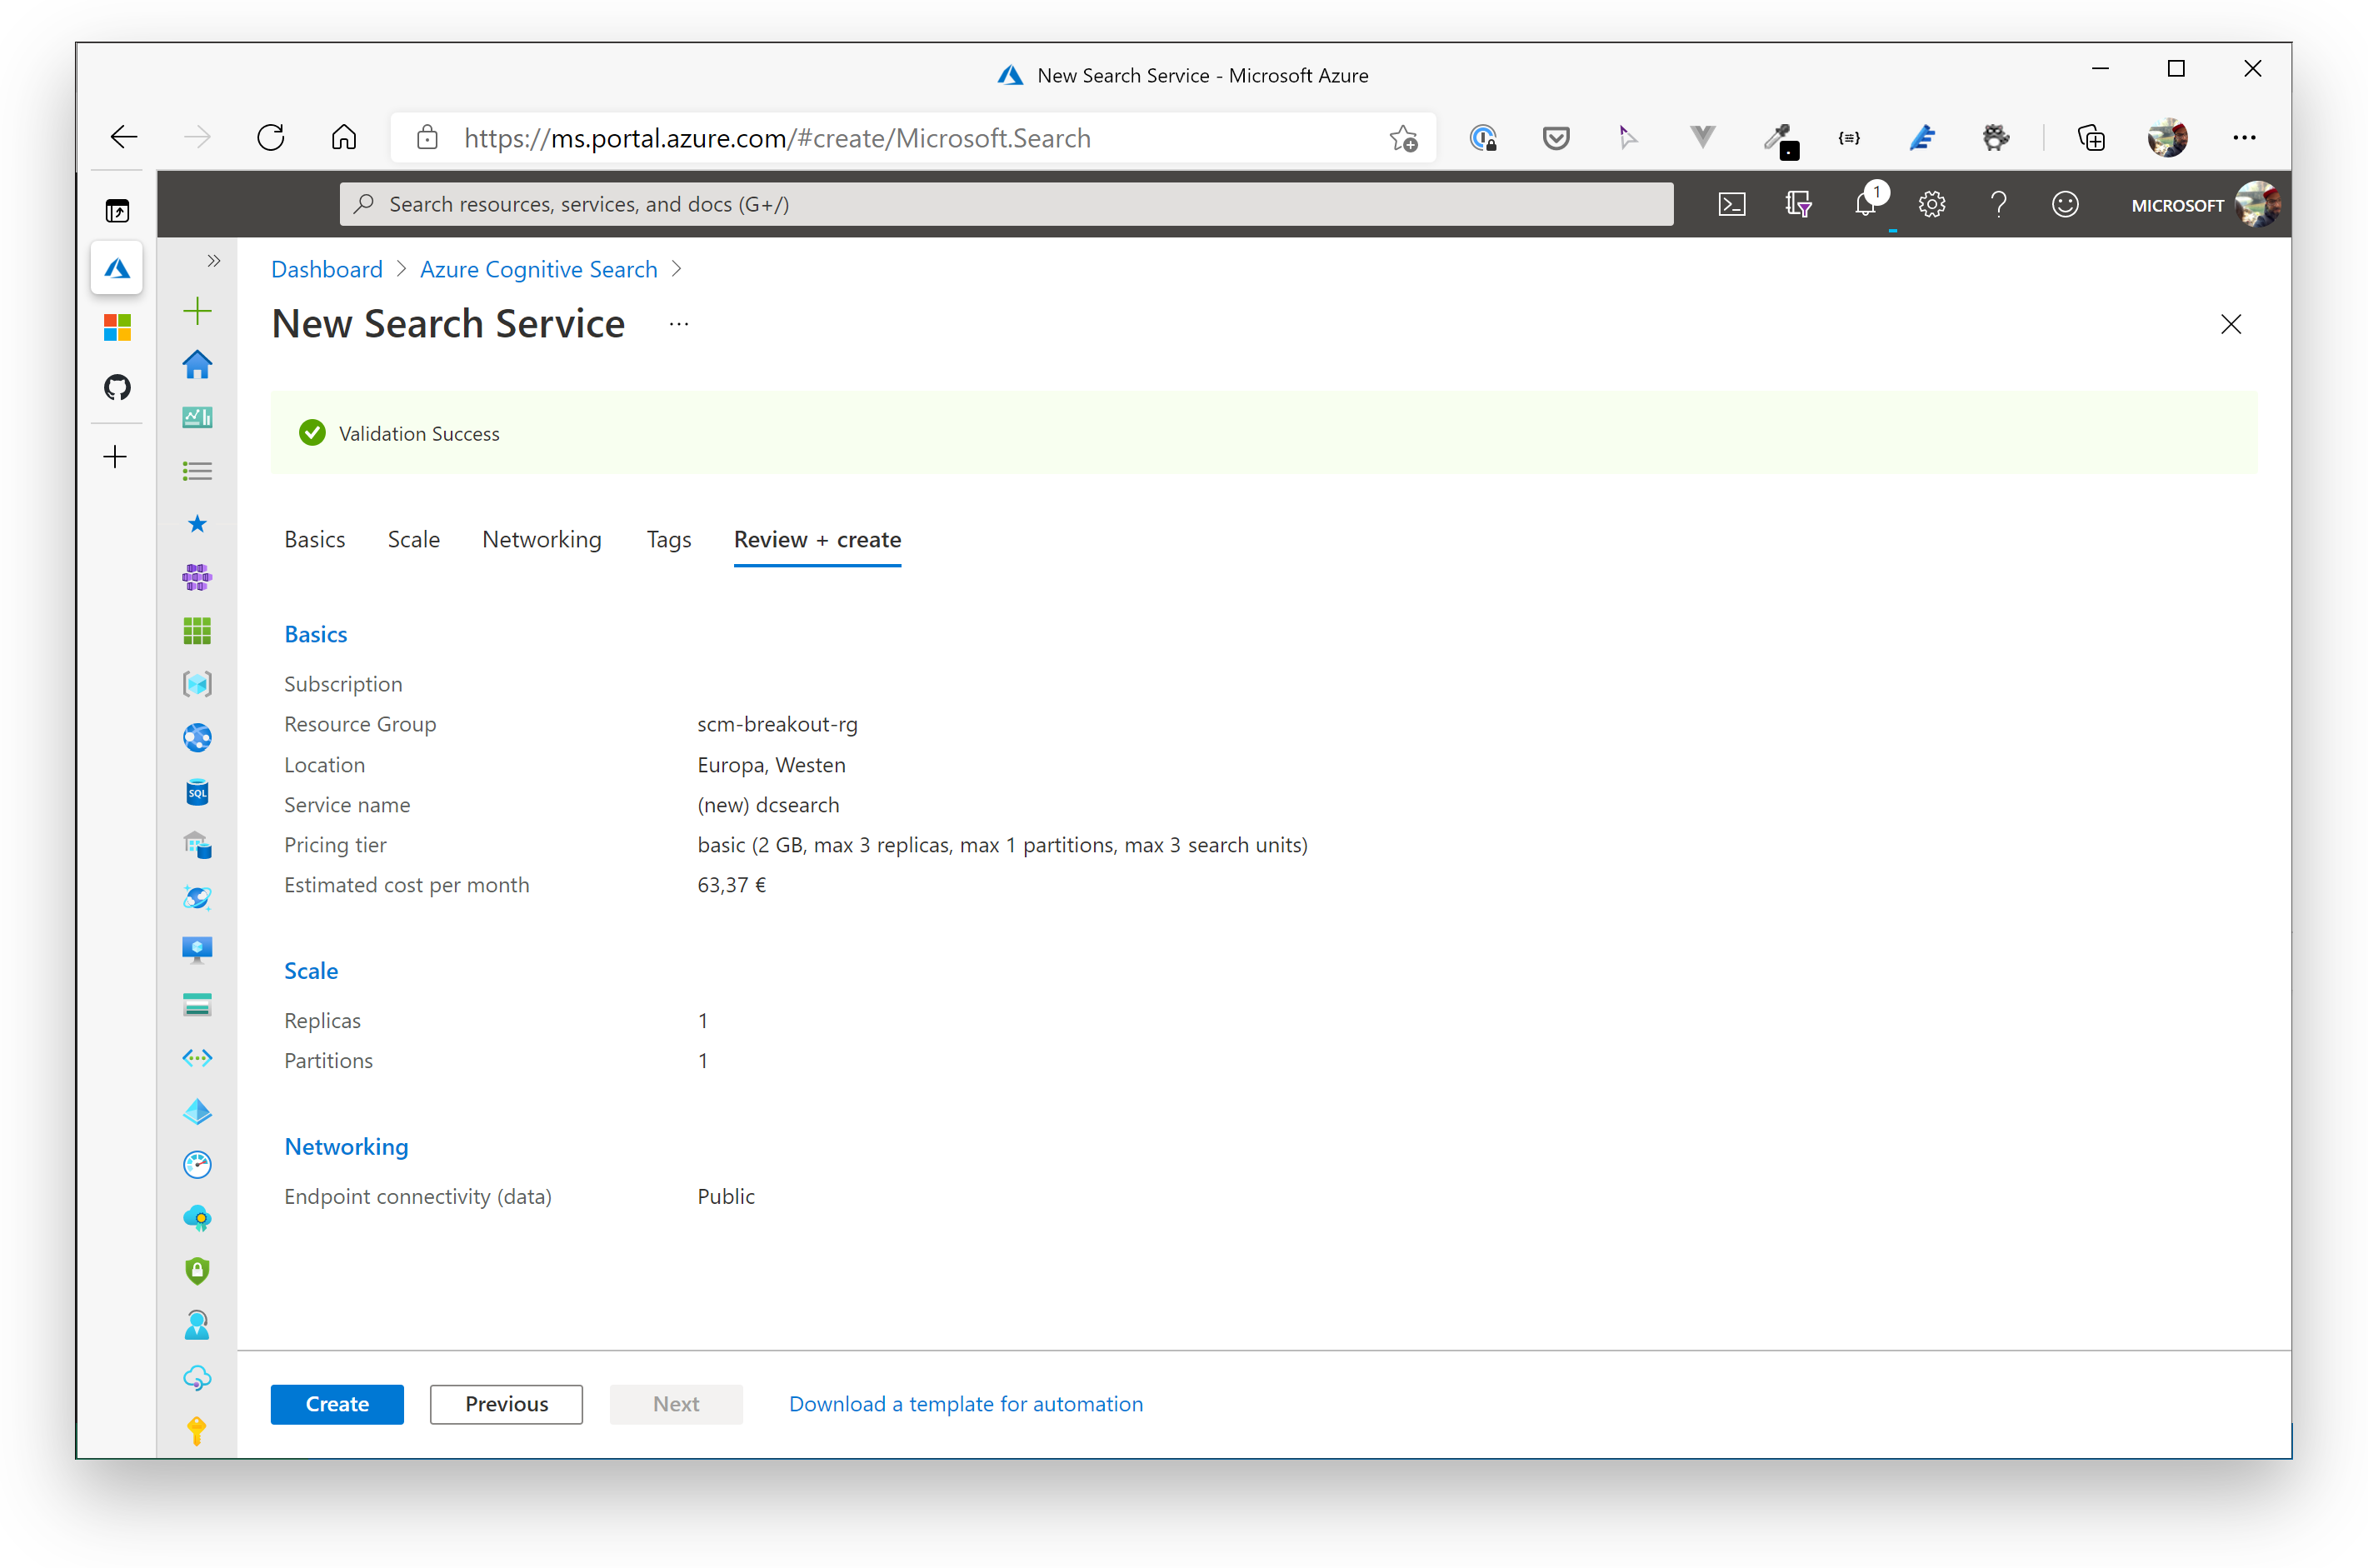
Create a new Azure Cognitive Search Account either via the Azure Portal or Azure CLI.
Account Properties:
| Parameter | Value |
|---|---|
| _Resource Group | use your existing resource group: scm-breakout-rg |
| Location | West Europe |
| Pricing Tier | Free*(for development purposes - if that is not possible, choose_Basic*) |
Leave all other settings as proposed by Azure.
# Setup Messaging Services
Create a new Azure Service Bus either via the Azure Portal or Azure CLI.
Service Bus Properties:
| Parameter | Value |
|---|---|
| Resource Group | use your existing resource group: scm-breakout-rg |
| Pricing Tier | Standard |
| Location | West Europe |
Leave all other settings as proposed by Azure.
# Service Bus Queue
When the deployment of the new Service Bus has finished, we need to add a Service Bus Queue. The queue will replace the Storage Account Queue we used to notify an Azure Function that creates thumbnails of contact images.
Service Bus Queue Properties:
- Name: sbq-scm-thumbnails
When successfully added, go to Shared Access Policies of the Service Bus Queue (!) and add two policies:
- Name: listen (enable checkbox Listen)
- will be used by clients that only need to listen to the Service Bus Queue
- Name: send (enable checkbox Send)
- will be used by clients that also need to be able to send messages to the Service Bus Queue
Our producers/consumers will use these Access Policies to be able to send and listen to/on that specific queue.
# Service Bus Topic for Contacts
We also nee a topic for handling Contacts changes (create, update etc.) with corresponding subscriptions. Go back to the Service Bus Namespace in the Portal and add a new topic.
Contacts Topic Properties:
- Name: sbt-contacts
Leave all other settings as suggested and click Create. When finished, open the topic and add two subscriptions.
Subscription for Search Service / indexing of contacts:
| Parameter | Value |
|---|---|
| Name | contactsearch |
| Max delivery count | 10 |
| Enable Sessions | true (in this sample, we will be using Service Bus sessions!) |
TIP
📝 Sessions enable the first-in, first out (FIFO) pattern within Azure Service Bus. If you want to know more about it, have a look at the official docs: https://docs.microsoft.com/azure/service-bus-messaging/message-sessions (opens new window)
Subscription for Visit Reports Service
| Parameter | Value |
|---|---|
| Name | visitreports |
| Max delivery count | 10 |
| Enable Sessions | false |
When you have successfully added the two subscriptions, go back to Shared Access Policies of the Service Bus Topic sbt-contacts and add two policies:
- Name: listen (enable checkbox Listen)
- will be used by clients that only need to listen to the Service Bus Topic
- Name: send (enable checkbox Send)
- will be used by clients that also need to be able to send messages to the Service Bus Topic
# Service Bus Topic for Visit Reports
We also need a topic for handling Visit Report changes (create, update etc.). Go back to the Service Bus Namespace in the Portal and add a new topic.
Visit Reports Topic Properties:
- Name: sbt-visitreports
Leave all other settings as suggested and click Create.
When successfully added, go back to Shared Access Policies of the Service Bus Topic sbt-visitreports and add two policies:
- Name: listen (enable checkbox Listen)
- will be used by clients that only need to listen to the Service Bus Topic
- Name: send (enable checkbox Send)
- will be used by clients that also need to be able to send messages to the Service Bus Topic
We don't add a subscription for the visit report topic at the moment. The topic will be used later when we integrate further services like Azure Congitive Services.
# Quality Check
You should have created the following Azure services by now:
- Azure SQL DB
- Azure Cosmos DB (database + container)
- Azure Cognitive Search
- Azure Service Bus
- Queue for thumbnail generation
- Shared Access Policies for listen and send
- Topic for Contacts
- Shared Access Policies for listen and send
- subscription for visit reports
- subscription for search service
- Topic for Visit Reports
- Shared Access Policies for listen and send
- Queue for thumbnail generation
If you missed to create one of these services, please click on the corresponding link and go back the specific section.
# Re-deploy Contacts/Resources Service and Image Resizer Function
Because we refactored the Contacts and Resources APIs to use Azure Service Bus for inter-service communication, we need to deploy new versions of these application services and change some of the App Configuration/Settings we added on Day 2.
TIP
📝 We will be re-using the Azure service instances from Day 2!
# Alter App Configuration/Settings
We will reuse the Web Apps for Contacts and Resources as well as the Azure Function for image manipulation we created yesterday. So, first we will adjust the App Configuration for each of the services.
TIP
📝 Use a second browser window/tab to be able to switch back and forth while adding the configuration settings.
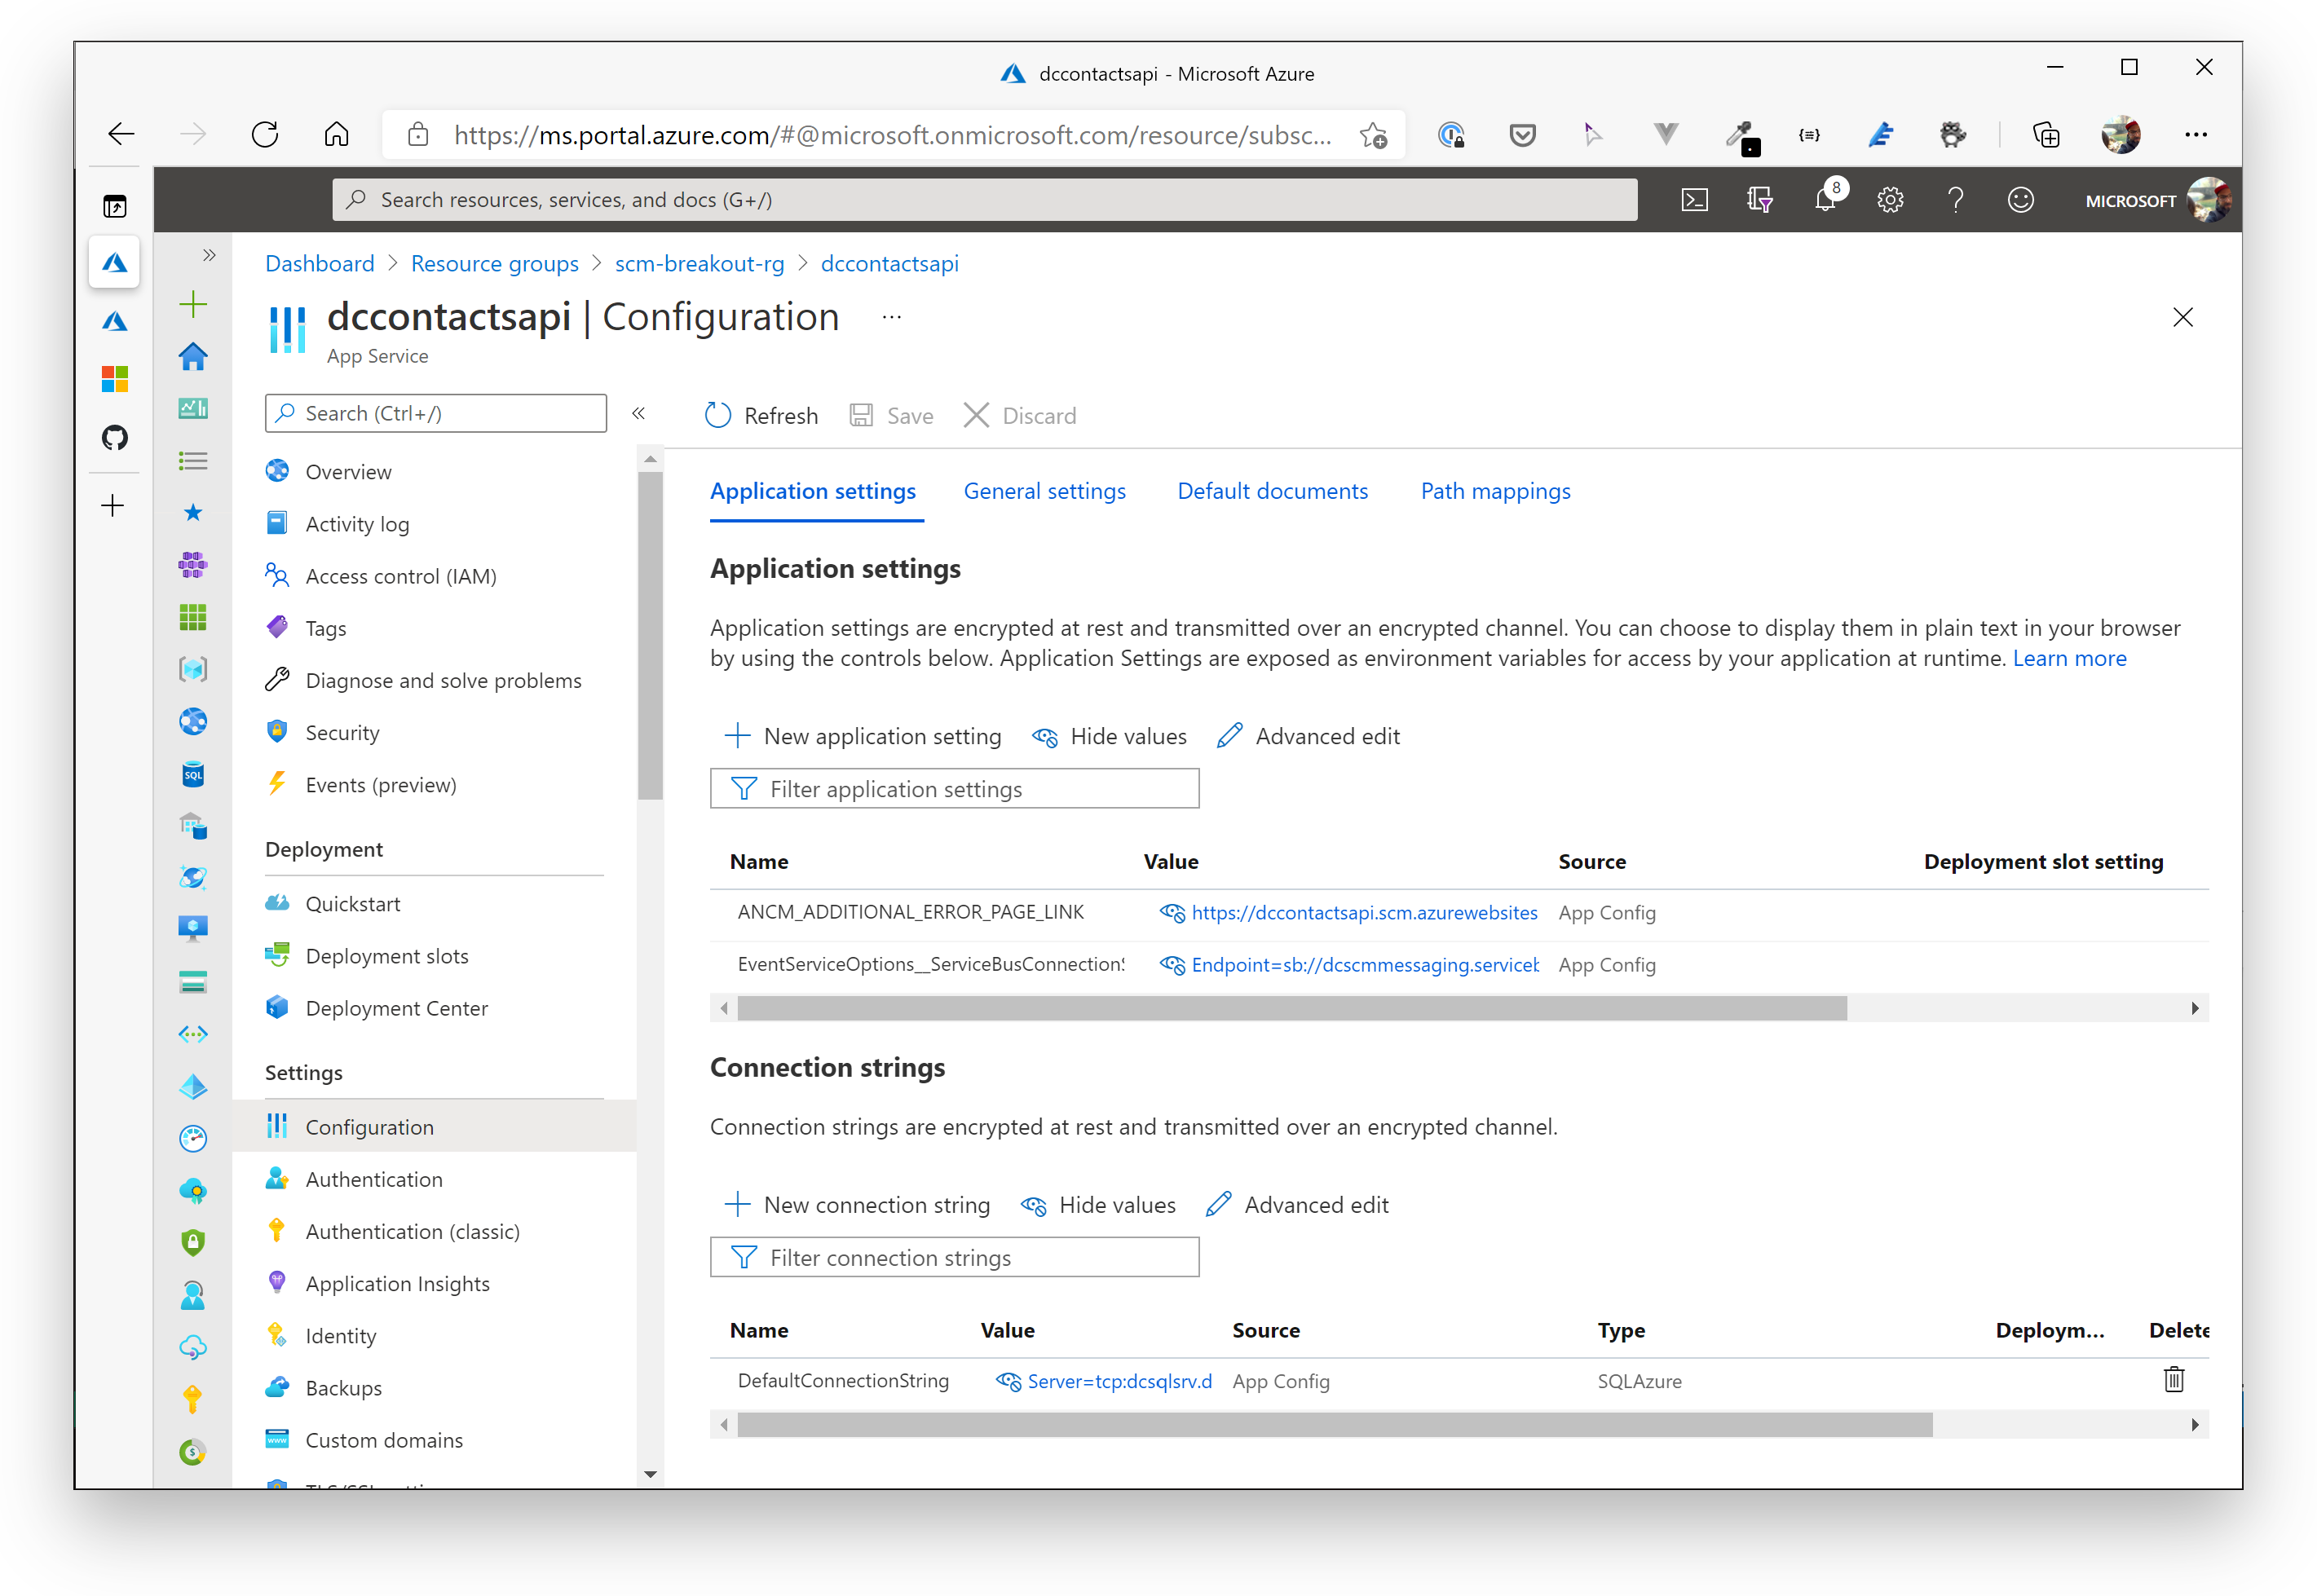
Azure Web App for Contacts Service:
Application Configuration/Settings:
| Parameter | Value / Hint |
|---|---|
| EventServiceOptions__ServiceBusConnectionString | use the Connection String from the Shared Access Policy (Topic sbt-contacts) for sending messages - send |
Connection Strings:
| Parameter | Value / Hint | Type |
|---|---|---|
| DefaultConnectionString | go to the Azure SQL DB you created and use the ADO.NET connection string (under "Settings" / "Connection strings"). Don't forget to add your password to the connection string! | SQLAzure |
Azure Web App for Resources Service:
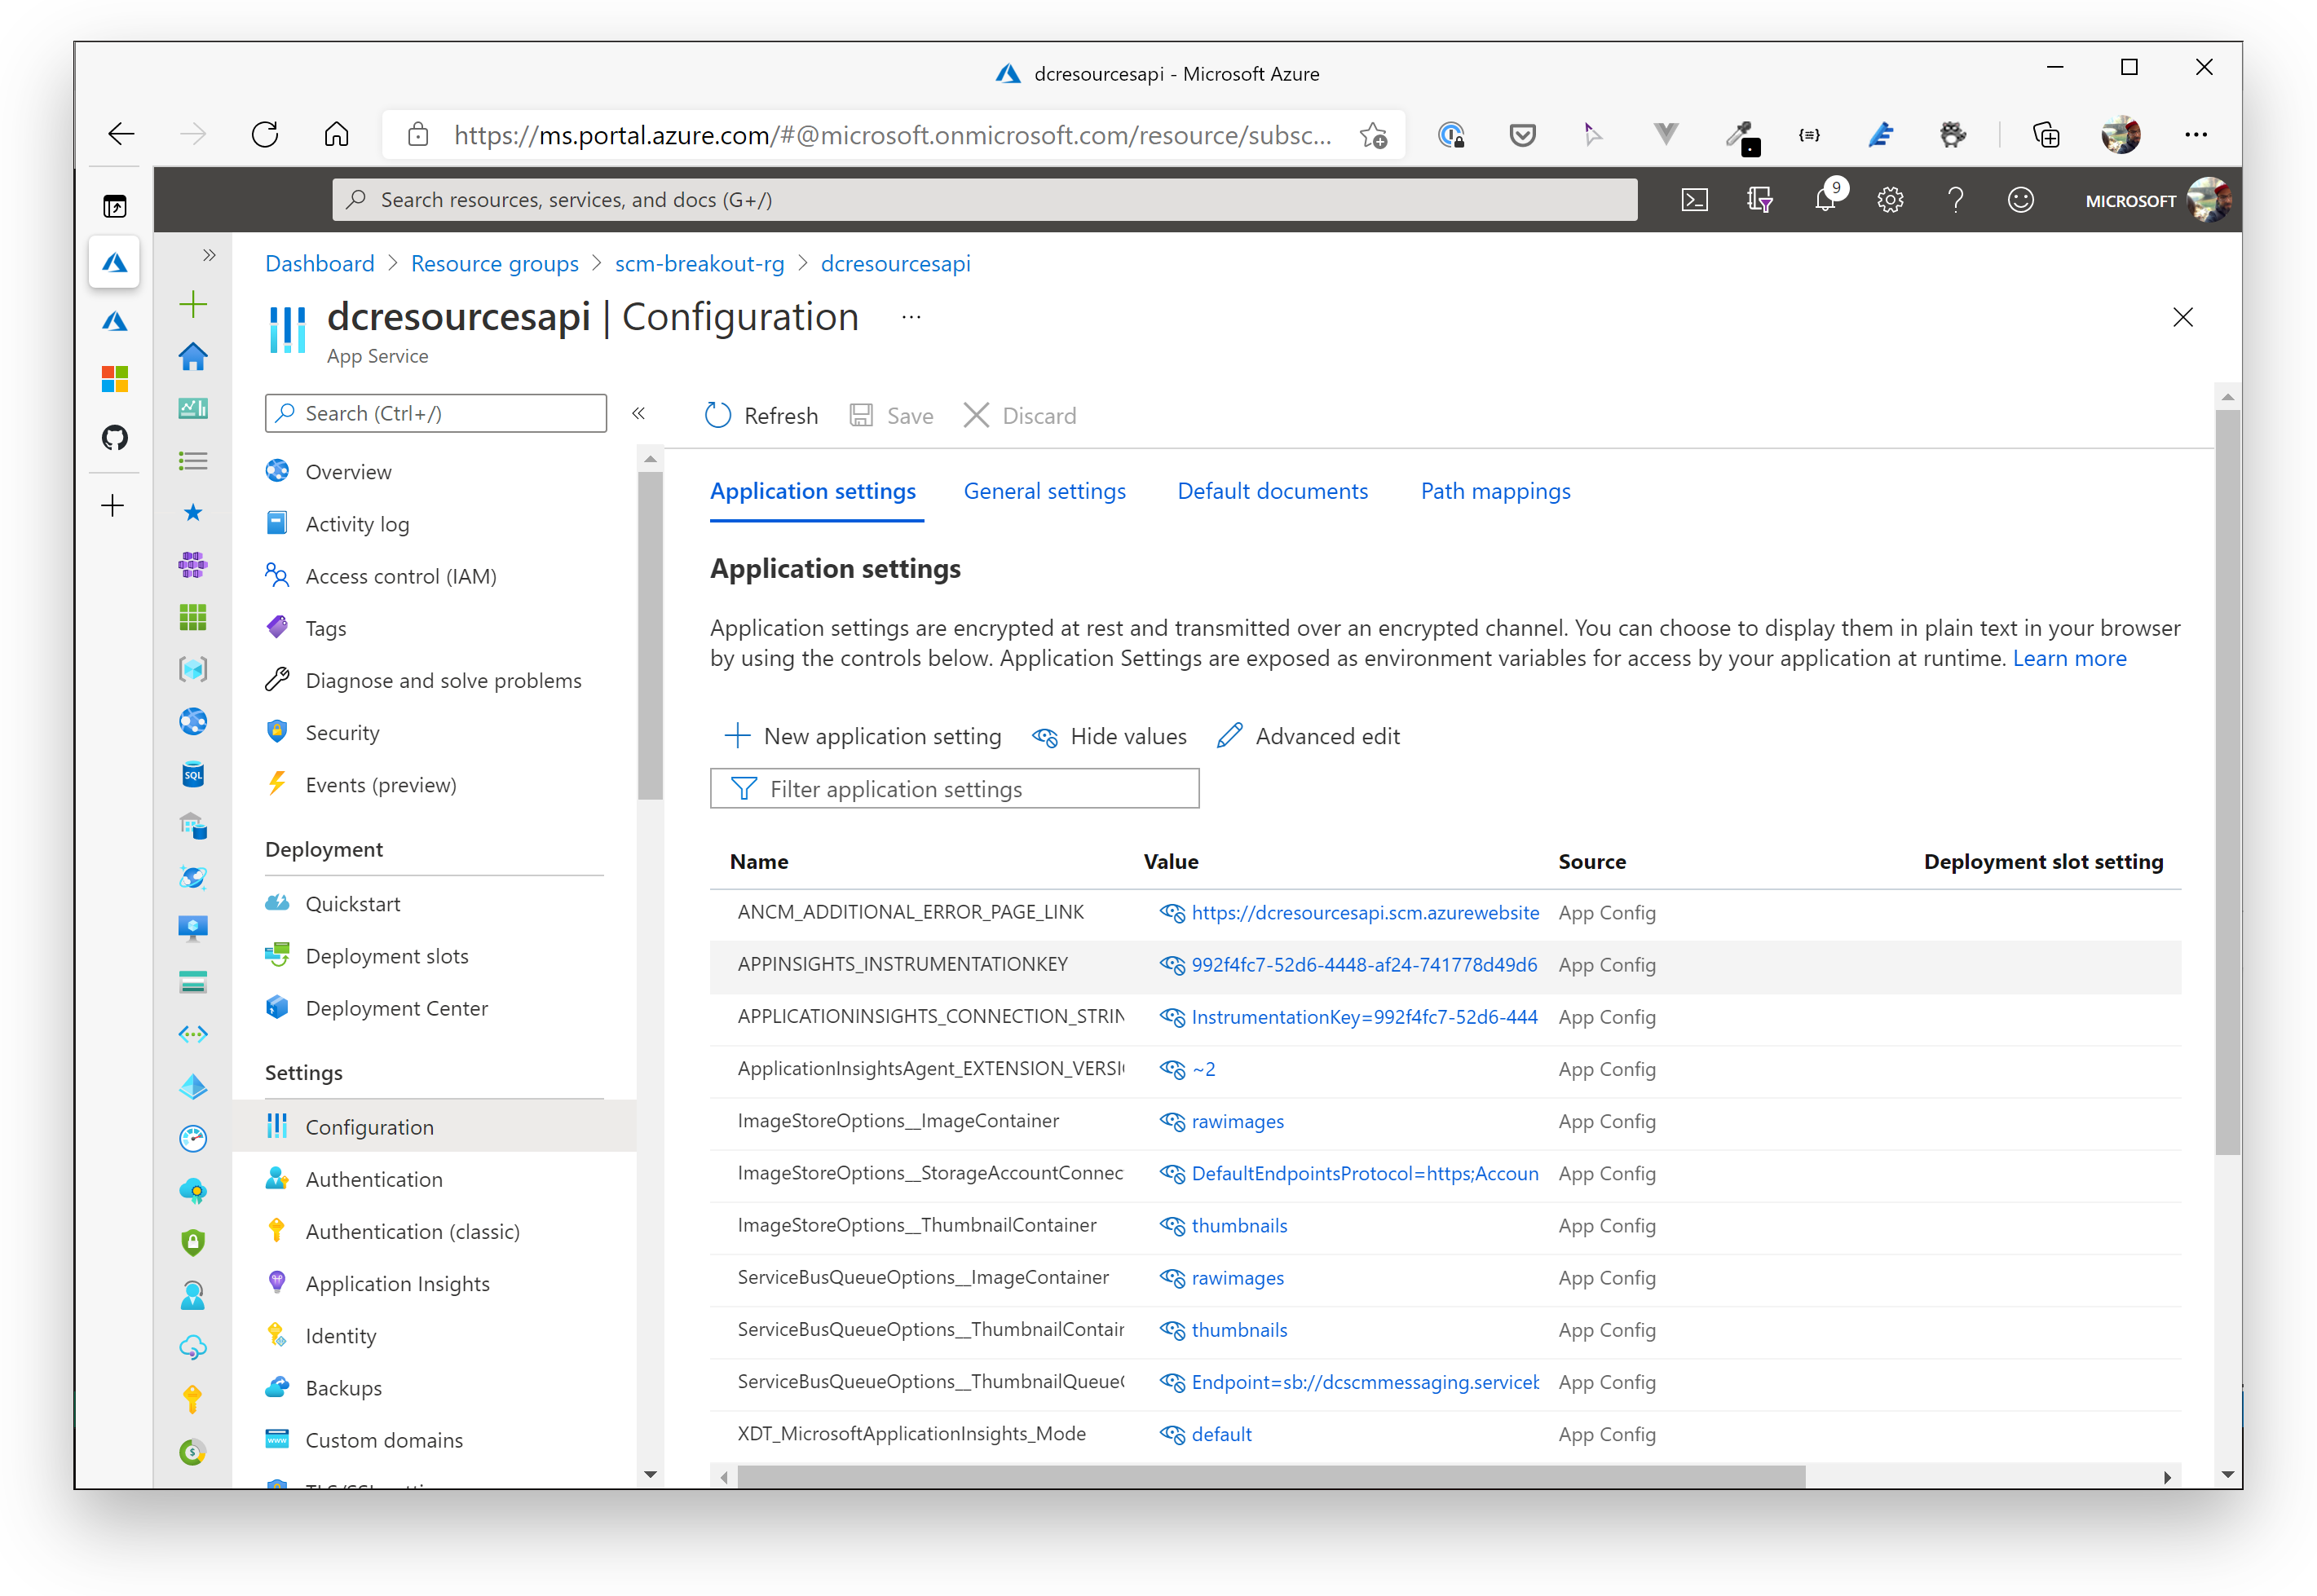
Application Settings:
| Parameter | Value / Hint |
|---|---|
| ImageStoreOptions__ThumbnailContainer | thumbnails |
| ImageStoreOptions__ImageContainer | rawimages |
| ImageStoreOptions__StorageAccountConnectionString | use the Connection String from your Storage Account created in the Break Out session yesterday (should be the same) |
| ServiceBusQueueOptions__ImageContainer | rawimages |
| ServiceBusQueueOptions__ThumbnailContainer | thumbnails |
| ServiceBusQueueOptions__ThumbnailQueueConnectionString | use the Connection String from the Shared Access Policy (Queue sbq-scm-thumbnails) for sending messages - send |
TIP
📝 You can delete all StorageQueueOptions__ app settings!
Azure Function for Image Manipulation / Resizer Service:
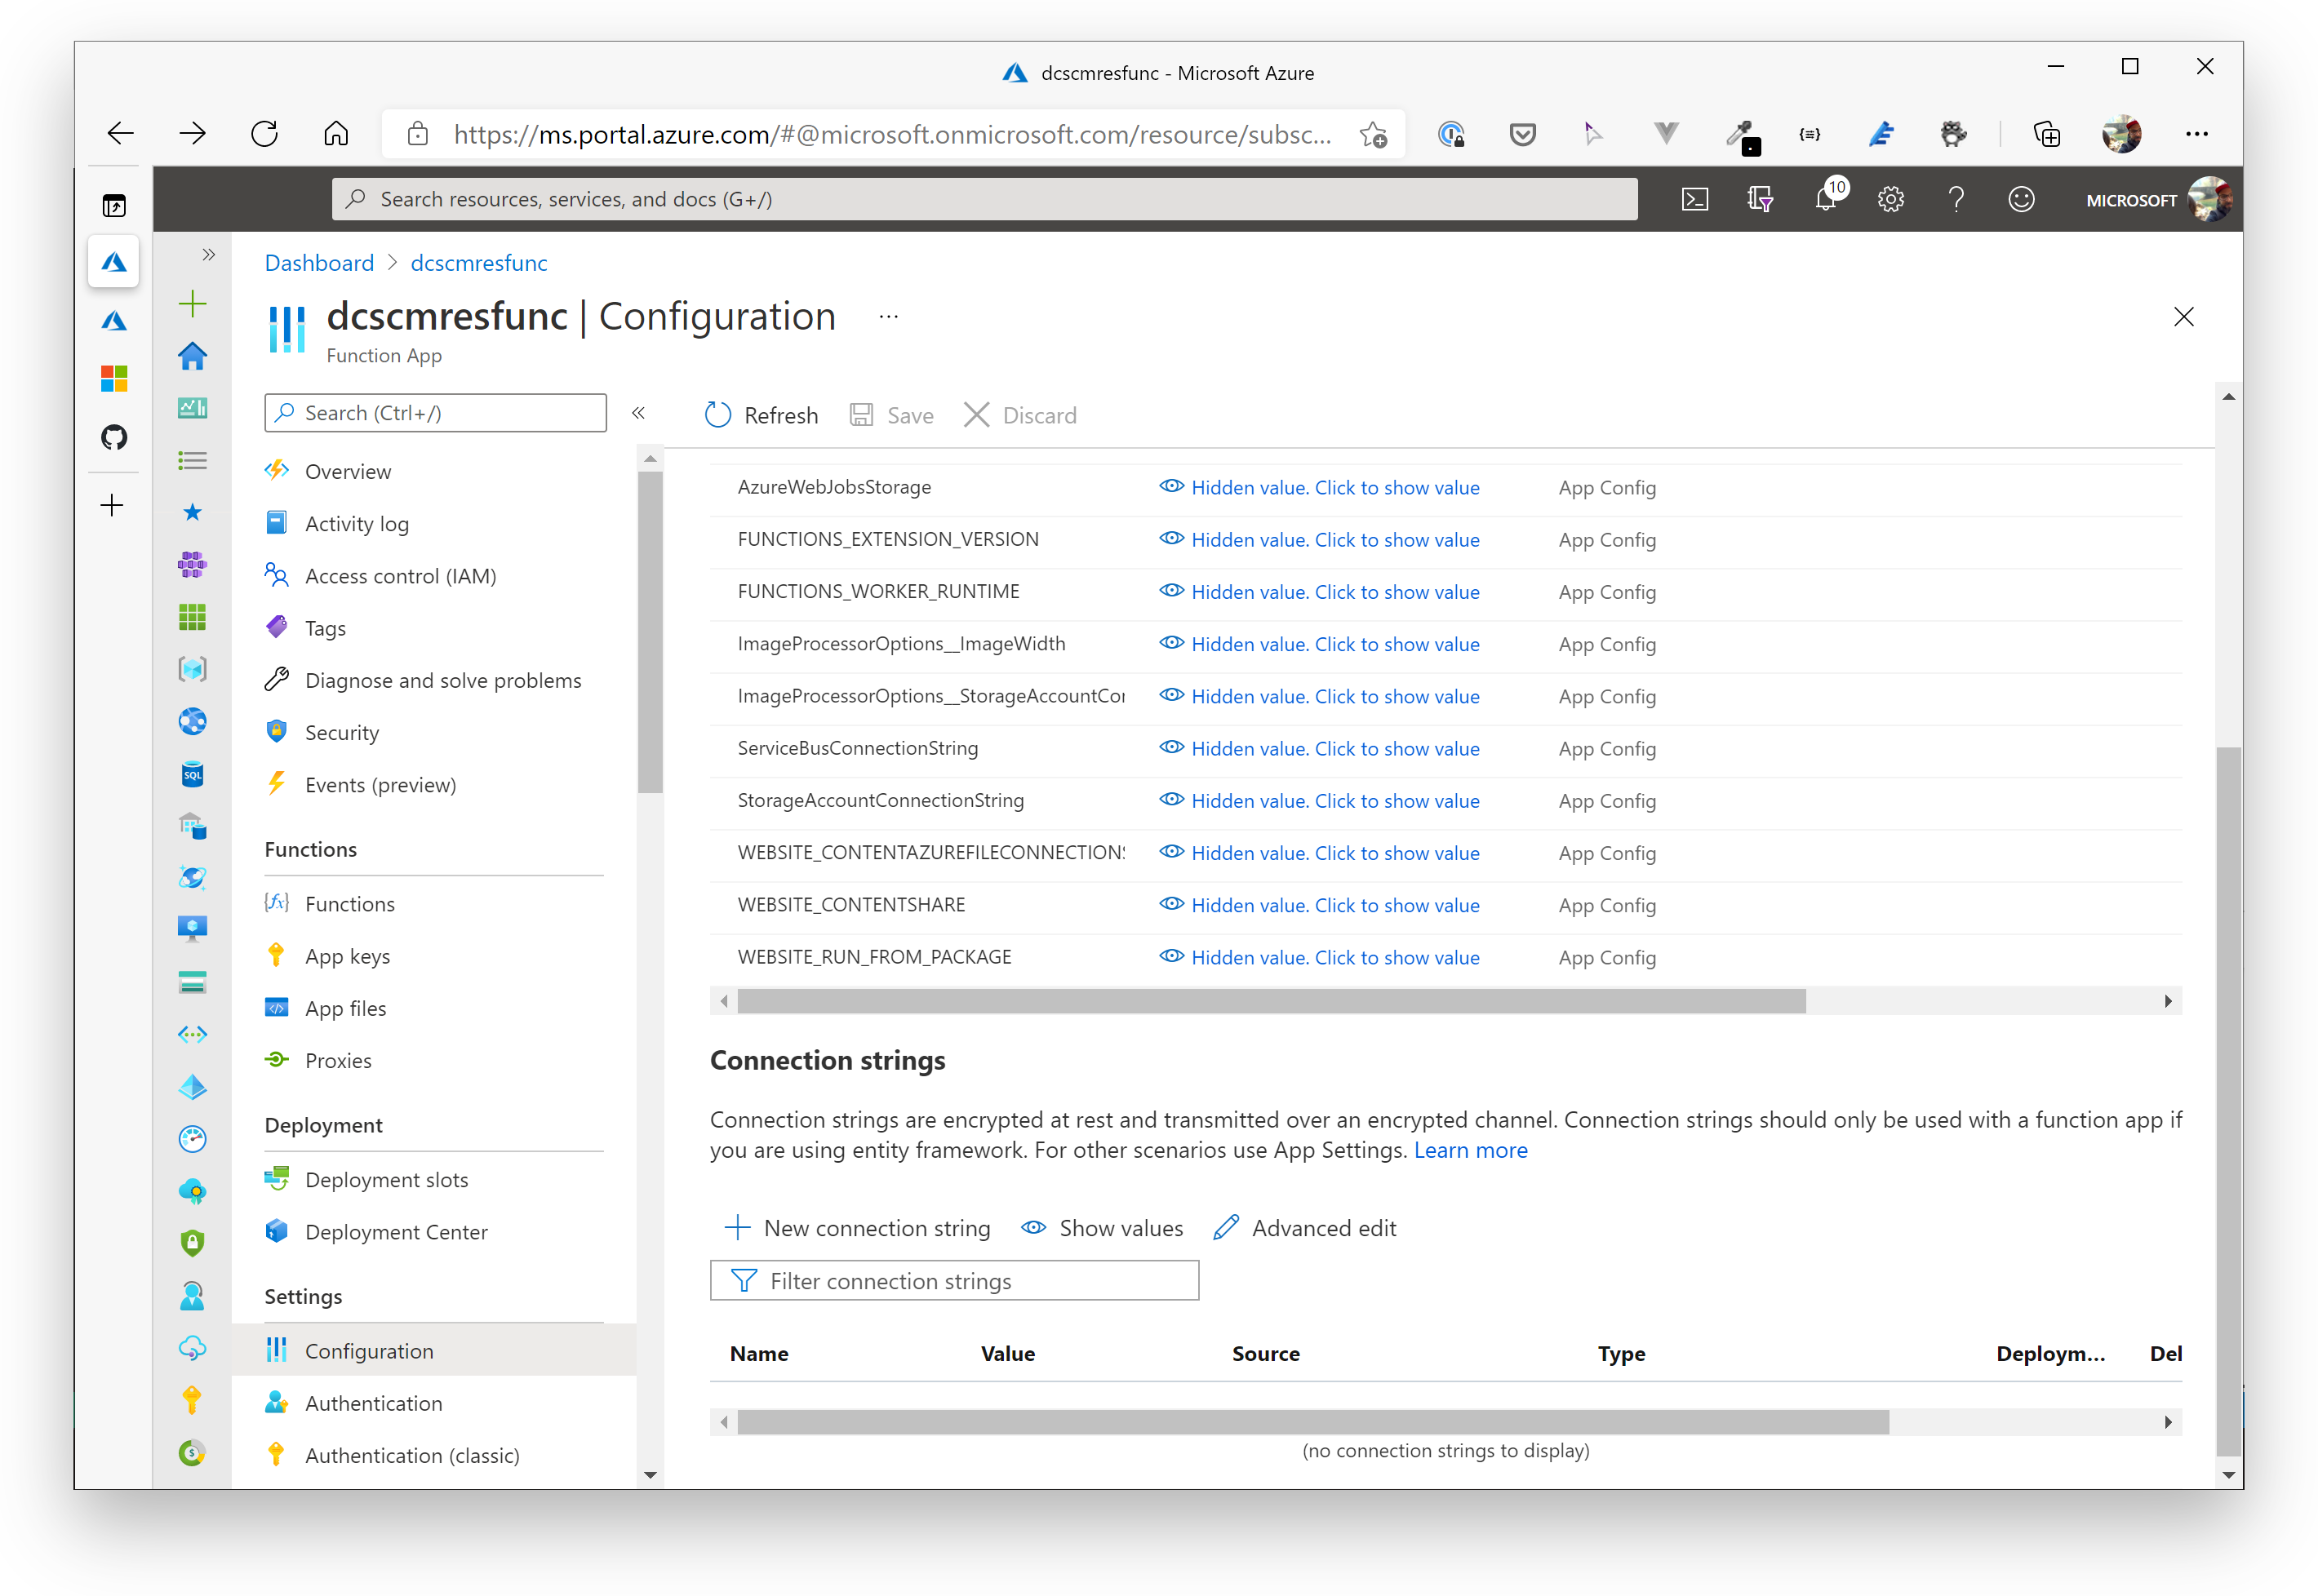
Configuration / Application Settings:
| Parameter | Value / Hint |
|---|---|
| ServiceBusConnectionString | use the Connection String from the Shared Access Policy (Queue sbq-scm-thumbnails) for listening for messages - listen Important: Please remove the EntityPath variable (incl. the value) at the end of the connection string! |
| ImageProcessorOptions__ImageWidth | 100 |
| ImageProcessorOptions__StorageAccountConnectionString | use the Connection String from your Storage Account created in the Break Out session yesterday (should be the same) |
TIP
📝 You can delete the QueueName app settings!
# Redeploy the services for Contacts, Resources and Image Manipulation
First of all: as seen in the Break Out session yesterday, everything is pre-created for you...this time, you need to open VS Code with the prepared workspace for Day 3 / Breakout 1 (day3/day3-breakout1.code-workspace).
The folder structure looks as follows:
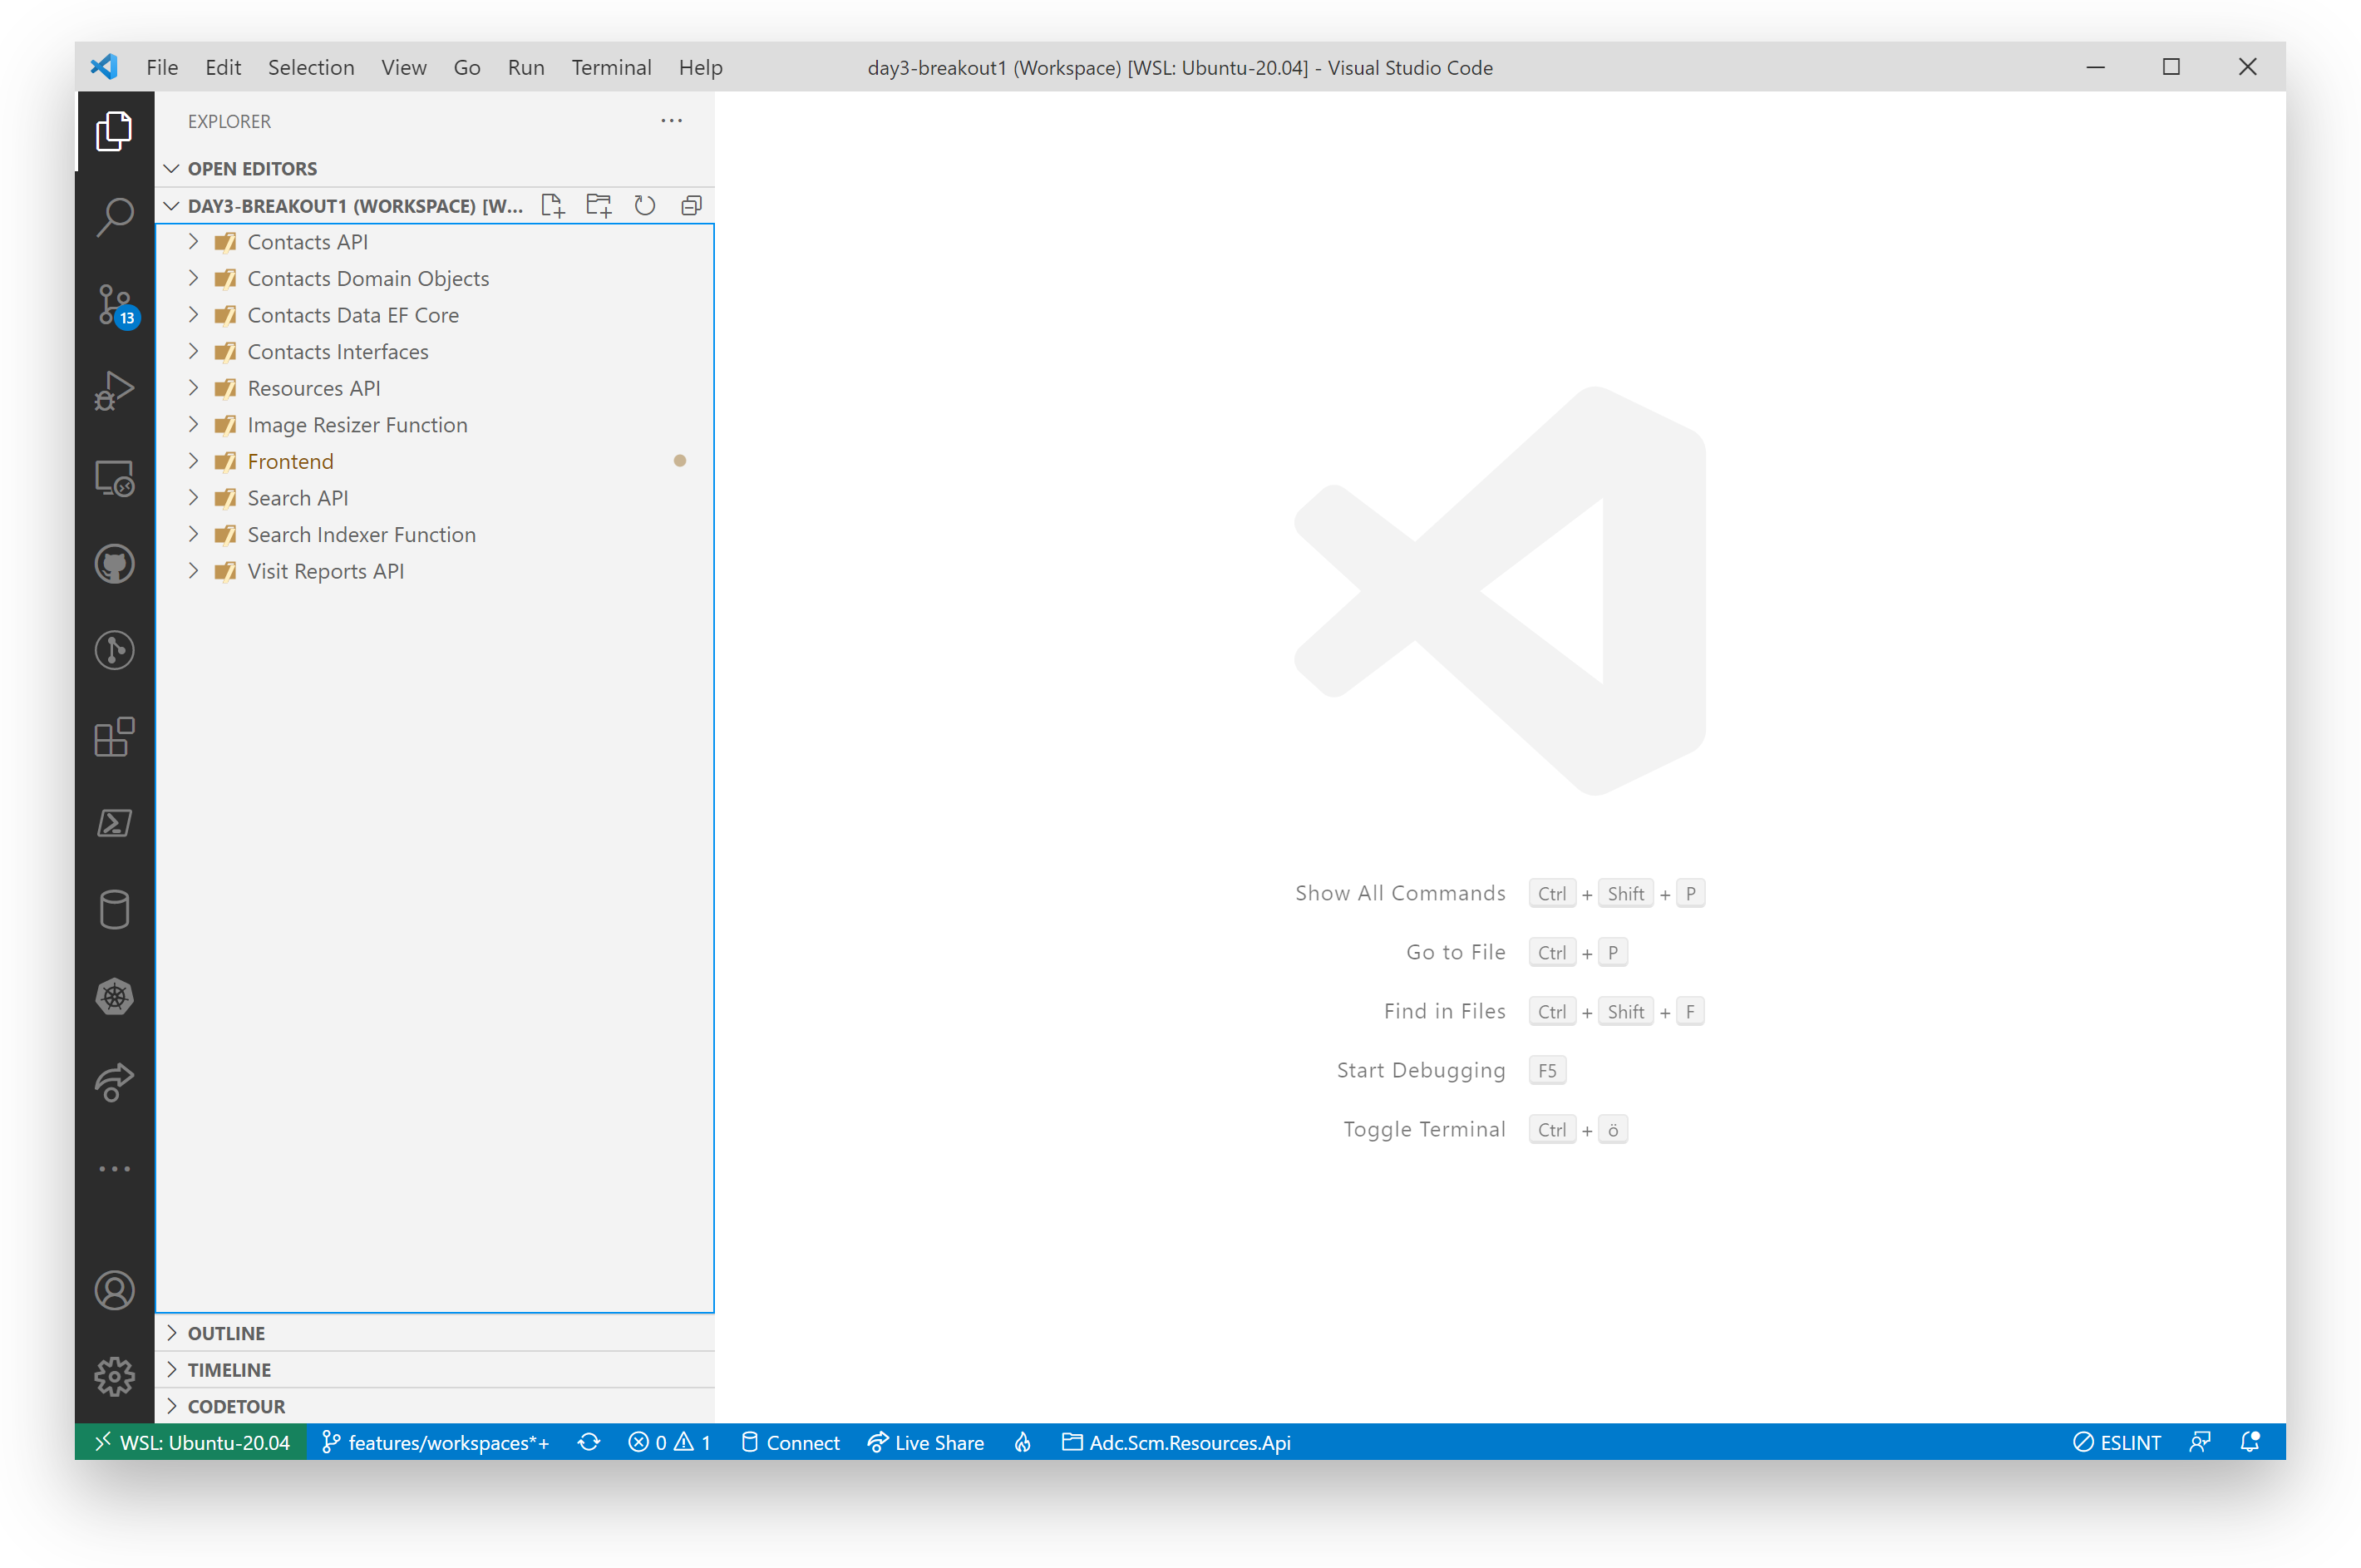
You will see additional projects added to the workspace compared to Breakout 2 of Day 2:
- Search API - contains the backend logic for searching for contacts objects via Azure Cognitive Search
- Search Indexer Function - contains the Azure Function to index contacts when a contact object has been created/updated
- Visit Reports API - contains the backend logic for managing visitreport objects
For now, we don't need to deal with the added projects. We simply redeploy the existing ones. You have deployed web apps and functions several times yesterday, so you should be familiar with the process.
So please re-deploy the Web Apps/Functions for:
- Contacts API
- Resources API
- Image Resizer Function
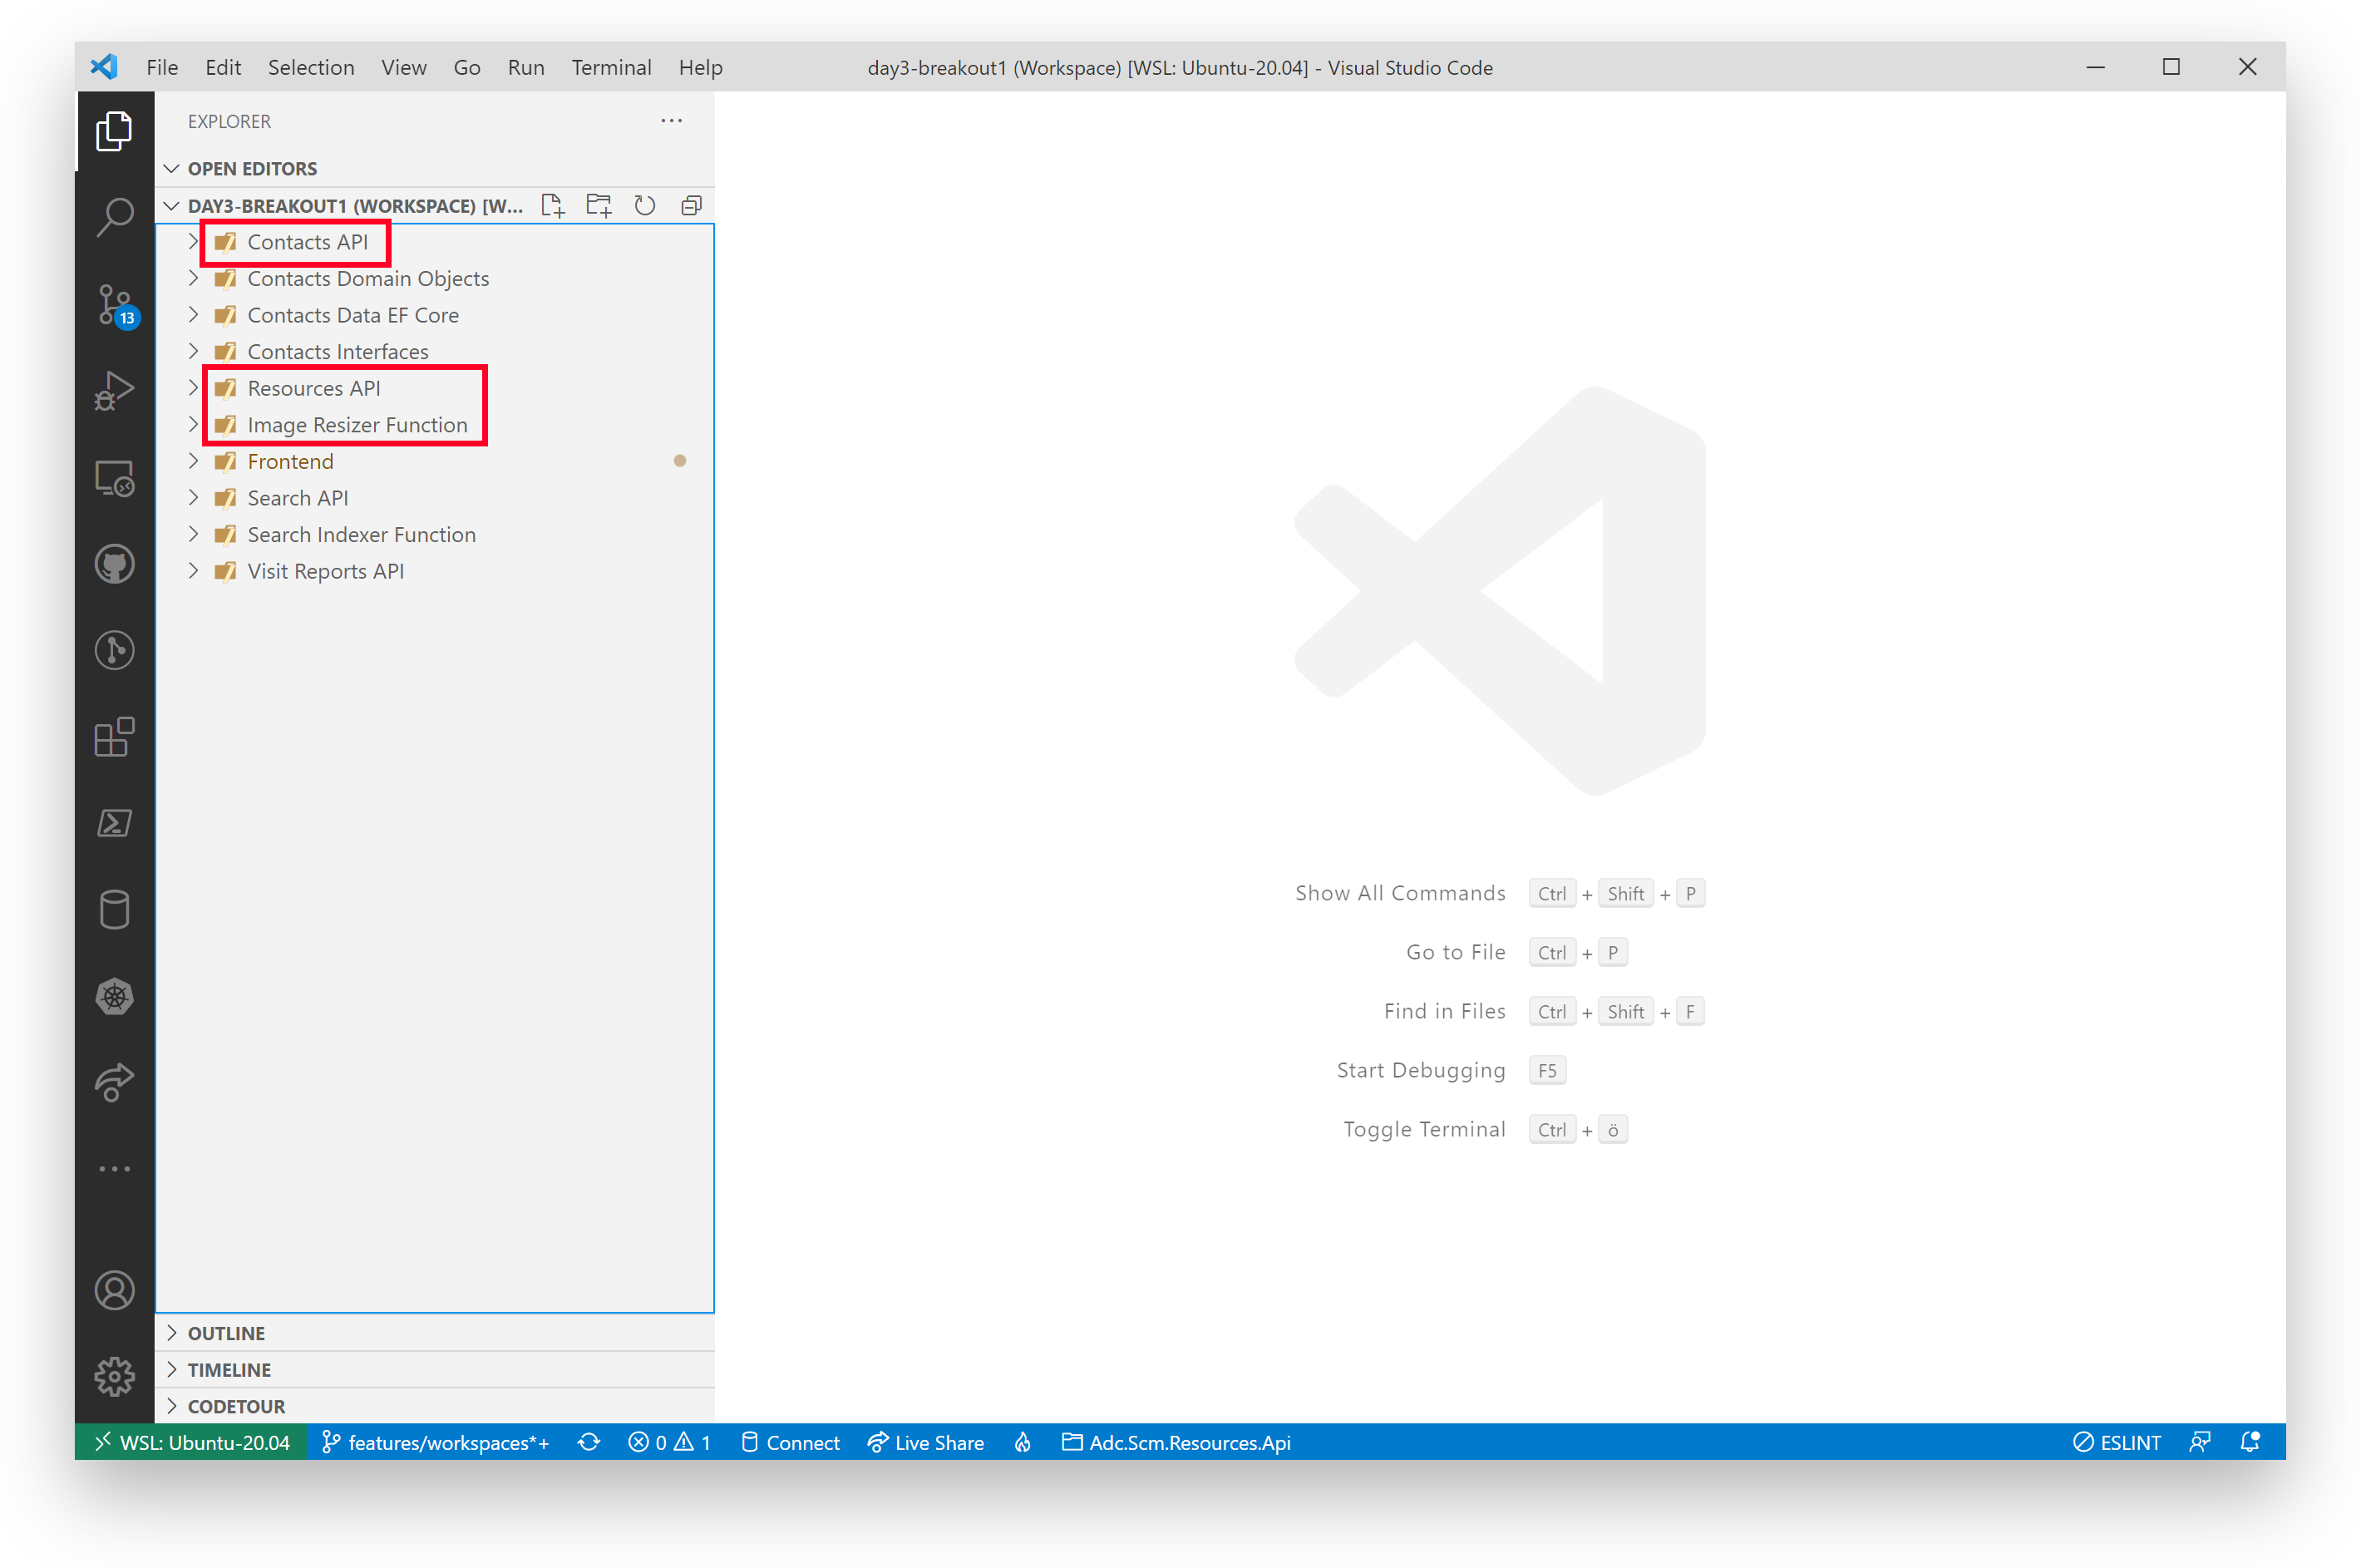
WARNING
⚠️ Please make sure you use the versions from the "Day3 - Breakout 1 Workspace"! Double-check that you use the correct VS Code workspace. The services have also been adjusted on the code level.
# Deploy the Contacts Search Service
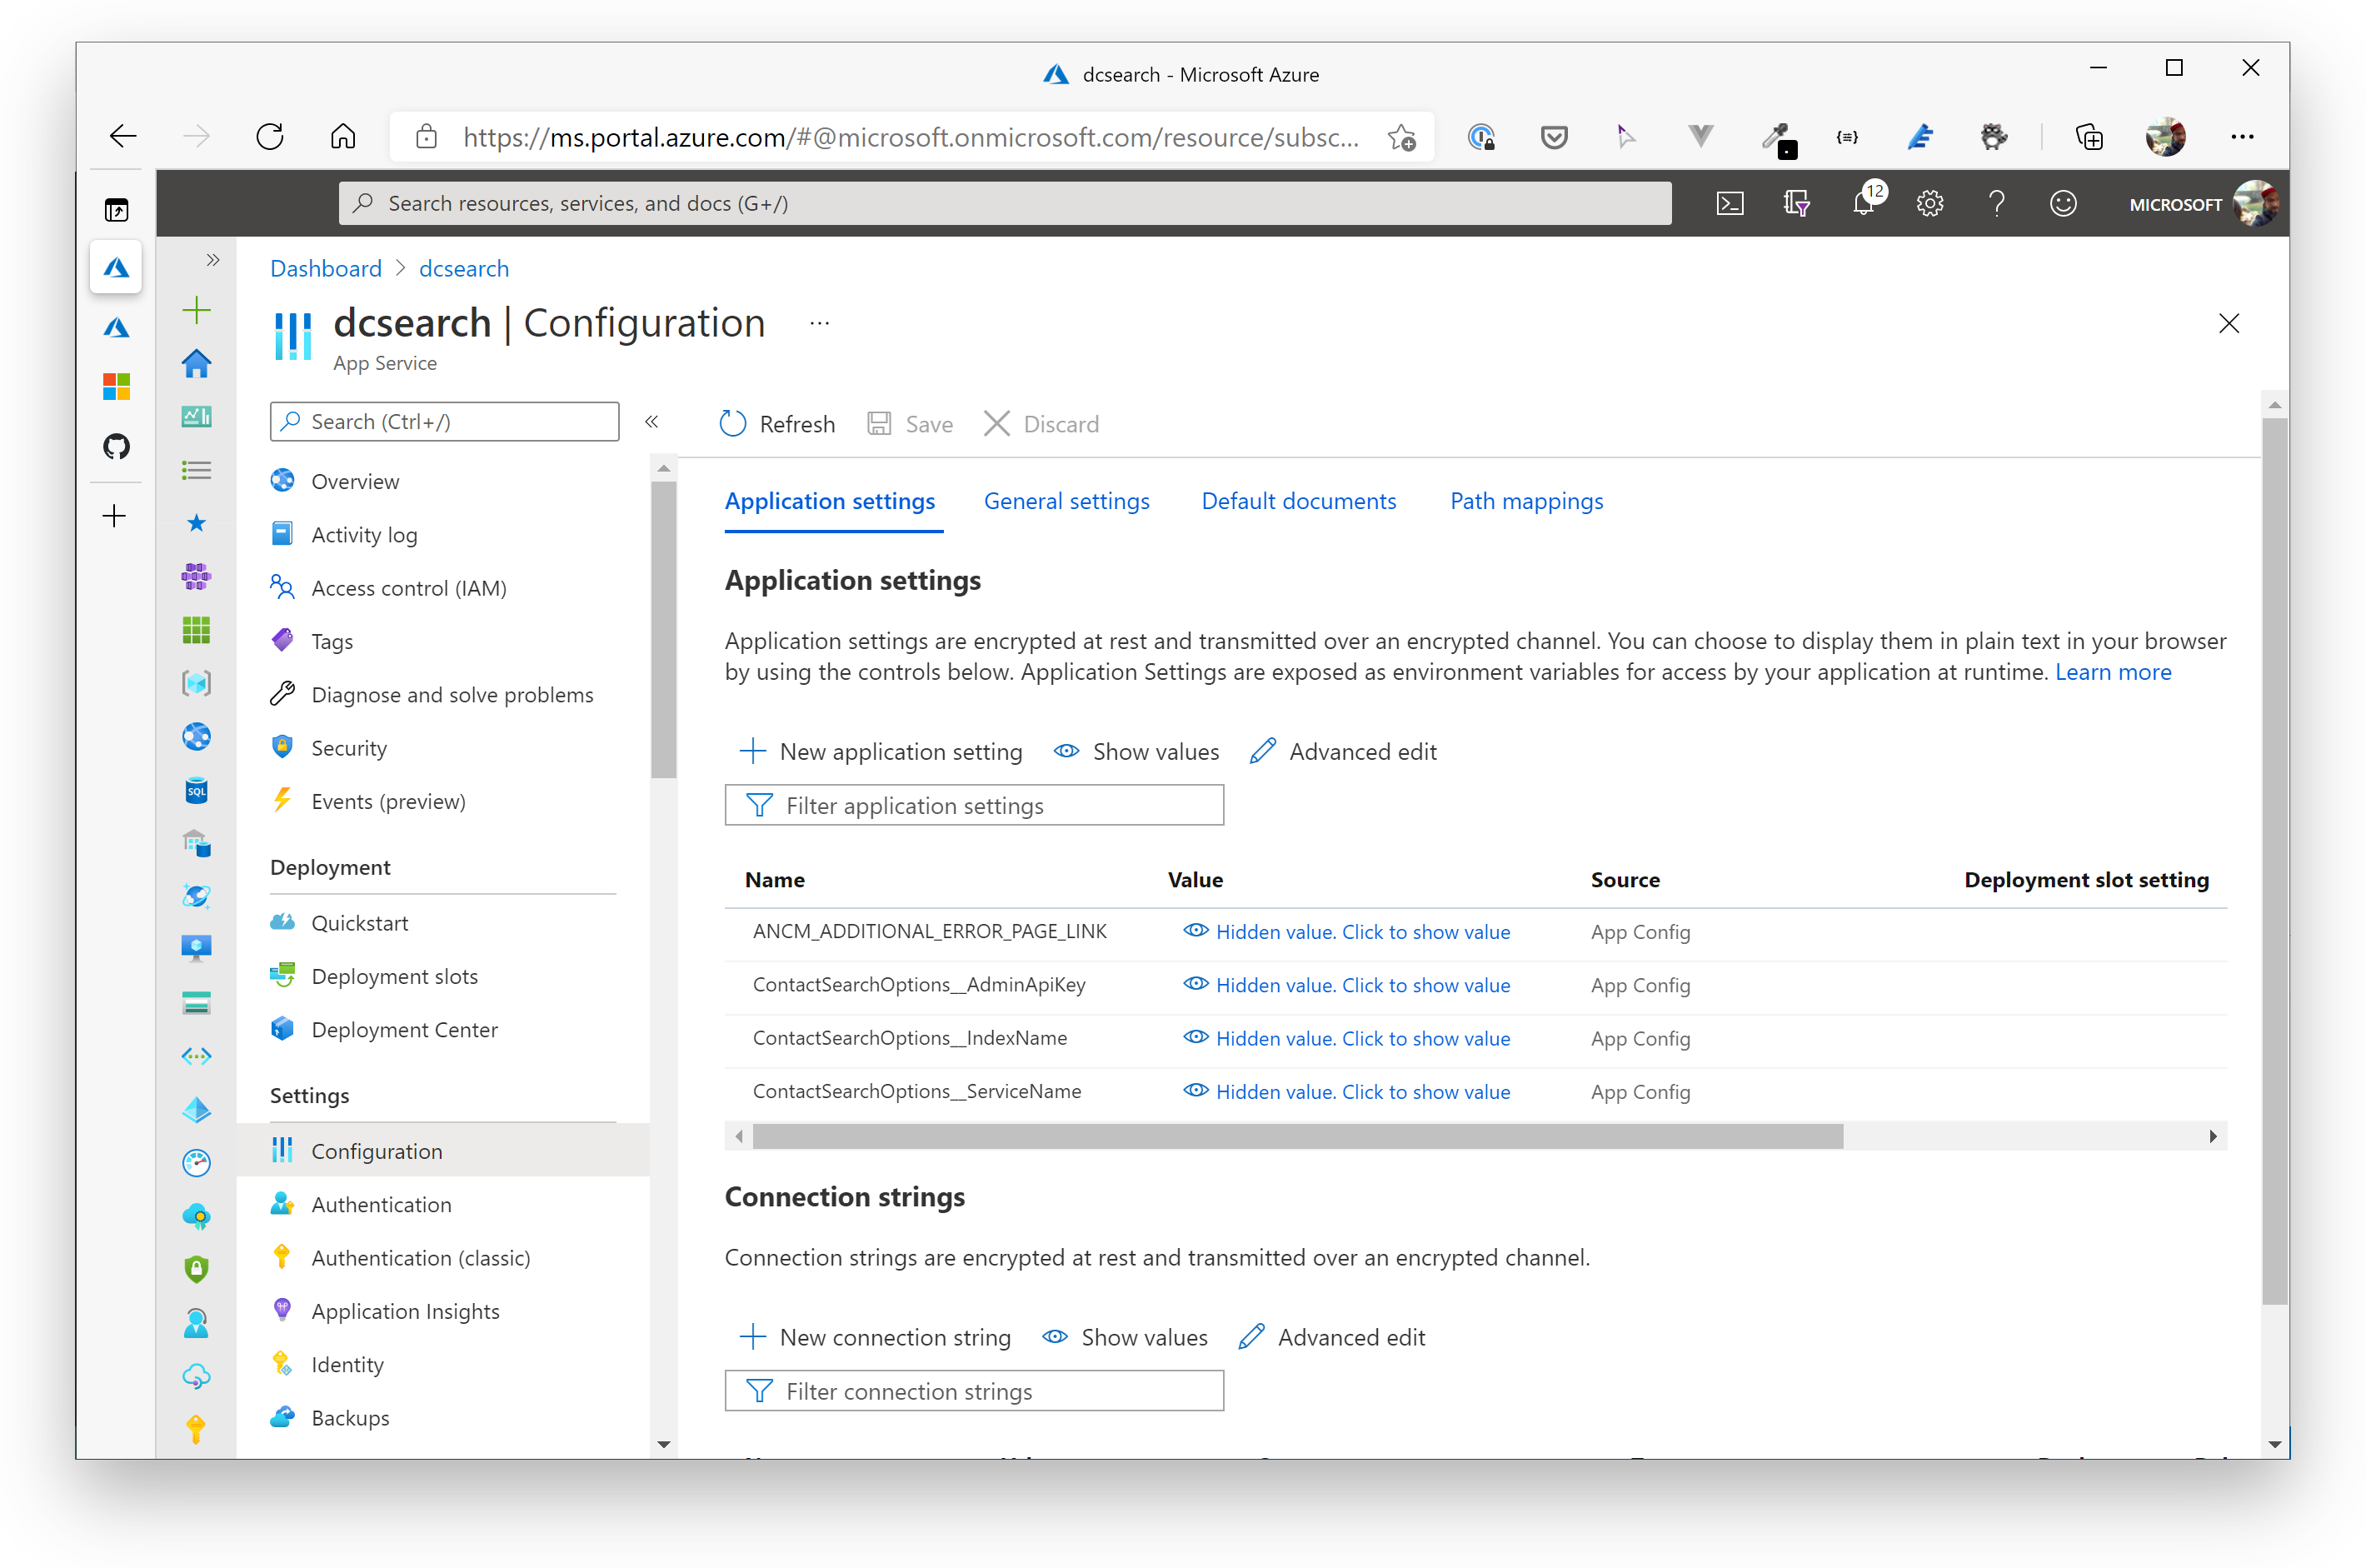
To be able to run the Contacts Search service (where we leverage the core functionality of Azure Search), we first need an Azure Web App to host it. So, please go to the Portal (or use the Azure CLI) and create an Azure Web App (with a new Azure AppService Plan on Windows, Runtime .NET 6) - use SKU / Size S1.
When finished, apply these settings to the Web App Configuration settings:
| Parameter | Value / Hint |
|---|---|
| ContactSearchOptions__AdminApiKey | use the Primary Admin Key from Azure Search (under Settings / Keys) |
| ContactSearchOptions__IndexName | scmcontacts |
| ContactSearchOptions__ServiceName | the name of your previously created Azure Search (just the subdomain! So from https://adcd3search-dev.search.windows.net (opens new window), only adcd3search-dev) |
Time to deploy the Contacts Search (folder Search API in VS Code) service to the newly created Azure AppService. Please deploy that service like you did with the Contacts API or Resources API (via right-click-deployment from within VS Code).
# Create and deploy the Contacts Search Indexer Function
Now we have deployed an Azure Search Service and an API that is able to query the search index. But how will contacts be pushed to the Azure Search index? Therefore, we will be using another Azure Function that listens to created and changed contacts via an Azure Service Bus Topic (sbt-contacts, you already created it - as well as the corresponding subscription contactsearch)!
Create the Azure function in the scm-breakout-rg resource group with the follwing parameters:
| Parameter | Value / Hint |
|---|---|
| Publish | Code |
| Runtime | .NET |
| Version | 6 |
| Region | West Europe |
| OS | Windows |
| Storage Account | Use the storage account you created in the breakout resource group |
| Plan Type | Consumption |
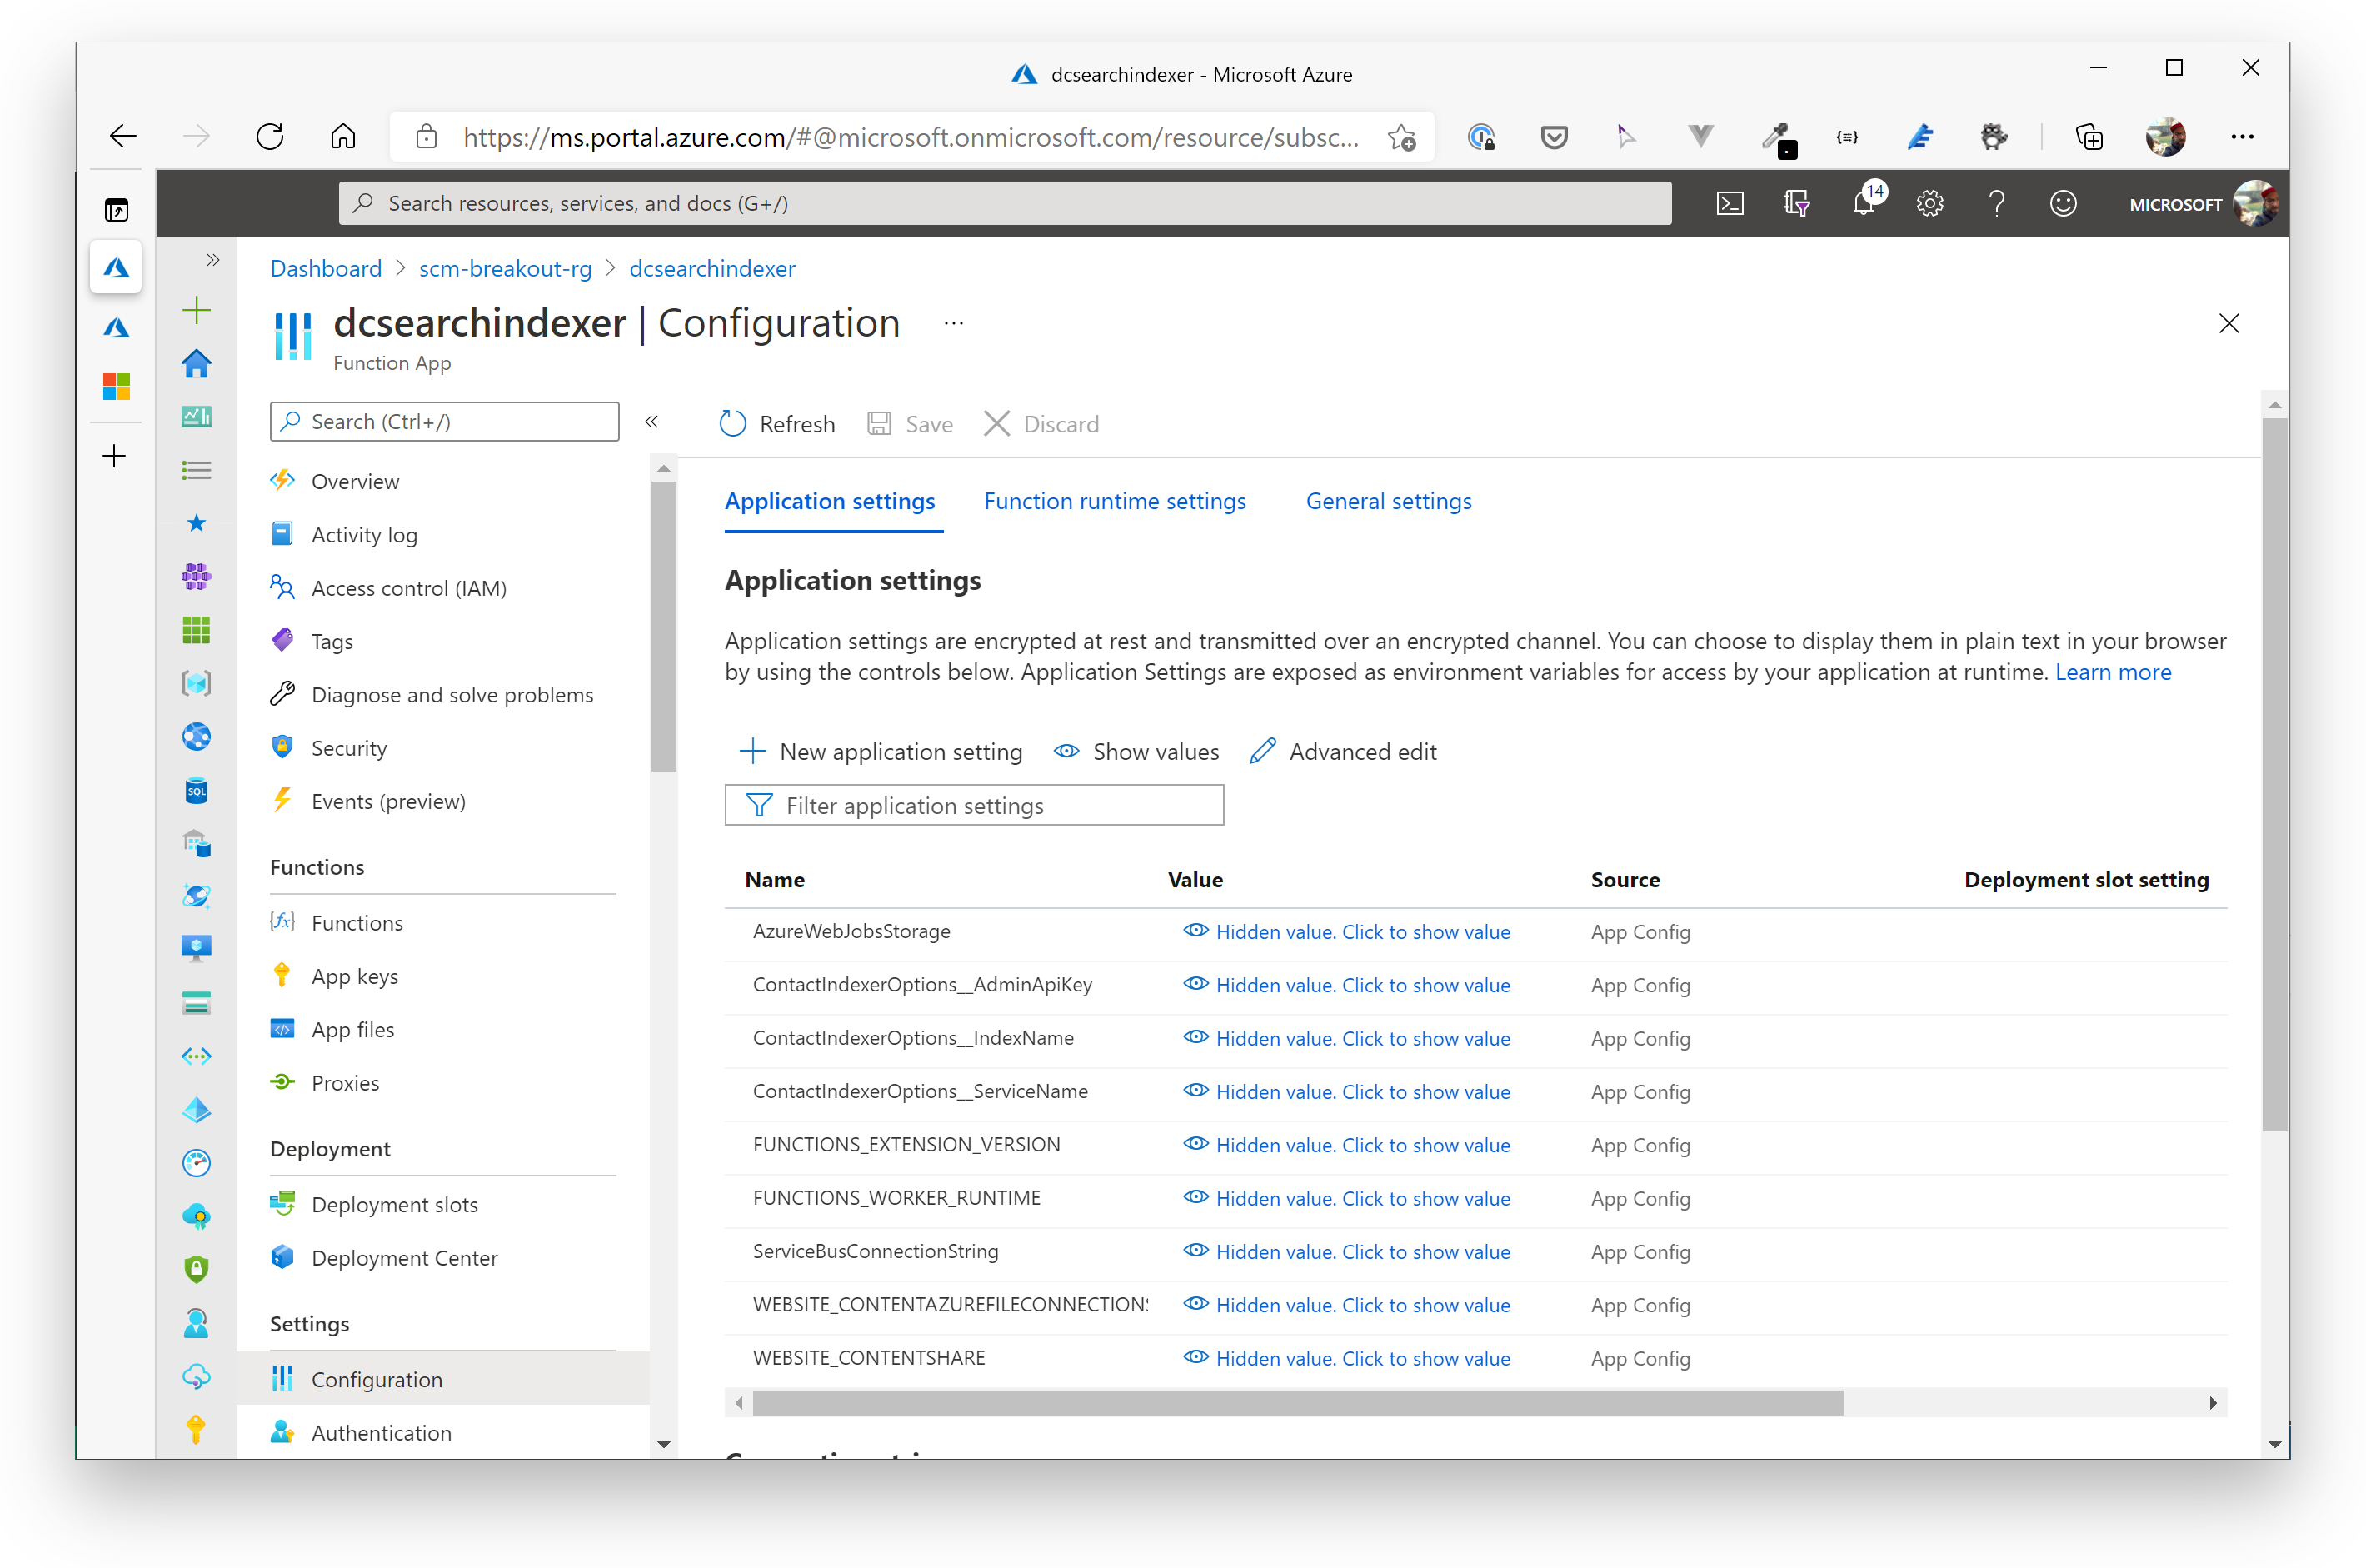
When finished, apply these settings to the App Configuration settings:
| Parameter | Value / Hint |
|---|---|
| ContactIndexerOptions__AdminApiKey | use the Primary Admin Key from Azure Search (under Settings / Keys) |
| ContactIndexerOptions__IndexName | scmcontacts |
| ContactIndexerOptions__ServiceName | the name of your previously created Azure Search (just the subdomain! So from https://adcd3search-dev.search.windows.net (opens new window), only adcd3search-dev) |
| ServiceBusConnectionString | use the Service Bus Connection String from the Shared Access Policy (Topics / sbt-contacts) for listening for messages - listen. Important: Please remove the EntityPath variable (incl. the value) at the end of the connection string! |
Last but not least, deploy the Contacts Search indexer function (folder Search Indexer Function) service from VS Code to the previously created Function App.
# ⏸️ Let's press "Pause" for a moment - What have we done so far?
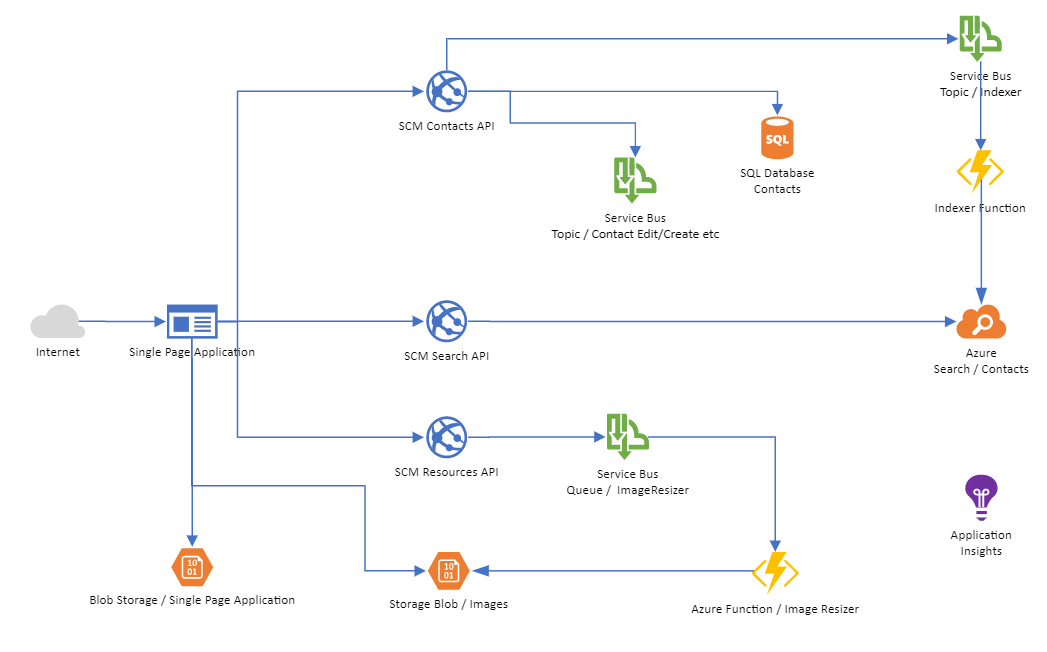
The was a lot of manual typing so far, so let's hold on for a moment. We have just migrated our initial services (Contacts and Resources, Image Resizer) to Azure Service Bus Queues and Topics. We redeployed new versions of these services to make use of Azure Service Bus. We also added Storage Services to our application. The Contacts Service now uses Azure SQL DB.
In addition, we added an Azure Search service (incl. indexer function) plus an API that is able to talk to Azure Search and query for contacts. The contacts will be added / updated in the search index "on-the-fly" whenever a contact is changed/created - notification is done via Service Bus Topics.
Regarding our architecture, we are at this stage:
Now, let's add the Visit Reports API.
# Deploy the Visit Reports Service
To deploy the Visit Reports API, we - as usual - need another Web App. As this service runs on NodeJS and we want to leverage Azure Web Apps on Linux this time, let's create one that is backed by a Linux OS.
Azure WebApp Properties
Create the Linux Web App with the following parameters.
| Parameter | Value / Hint |
|---|---|
| Resource Group | scm-breakout-rg |
| Publish | Code |
| Runtime Stack | Node 14 LTS |
| App Service Plan | Create a new one: OS - Linux, SKU - S1 |
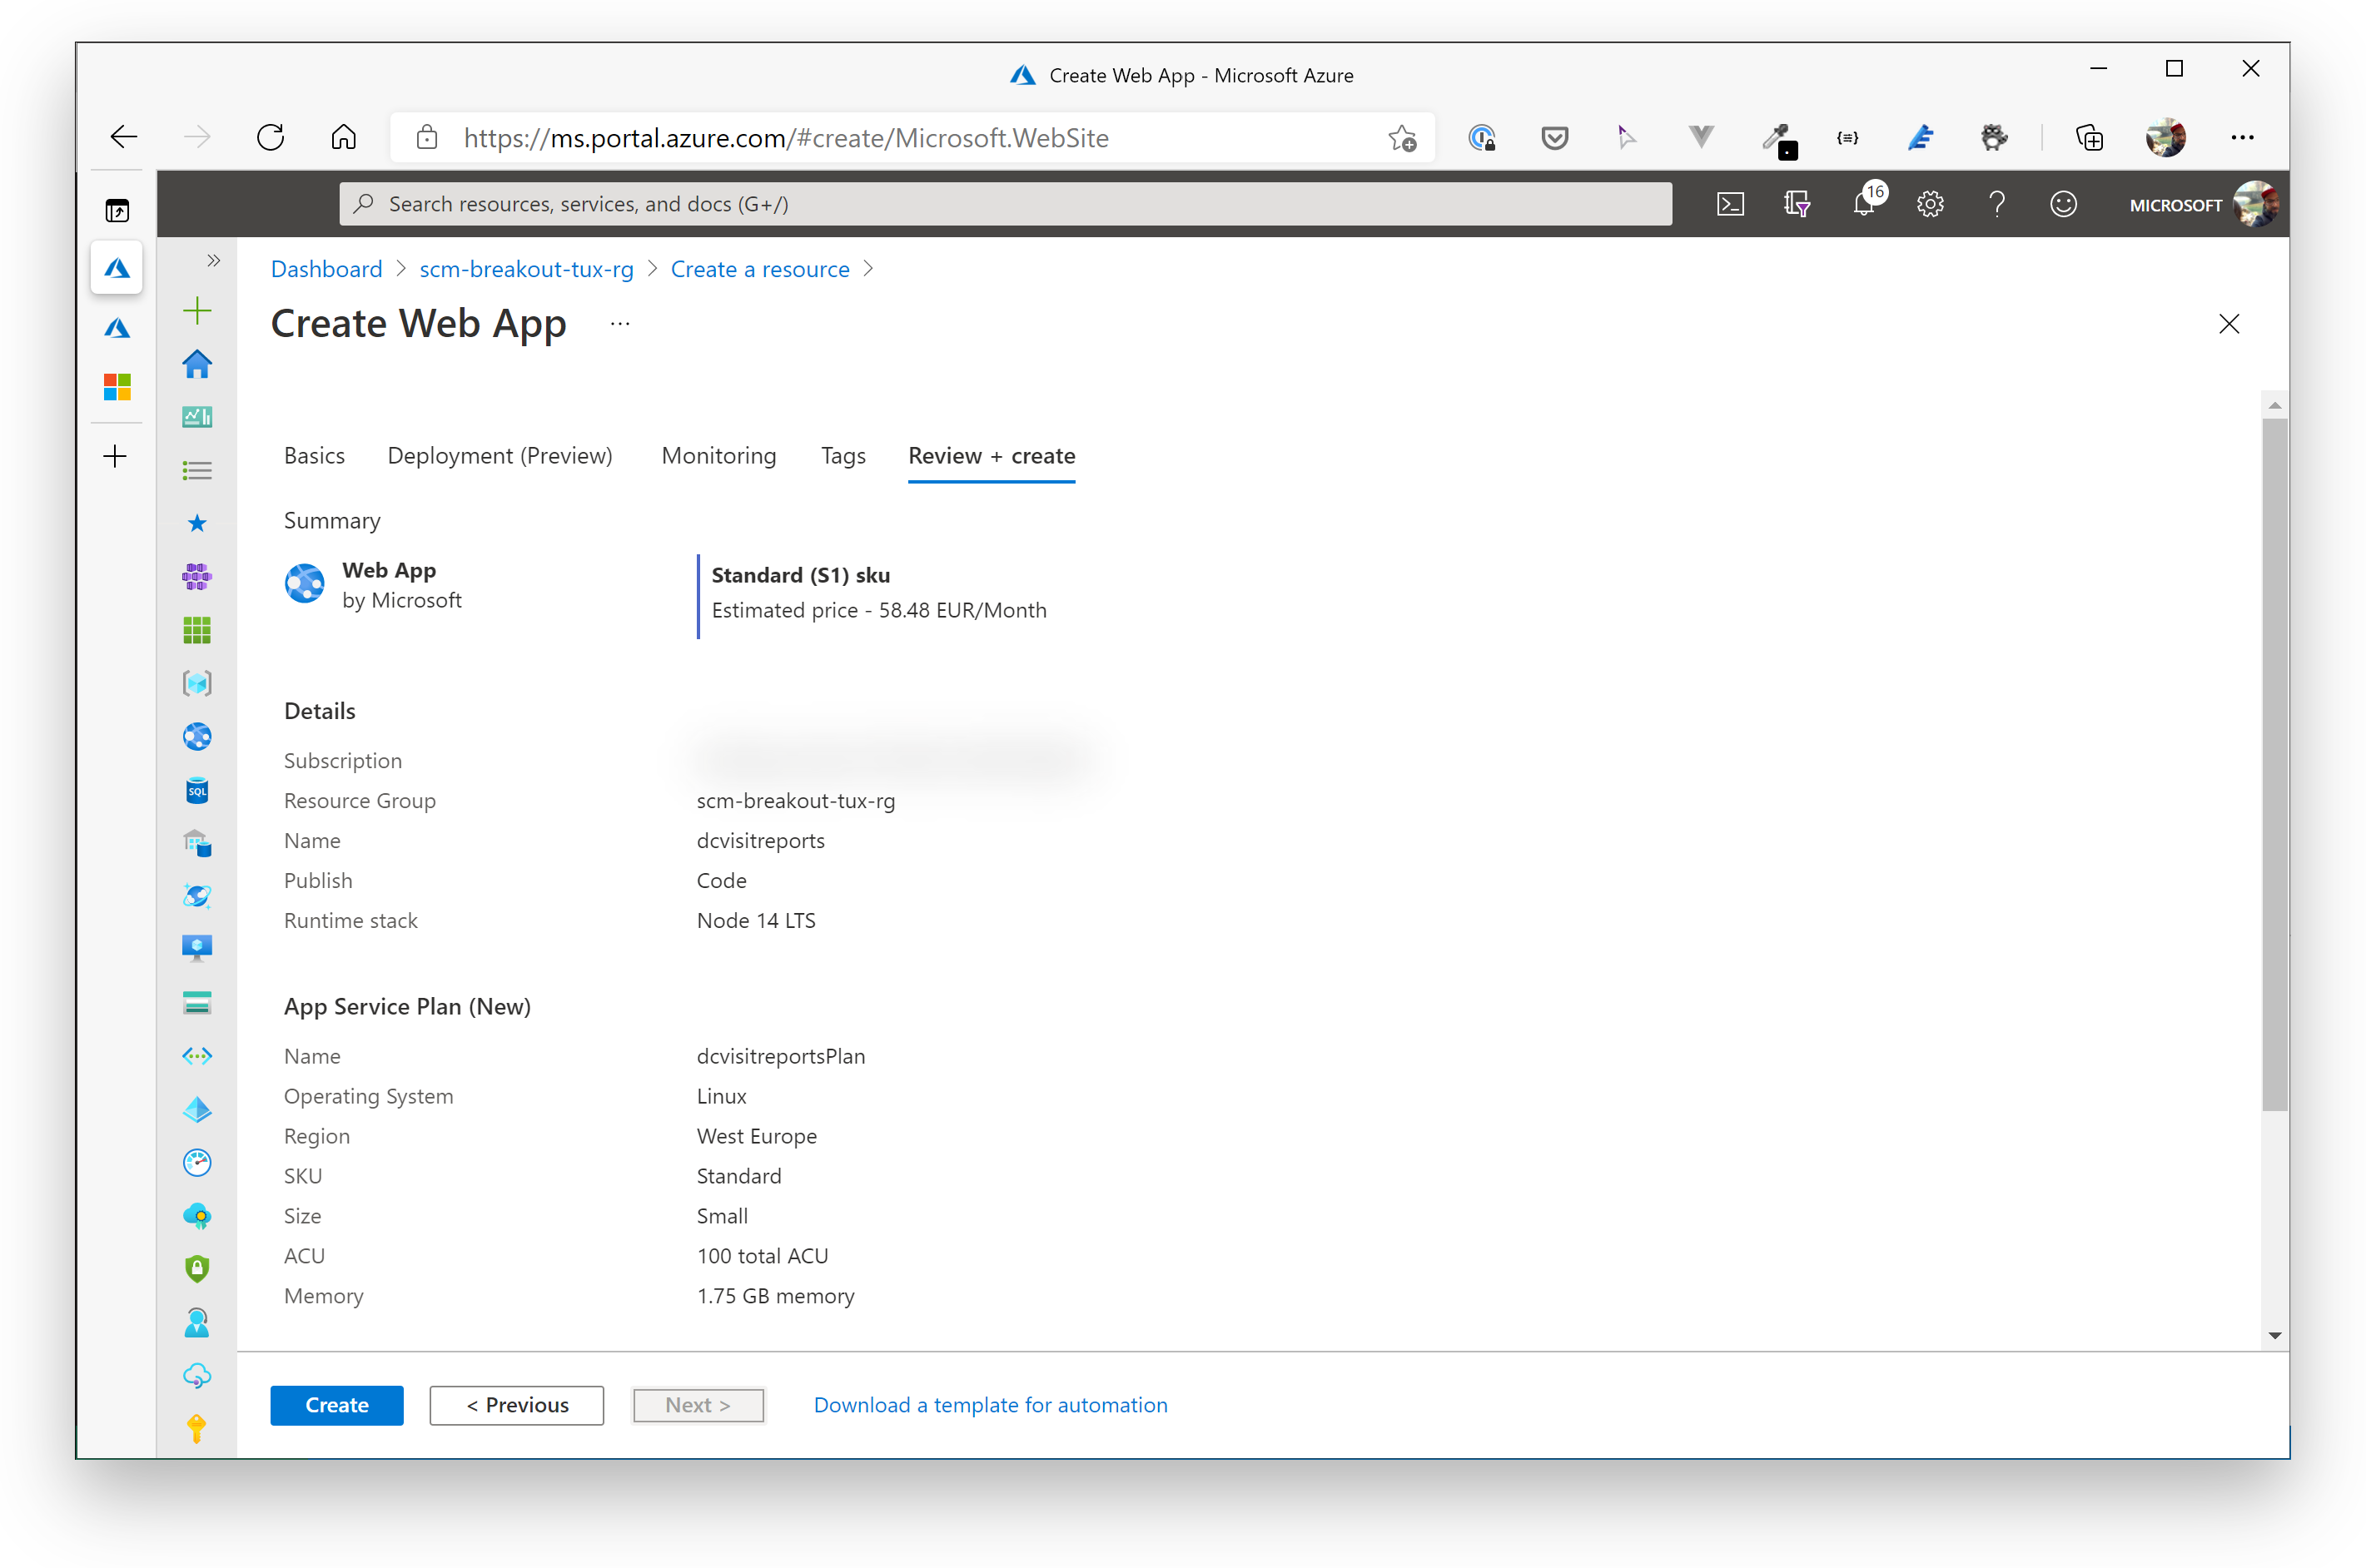
When the Web App has been created, go to the Configuration section and add the following settings (App settings + Connection strings!).
Azure Web App / Configuration / Application Settings
| Parameter | Value |
|---|---|
| APPINSIGHTS_KEY | <empty> |
| COSMOSDB | the endpoint to the Cosmos DB, e.g. https://adcd3cosmos-dev.documents.azure.com:443/ (opens new window) |
Azure Web App / Configuration / Connection Strings
| Parameter | Value | Type |
|---|---|---|
| COSMOSKEY | Primary Key of your Cosmos DB | Custom |
| SBCONTACTSTOPIC_CONNSTR | Primary Connection String of the Service Bus Contacts Topic (sbt-contacts / listen) | Custom |
| SBVRTOPIC_CONNSTR | Primary Connection String of the Service Bus Visit Reports Topic (sbt-visitreports / send) | Custom |
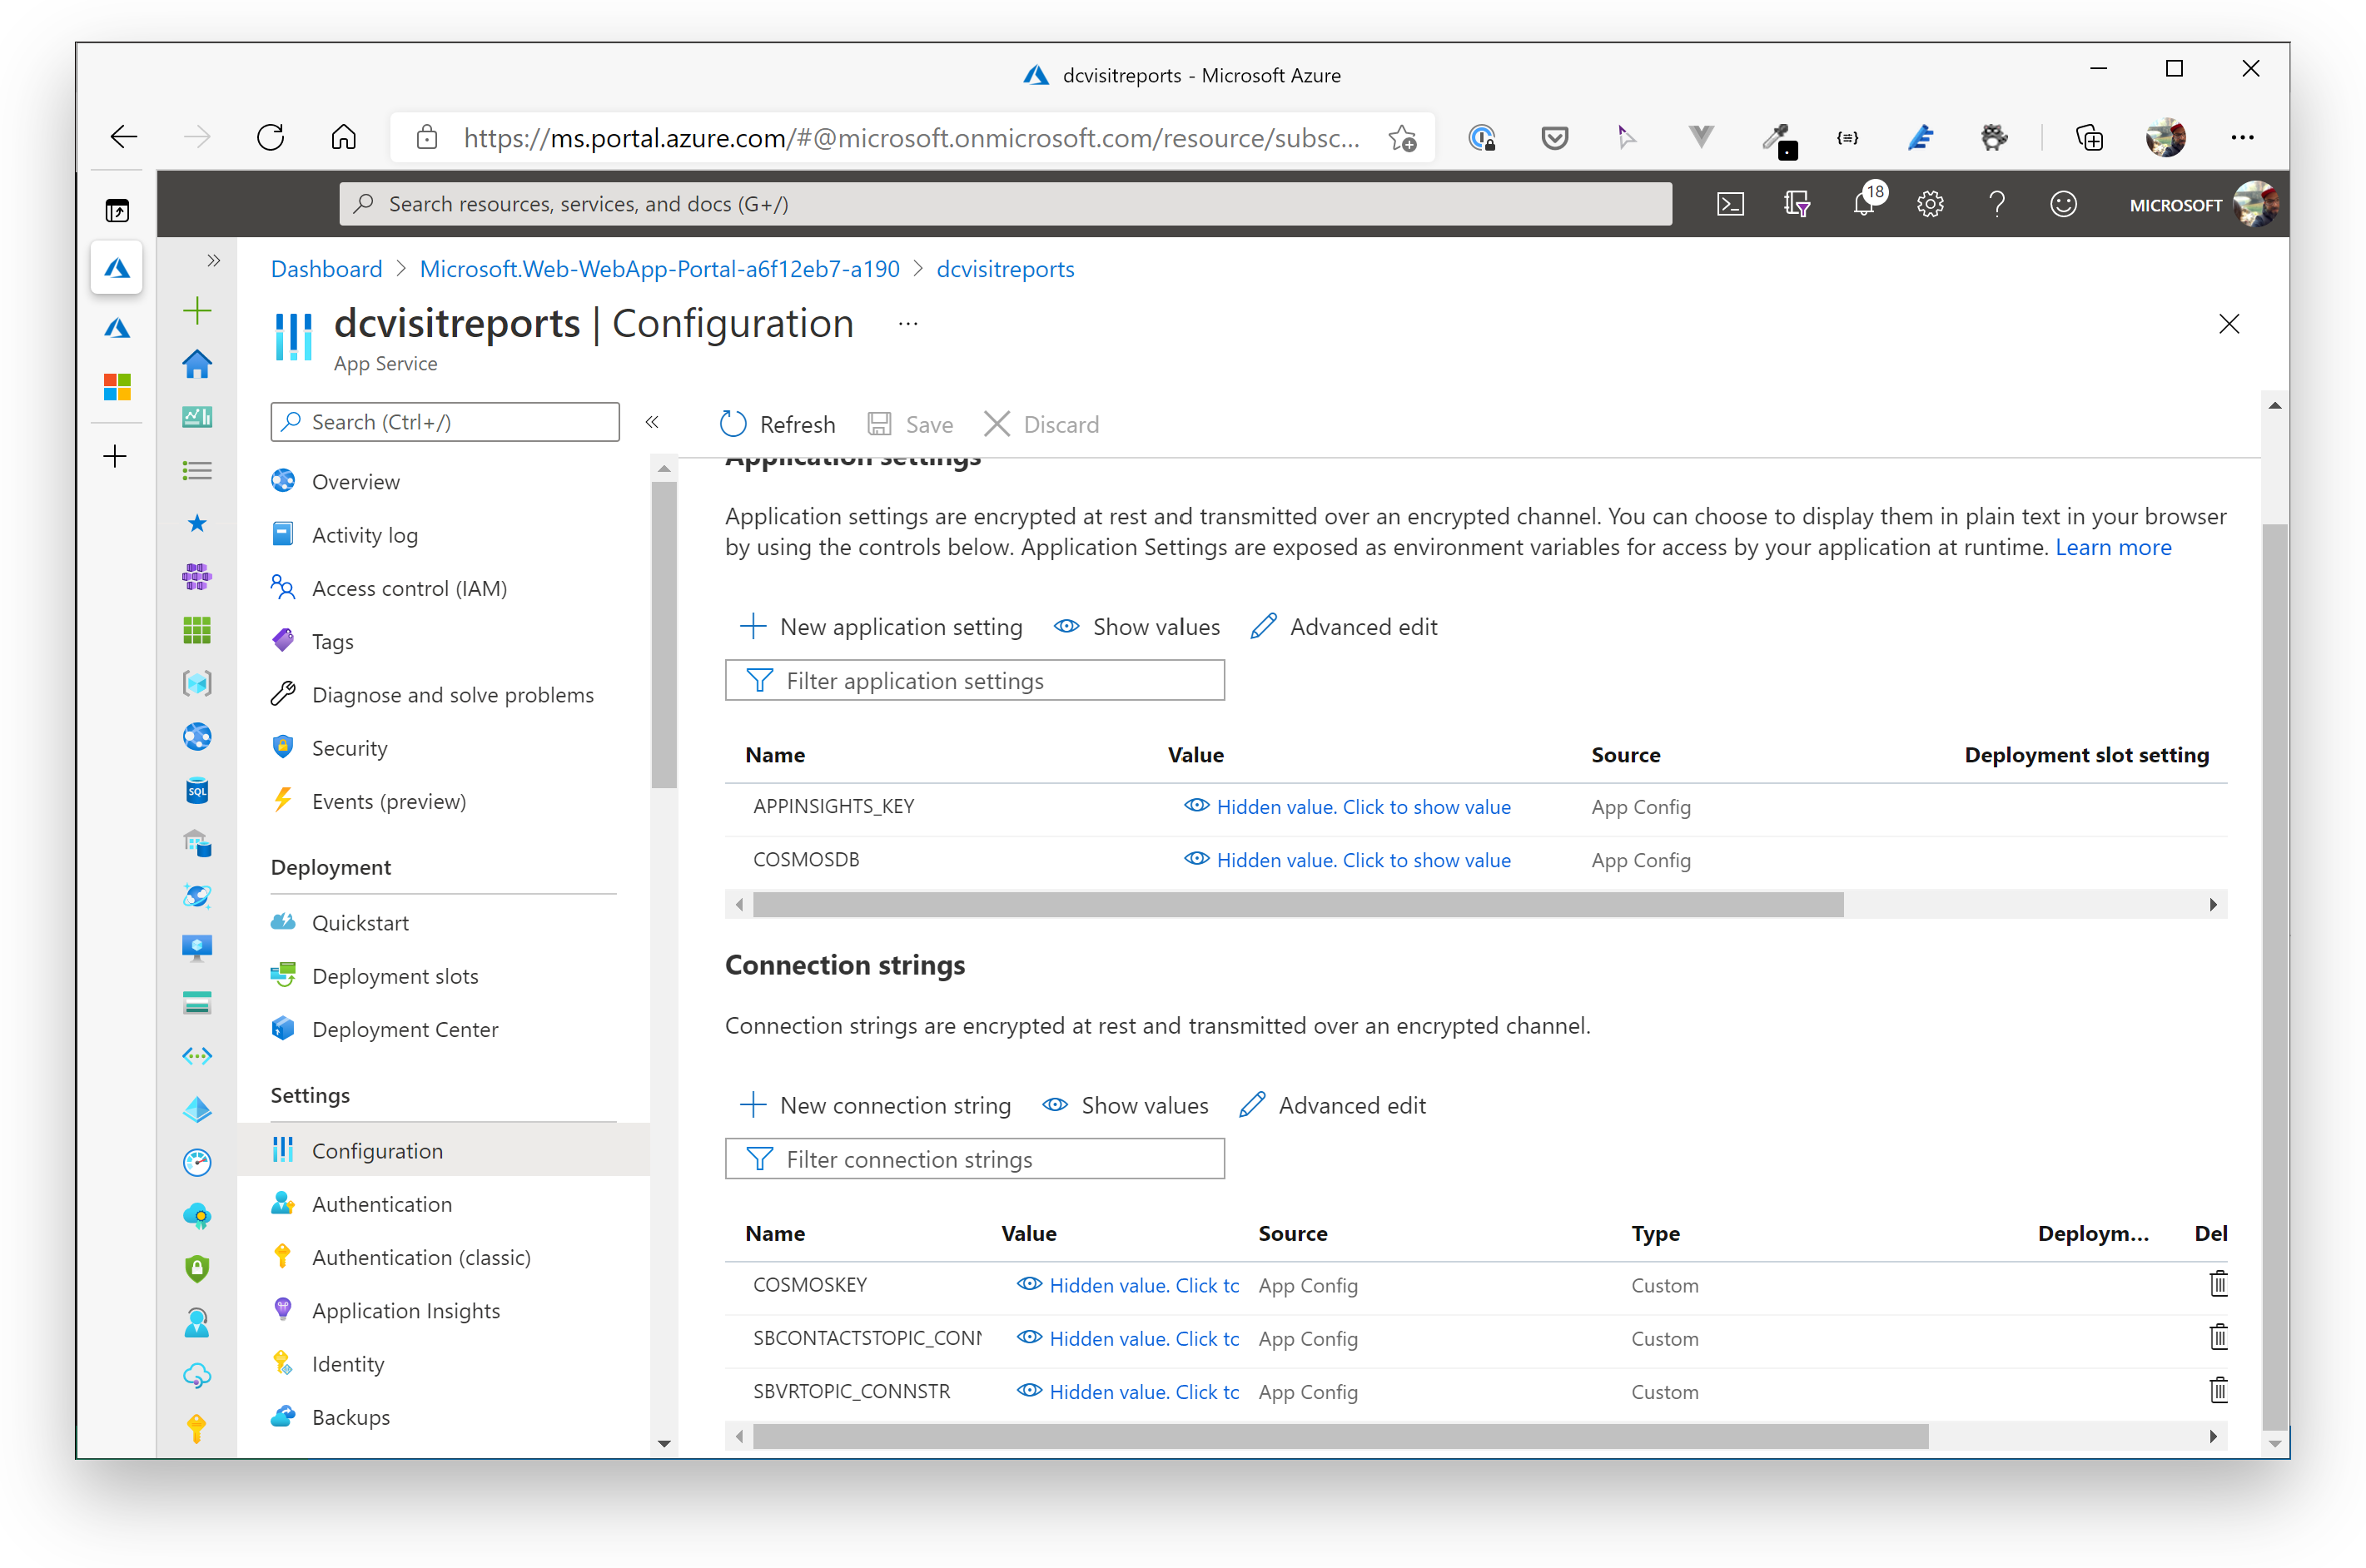
Now, from an infrastructure point of view, we are ready to deploy the NodeJS app. Right-click on the folder Visit Reports API, select the correct Azure AppService and confirm the deployment to it.
TIP
📝 While deploying to the AppService, Azure will run npm install for you, so you don't need to do this upfront. This will keep the amount of data sent to Azure quite small and reduces the deployment duration significantly! The technology working behind the scenes is called Oryx. If you want to know more about it and how to configure builds during deployment, this is the way to the GitHub repository: https://github.com/microsoft/Oryx (opens new window)
Oryx configuration: https://github.com/microsoft/Oryx/blob/master/doc/configuration.md#oryx-configuration (opens new window)
In the output window, watch how the NodeJS app is copied to the Web App and is being started by Azure.
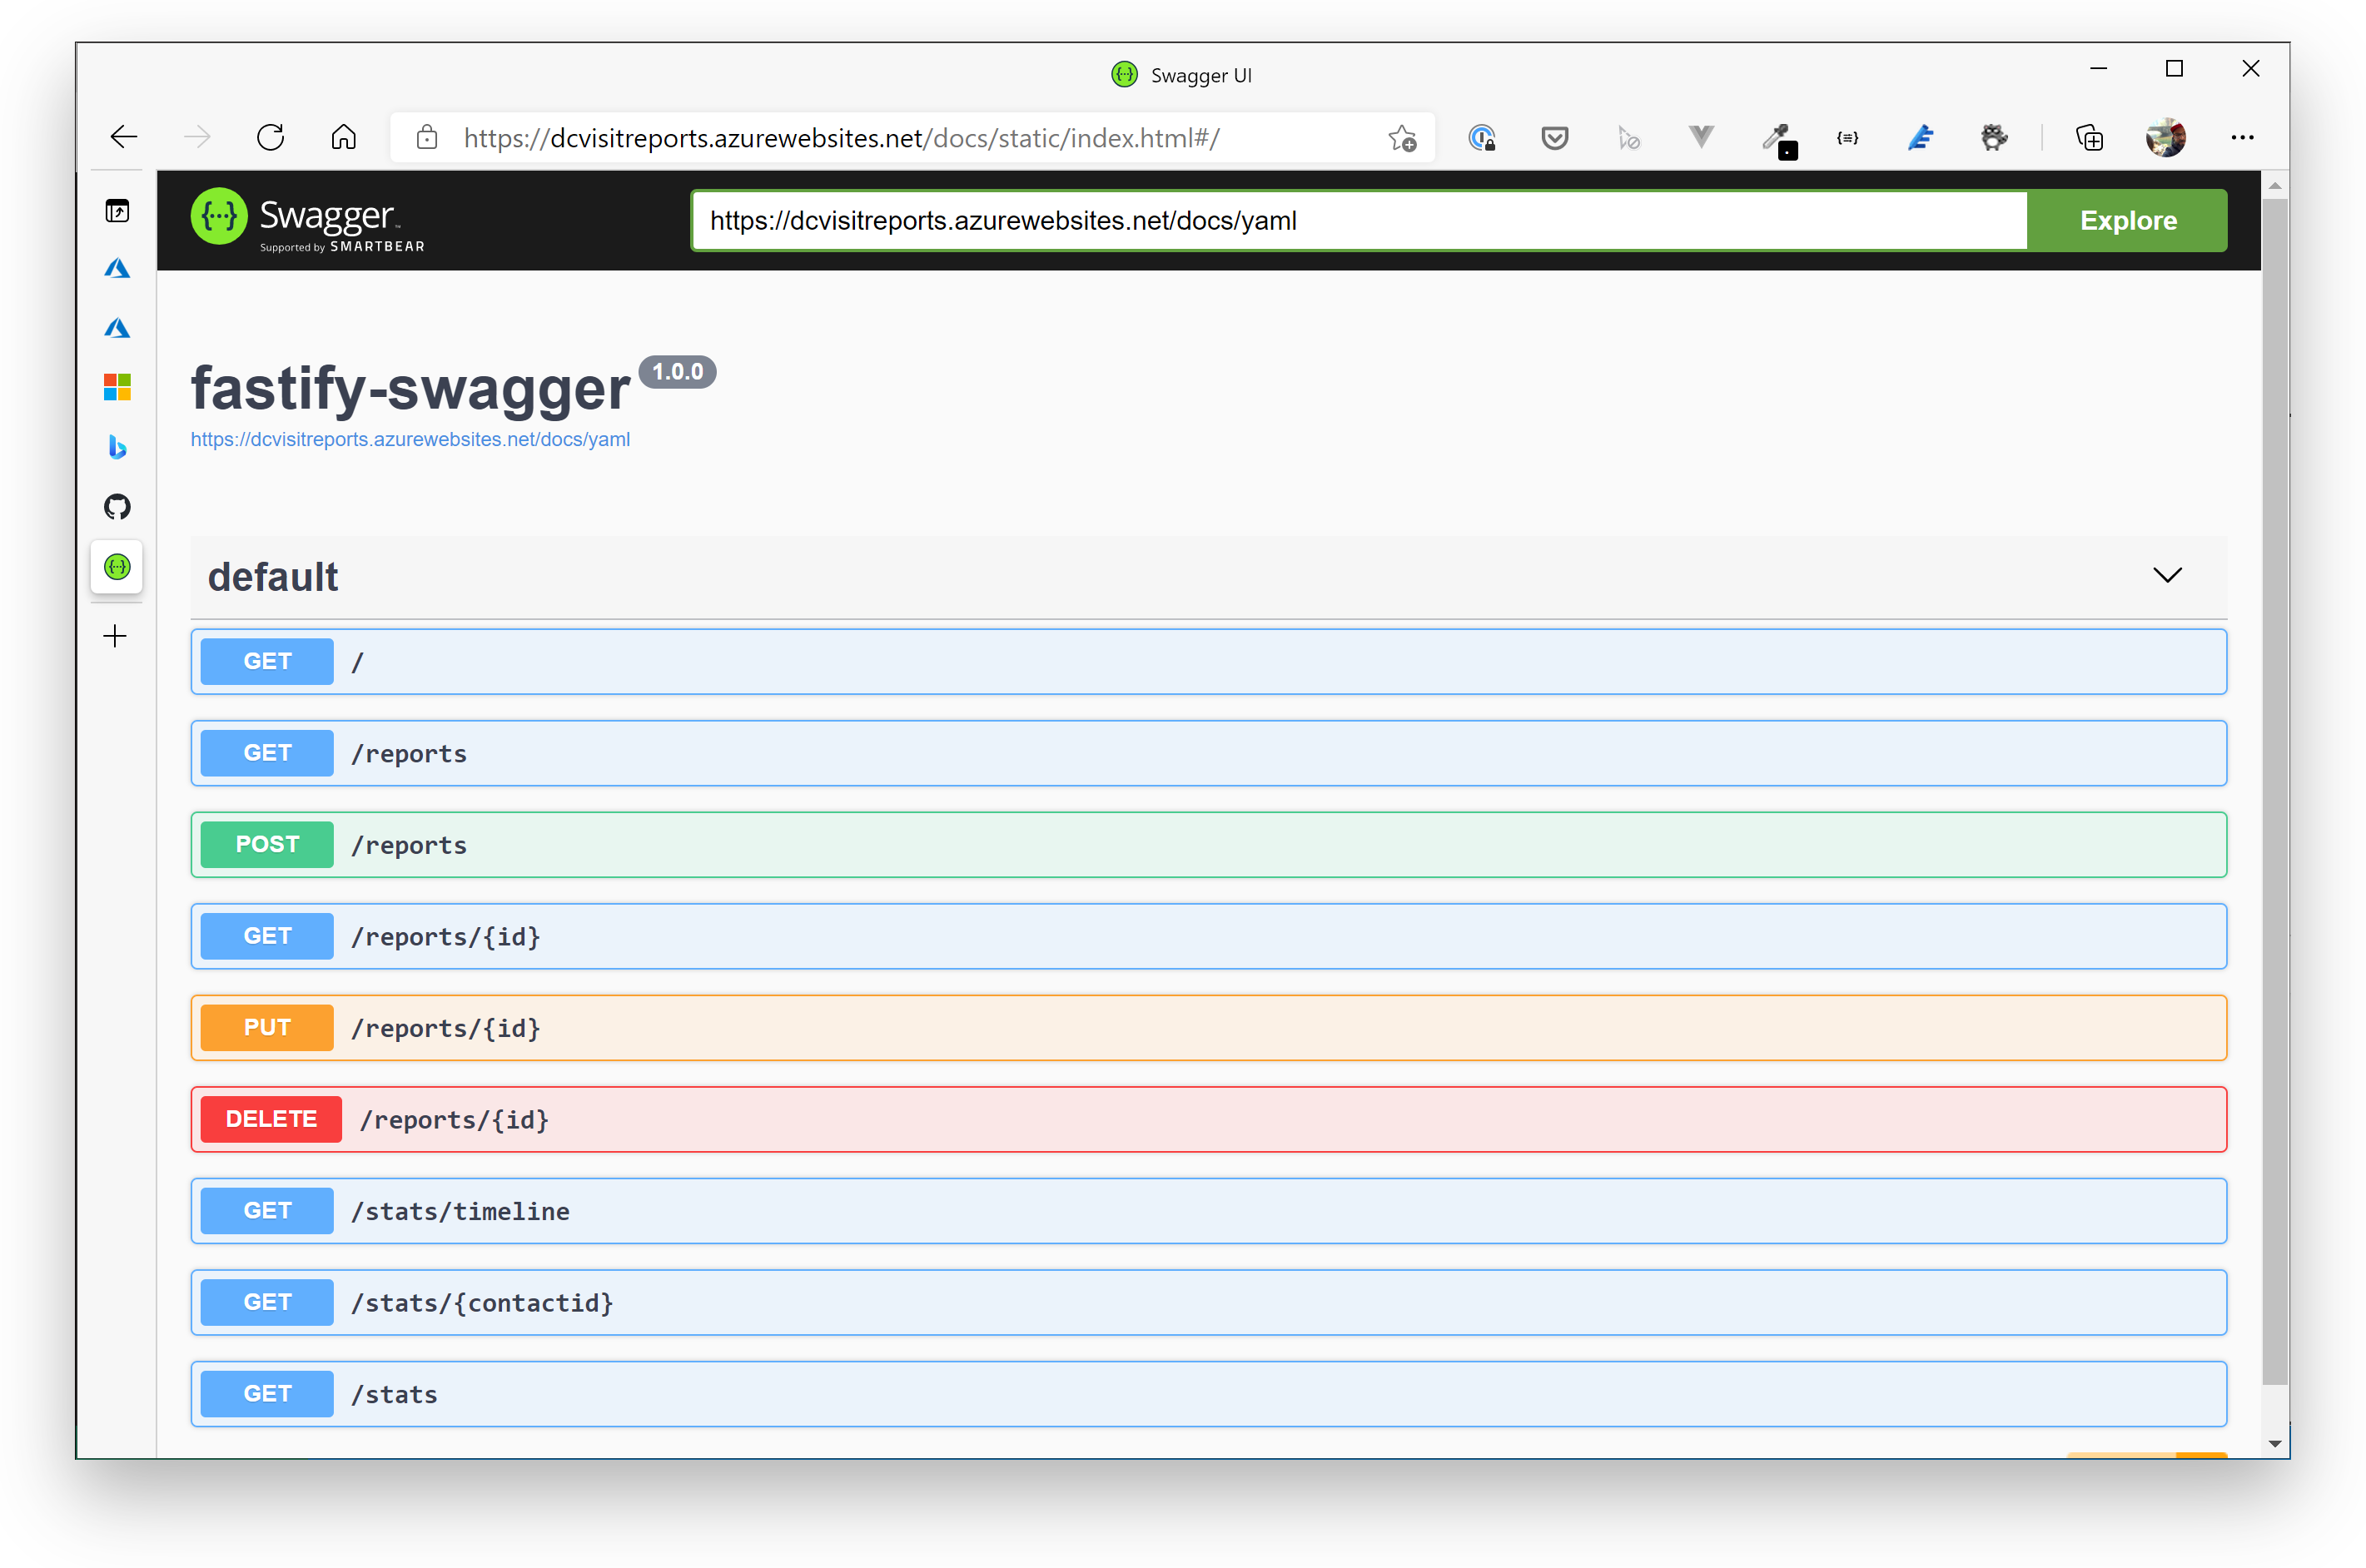
You can check, if it's running correctly by opening a browser window and point it to the following URL:
https://YOUR_WEB_APP_NAME.azurewebsites.net/docs (opens new window)
WARNING
⚠️ You will see the Swagger UI of the visit reports service - in the Explore textbox, replace json with yaml to view all operations.
# Deploy the Frontend
Now that we have introduced a few new services, we also need to redeploy the VueJS frontend. Of course, we also added a few changes in the UI itself (please see the intro section). So we definetly want that new version running now in Azure.
Open the settings.js file in folder Frontend --> public/settings and adjust the settings to fit the URLs of your Web Apps. You will need:
| Parameter | Value |
|---|---|
| endpoint | URL of the contacts API endpoint, e.g. https://adcday3scmapi-dev.azurewebsites.net/ (opens new window) |
| resourcesEndpoint | URL of the resources API endpoint, e.g. https://adcday3scmresourcesapi-dev.azurewebsites.net/ (opens new window) |
| searchEndpoint | URL of the search API endpoint, e.g. https://adcday3scmrsearchapi-dev.azurewebsites.net/ (opens new window) |
| reportsEndpoint | URL of the visit reports API endpoint, e.g. https://adcday3scmvr-dev.azurewebsites.net (opens new window) |
| enableStats | false (we will be adding statistics when we introduced Cognitive Services in the next challenge) |
| aiKey | "" (just leave it empty) |
Sample:
var uisettings = {
    "endpoint": "https://adcday3scmapi-dev.azurewebsites.net/",
    "resourcesEndpoint": "https://adcday3scmresourcesapi-dev.azurewebsites.net/",
    "searchEndpoint": "https://adcday3scmrsearchapi-dev.azurewebsites.net/",
    "reportsEndpoint": "https://adcday3scmvr-dev.azurewebsites.net",
    "enableStats": false,
    "aiKey": ""
}
After you have adjusted the settings, open an integrated terminal in VS Code for folder Frontend and run...
npm install && npm run build
The VueJS app is built into folder dist of the Frontend directory. When the build has finished, right-click on that dist folder and choose "Deploy to Static Website via Azure Storage" and select the correct storage account.
When everything is set up correctly and the services work as expected, you should be able to open the SPA and test the Contacts and Visit Reports services, as well as the Search service.
Add and edit a few new contacts (search for them via the top navigation bar) and create some visit reports for them.


# Wrap-Up
So, we know, this was a lot of manual work to do, to add a simple microservice-oriented application to Azure. There are a lot of moving parts in that kind of applications and you will want to avoid deploying such applications manually. That's why we will be introducing Azure DevOps on Day 4, so that you can build and deploy the infrastructure as well as the services automatically. Anyway, we wanted to show you how it's done "the hard way" to bring you relief the day after.
We now have one more challenge to complete (Cognitive Services), until the application is finished from a services perspective.
In this Breakout Challenge, you made use of: