# Challenge 7 (optional): VM and Custom Script Extensions - Post deployment automation or configure / setup / install something within an empty VM
# Here is what you will learn 🎯
- How to automate the further configuration / setup of an 'empty' VM after it has been deployed.
- Use a Custom Script Extension for a Windows VM.
- Upload automation code into a storage account for anonymous download (so that the CSE agent can download)
- Modify an ARM Template to enable 'zero touch VM deployments'
# Table Of Contents
- Do you need a VM?
- Attach a simple HelloWorld Custom Script Extension (CSE) to a VM using the Portal
- See what has happened inside the VM
- Attaching a CSE to a VM in an ARM Template (optional)
- Cleanup
# Do you need a VM?
For this lab you need an Azure virtual machine that runs Windows Server and some storage accessible to hold your automation code.
Just click  to spin up a new VM for this lab.
| Name | Value |
|---|---|
| Resource group | e.g. rg-www-test-001 |
| Location | e.g. North Europe |
| Admin user | demoadmin |
| Admin password | %complex enough% |
| Vm Size | e.g. Standard_F2s_v2 |
| Disk Sku | StandardSSD_LRS |
# Attach a simple HelloWorld Custom Script Extension (CSE) to a VM using the Portal
Take the following code and copy & paste it into a file named e.g.
HelloWorld.ps1:############################################## # HelloWorld Custom Script Extension (CSE) ############################################## $folderPath = Join-Path 'C:' 'temp' $filePath = Join-Path $folderPath 'CSEwasRunAt.txt' #create directory if it doesn't exist if (-not (Test-Path -Path $folderPath)) { New-Item -Path $folderPath -ItemType 'Directory' } #write current time to file. Get-Date | Out-File $filePath -Append #This is really simple but imagine what else you can do to customize a vm ...Upload this file to a storage account
[Azure Portal]
-> Resource Group
-> rg-www-test...
-> sawww... (_your storage account_)
-> containers
-> 'csescripts'
-> Upload
->File "HelloWorld.ps1"
-> Upload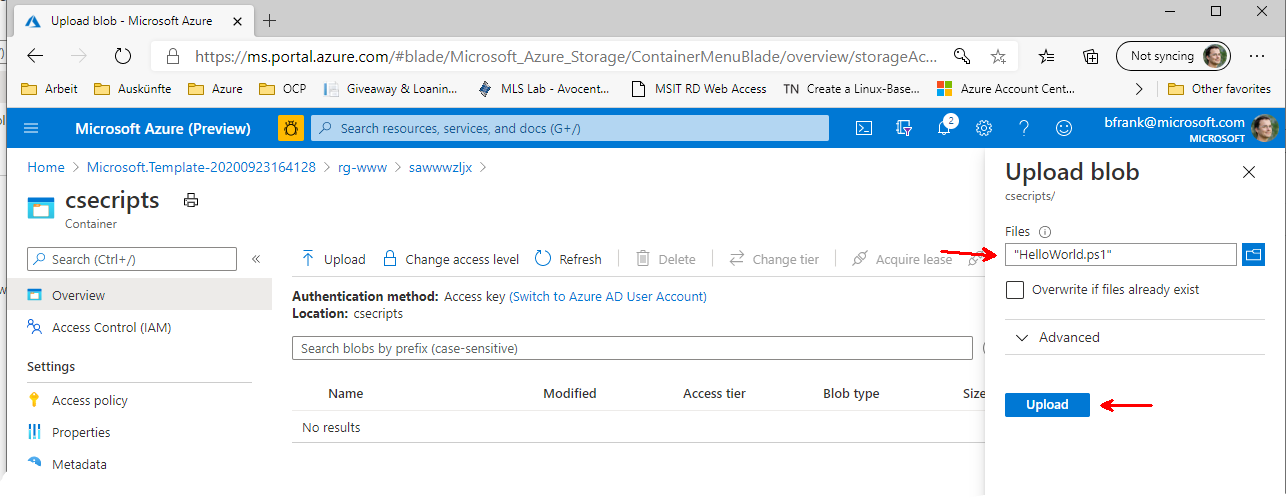
Make this file being executed by the Custom Script Extension within the the VM:
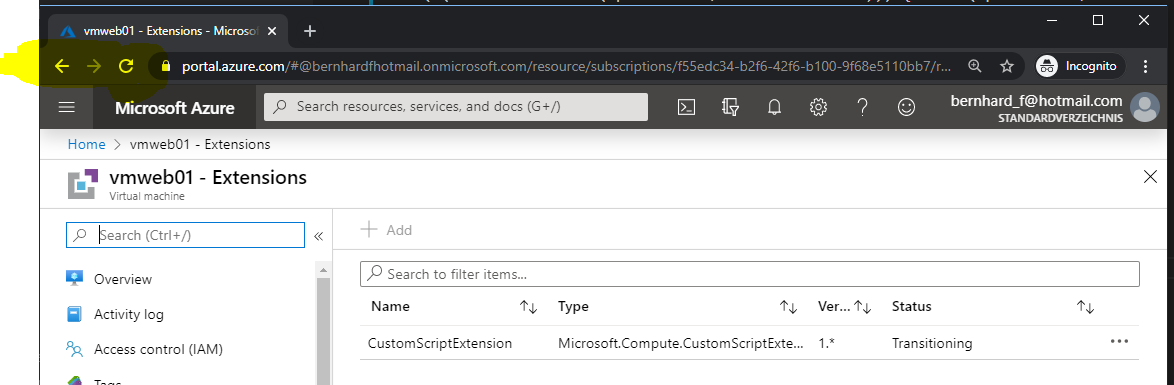
[Azure Portal]
-> Home
-> Search 'virtual machines'
-> 'vmblue'
-> Extensions
-> Add
-> 'Custom Script Extension'
-> Create
Parameter Action Script file (Required) Browse to your 'HelloWorld.ps1' -> it is in your storage account 'sawww...' -> csescripts Arguments (Optional) none Wait some seconds then do a refresh of your browser - it'll show the progress:
Final result should show a success:

# See what has happened inside the VM
Now we RDP into the VM and see what has happened and where to find logs in case something breaks.
[Azure Portal]
-> Resource Groups
-> 'rg-www...'
-> 'vmblue'
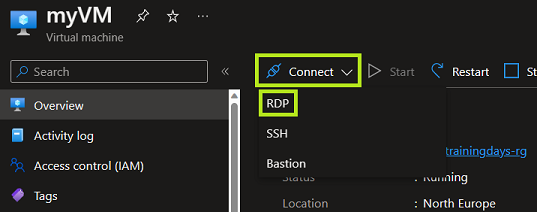
-> Connect
-> Download RDP file
-> Open the downloaded RDP file on your device
-> If Windows tries to connect you via Windows Hello, select 'More choices' and 'Use a different account' as we have to use the credentials you set the VM up with
-> Provide the username & password you created the VM with and select 'OK'
-> You can disregard the warning that the remote computer's identity cannot be verified
| Parameter | Value |
|---|---|
| User | demouser |
| Password | %Your Password% |
Within the VM:
Navigate to
C:\temp. The result should look similar to this: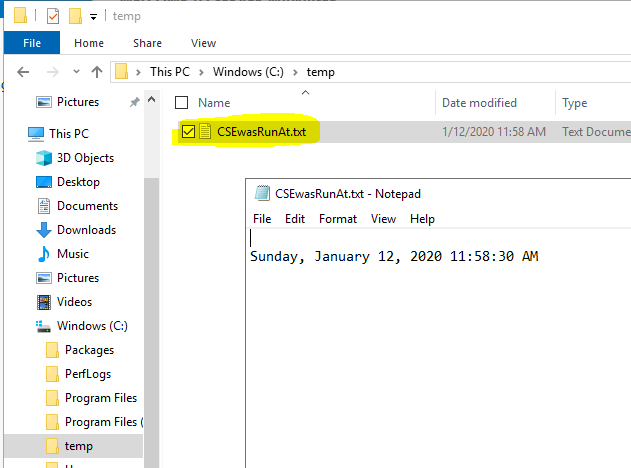
Navigate to
C:\Packages\Plugins\Microsoft.Compute.CustomScriptExtension\ _%version%_\Downloads. The CSE is software that runs within the VM. The script that will be executed is downloaded first to this location. If you don't see your script file CSE might have trouble to download the resource.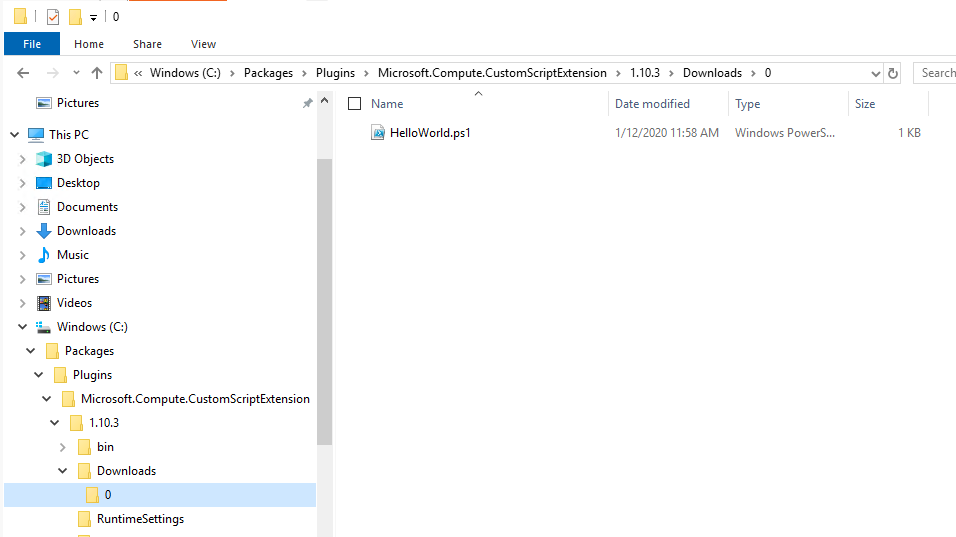
Navigate to
C:\WindowsAzure\Logs\Plugins\Microsoft.Compute.CustomScriptExtension\ _%version%_This is the place where the CSE logs its actions locally - a good place to start troubleshooting.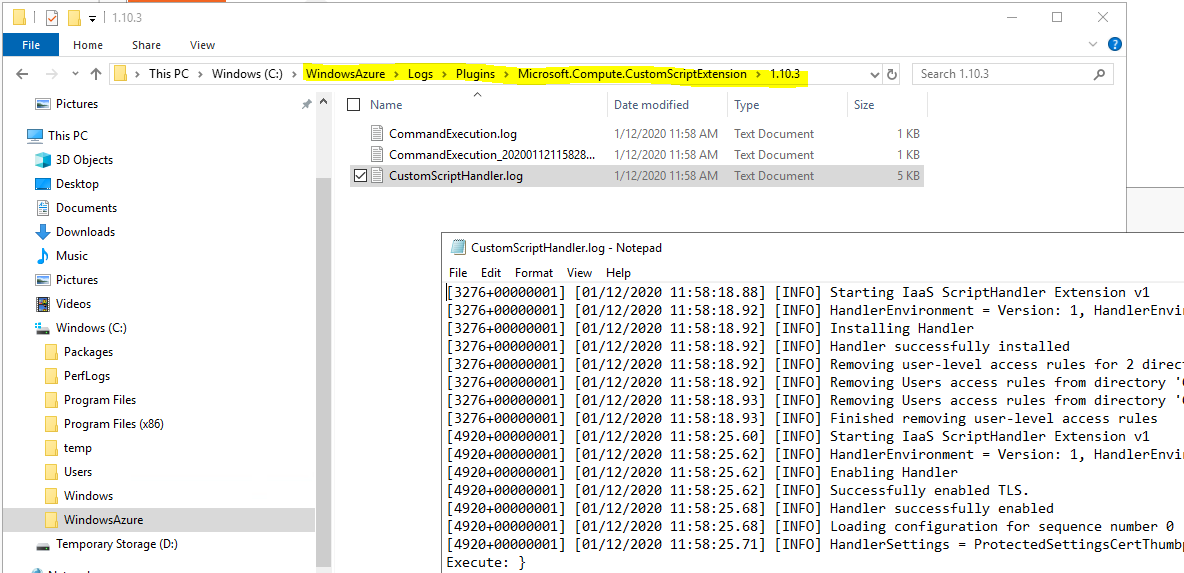
Remove the CSE from the VM
[Azure Portal]
-> Home
-> Search 'virtual machines'
-> 'vmblue'
-> 'Custom Script Extension'
-> 'Uninstall'
TIP
📝You can only have one Custom Script Extension attached to a VM at a time. If you want to process multiple CSE scripts you have multiple options.
The easiest would be to install & uninstall one CSE at a time:
Install CSE ('Script1') -> deinstall CSE -> Install CSE ('Script2') -> deinstall ->...A better, but more demanding solution would be to deploy the extension using an ARM/Bicep template. The template enables you to specify multiple files to download from a storage account, of which one could be an orchestration file. The following section provides you with an introduction to this approach.
# Attaching a CSE to a VM in an ARM Template (optional)
The goal of this action is to learn how to avoid the portal, i.e. so that the CSE can be attached to a VM during deployment time e.g. using an ARM template. With the whole setup Azure + VM Settings can be done in a '0 touch way'.
In the next CSE we want to install Internet Information Services (IIS) in the VM. Take a look at the code file first ("CSE_Install-IIS.ps1 (opens new window)"). The relevant parts starts at #region install IIS features.
When automating CSE e.g. through ARM deployment - the CSE needs a valid download location for the code file (
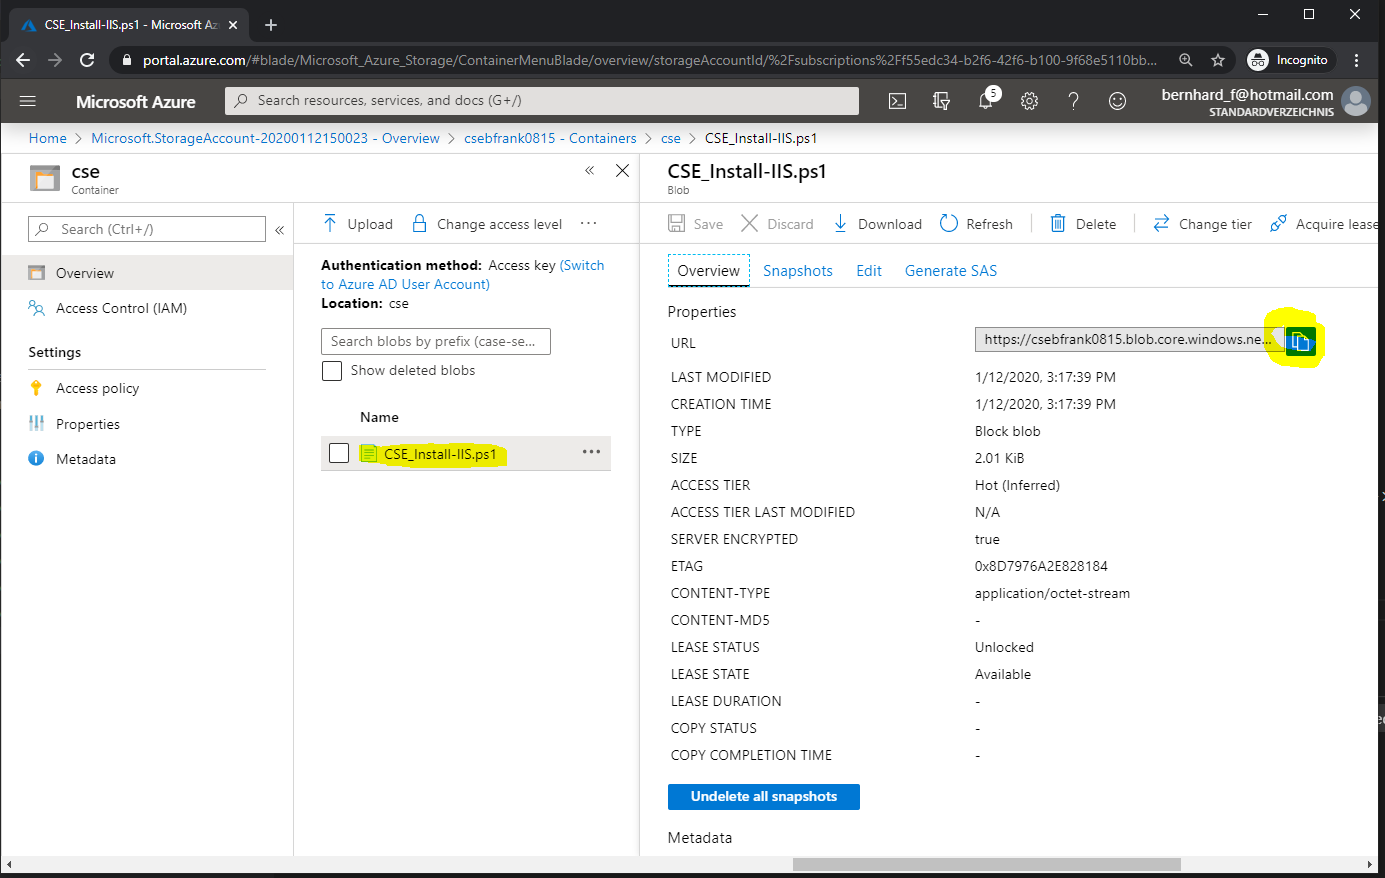
CSE_Install-IIS.ps1). This could be e.g. a public GitHub repo or another https-reachable location. In this lab we use a storage account for this. Upload ("CSE_Install-IIS.ps1 (opens new window)") file to a storage account.[Azure Portal] -> Resource Group -> rg-www -> sawww... (%your storage account%) -> containers -> 'csescripts' -> Upload -> File "CSE_Install-IIS.ps1" -> UploadEdit the CSE ARM template to use the correct scripts location. Once uploaded you can copy the blobs URL from the Azure portal
❔ Question Can you download the file in your browser using the URL? If not have you set the correct access level at the container?
Edit this: [CSE ARM template](https://raw.githubusercontent.com/ azuredevcollege/trainingdays/master/day1/challenge-07/scripts/ ARMCSE.json) template to use the scripts location:
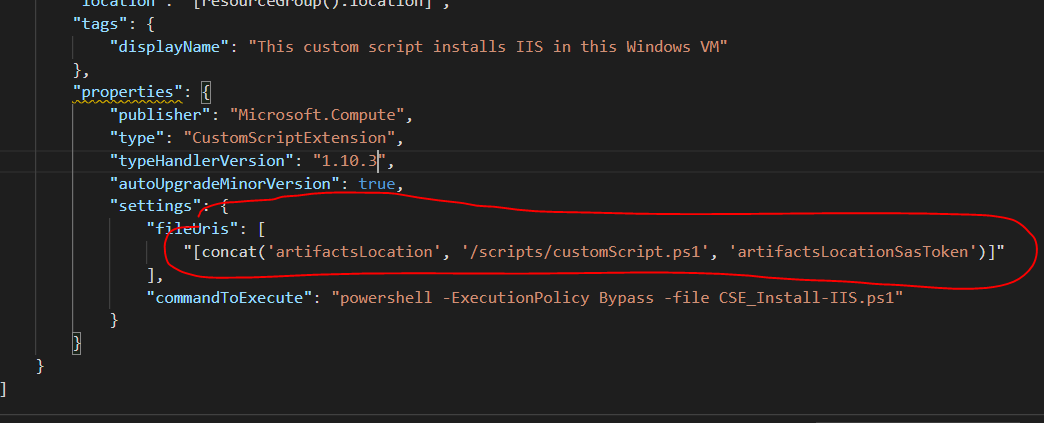
with your value
...
"fileUris": [
  "https://sawww....blob.core.windows.net/cse/CSE_Install-IIS.ps1"
],
...
Copy the template into the clipboard.
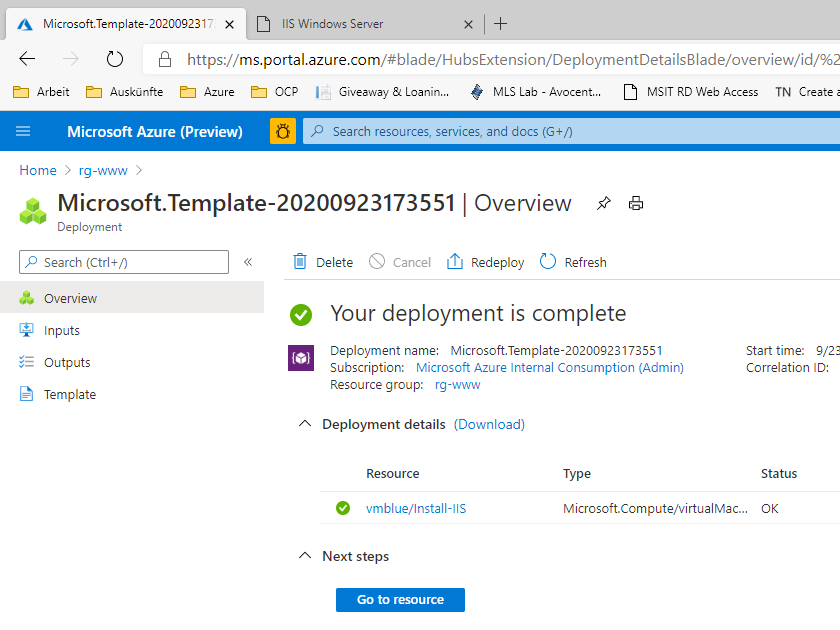
Deploy the ARM Template.
[Azure Portal]
-> Resource Groups
-> 'rg-www'
-> '+'
-> Template deployment
-> "Build your own template in the editor"
-> Paste the clipboard
Select the right resource group and VM and deploy:
Name Value Resource group e.g. rg-www-test-001 Region e.g. North Europe VM name vmblue Deployment will take some minutes: A role is installed and an IIS feature is downloaded and installed.
At the end the result should look like this:
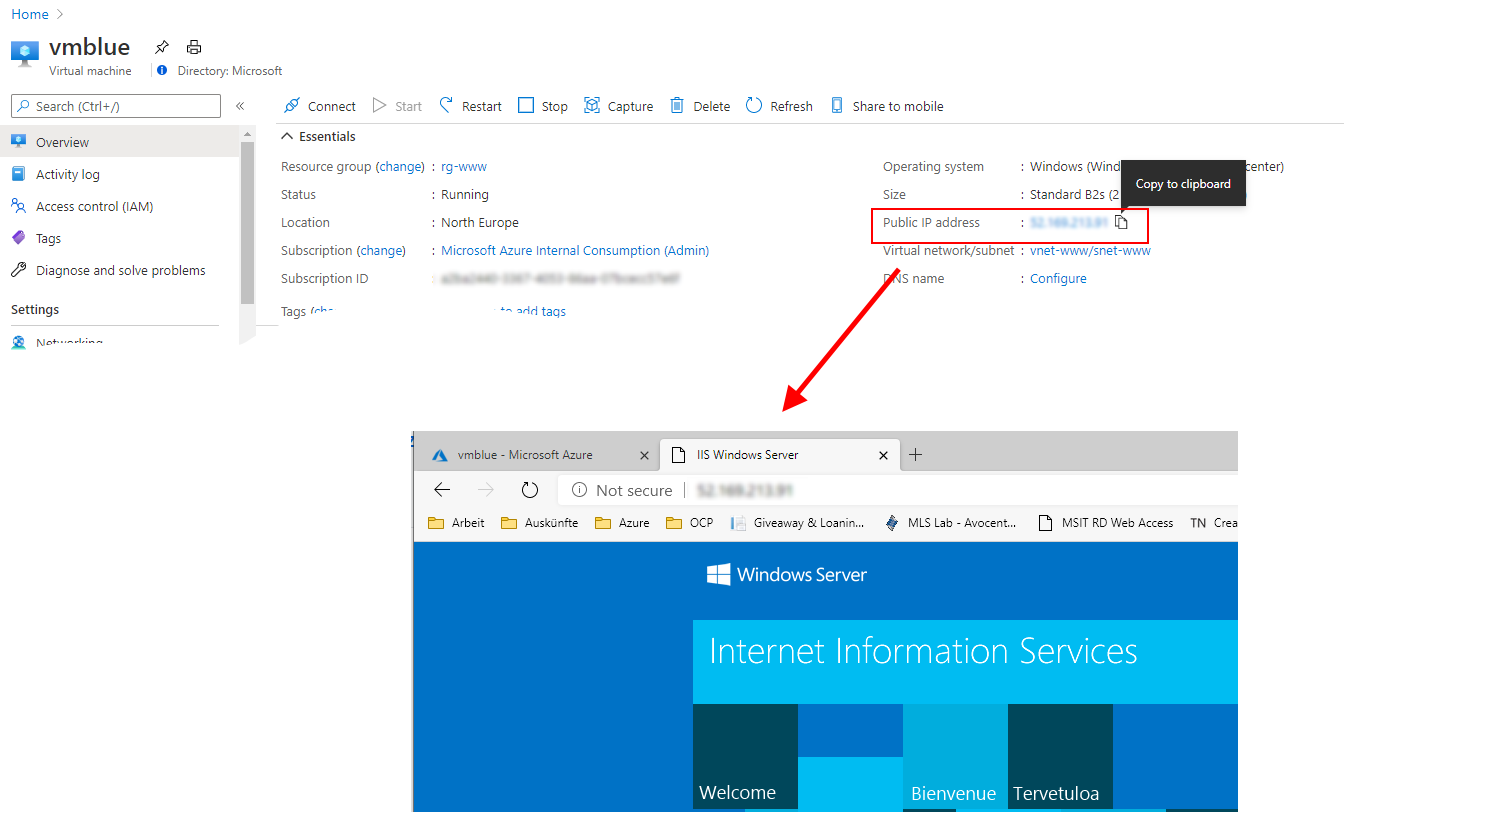
Now you have a web server in your VM - you should test by browsing to the public IP address:
# Cleanup
Cleanup by deleting the resource group.
[Azure Portal]
-> Resource Groups
-> 'rg-www'
-> 'Delete resource group'